Configure Online Signup & Provisioning
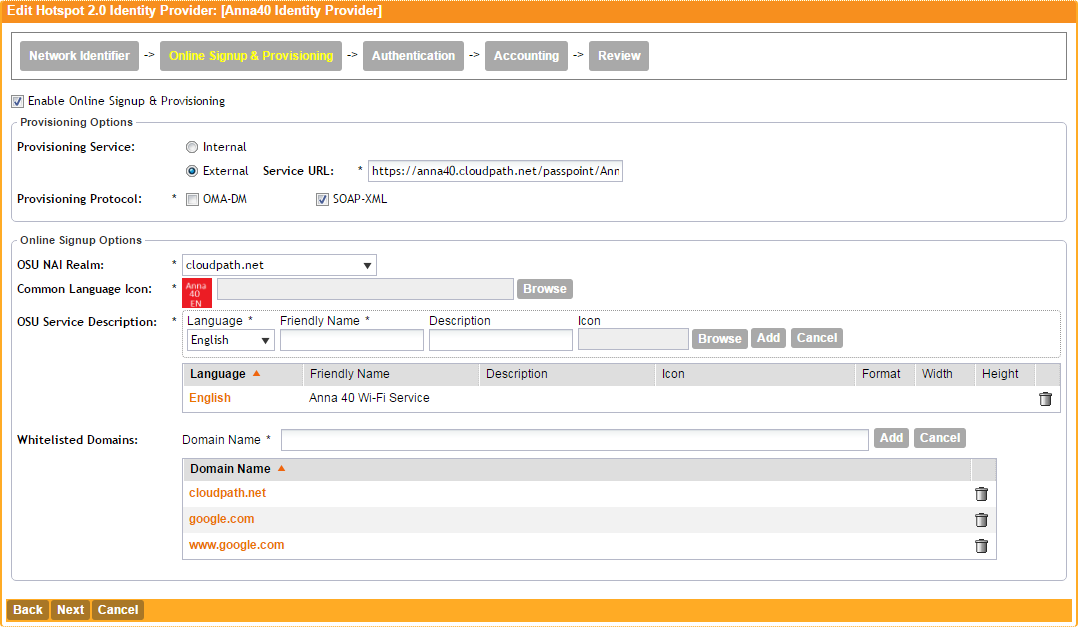
- On the Online Signup & Provisioning tab, enable Online Signup & Provisioning.
- Select External Provisioning Service and enter the Service URL. The Service URL on the controller must match the Passpoint OSU URL displayed on the Cloudpath system Deploy page ().
- Enter the
OSU NAI Realm of the Cloudpath system.
Note: The Realm of the Cloudpath system should be consistent throughout the Identity Provider configuration.
- Upload the Common Language Icon. This is the icon embedded in the Hotspot 2.0 WWW certificate on the Cloudpath system. Support file size = 64x64 pixels, file type = PNG.
- Add one or more Languages for the Friendly Name. The Friendly Name must match the Friendly Name in the Hotspot 2.0 WWW certificate on the Cloudpath system.
- Add one or more Whitelisted Domains. The domain of the Cloudpath system must be included.
- Leave the default values for the remaining fields, and click Next to apply changes and continue with Authentication.