Advanced Install
Advanced Install is the typical way to
install if you do not want to use UMM.
- On the first page of the Installation window, select .
- On the
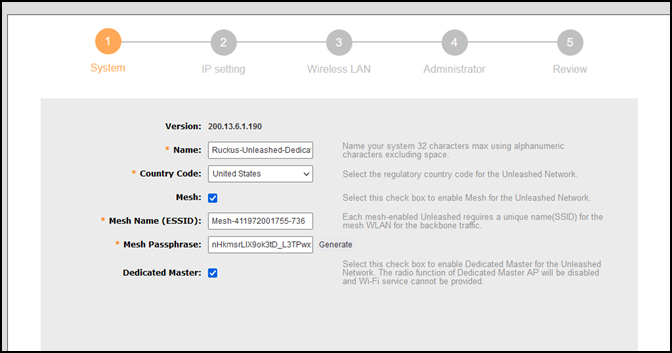
System page, complete the following steps:
- Enter a name for the Unleashed system. This system name can be used to identify the Unleashed device on your local area network.
- Select your country code from the menu.
- If you want to enable
Mesh networking for your Unleashed network, select the Mesh
check box. Refer to Mesh Networking for more
information.Note: If the Unleashed AP does not support Mesh (for example, the R310), it can be configured as the Unleashed Master AP, but it will not be able to participate in the Mesh network.200.15 - updates due to config change in Master AP's Mesh modeNote: If the Master AP is in Gateway mode and the WAN port is connected through PPPoE, Mesh can be enabled, but the Master AP must be a Root AP to become a member of a Mesh tree; all of the other connected member APs can be part of a Mesh tree.
- Select the Dedicated
Master check box if you want to enable Dedicated Master
for the Unleashed network.Note: Dedicated Master is supported only for the R750 AP, R770 AP, and R850 AP.
- Click Next to continue.
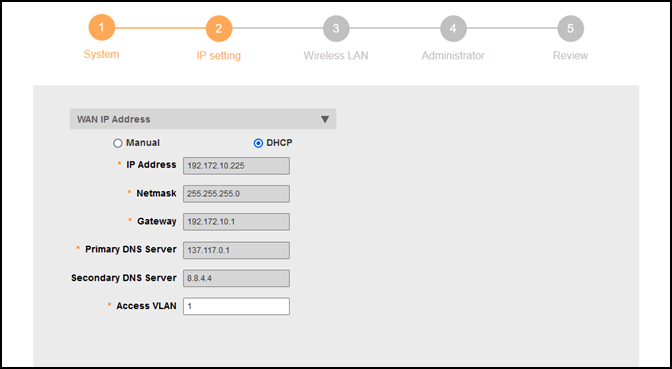
- On the IP
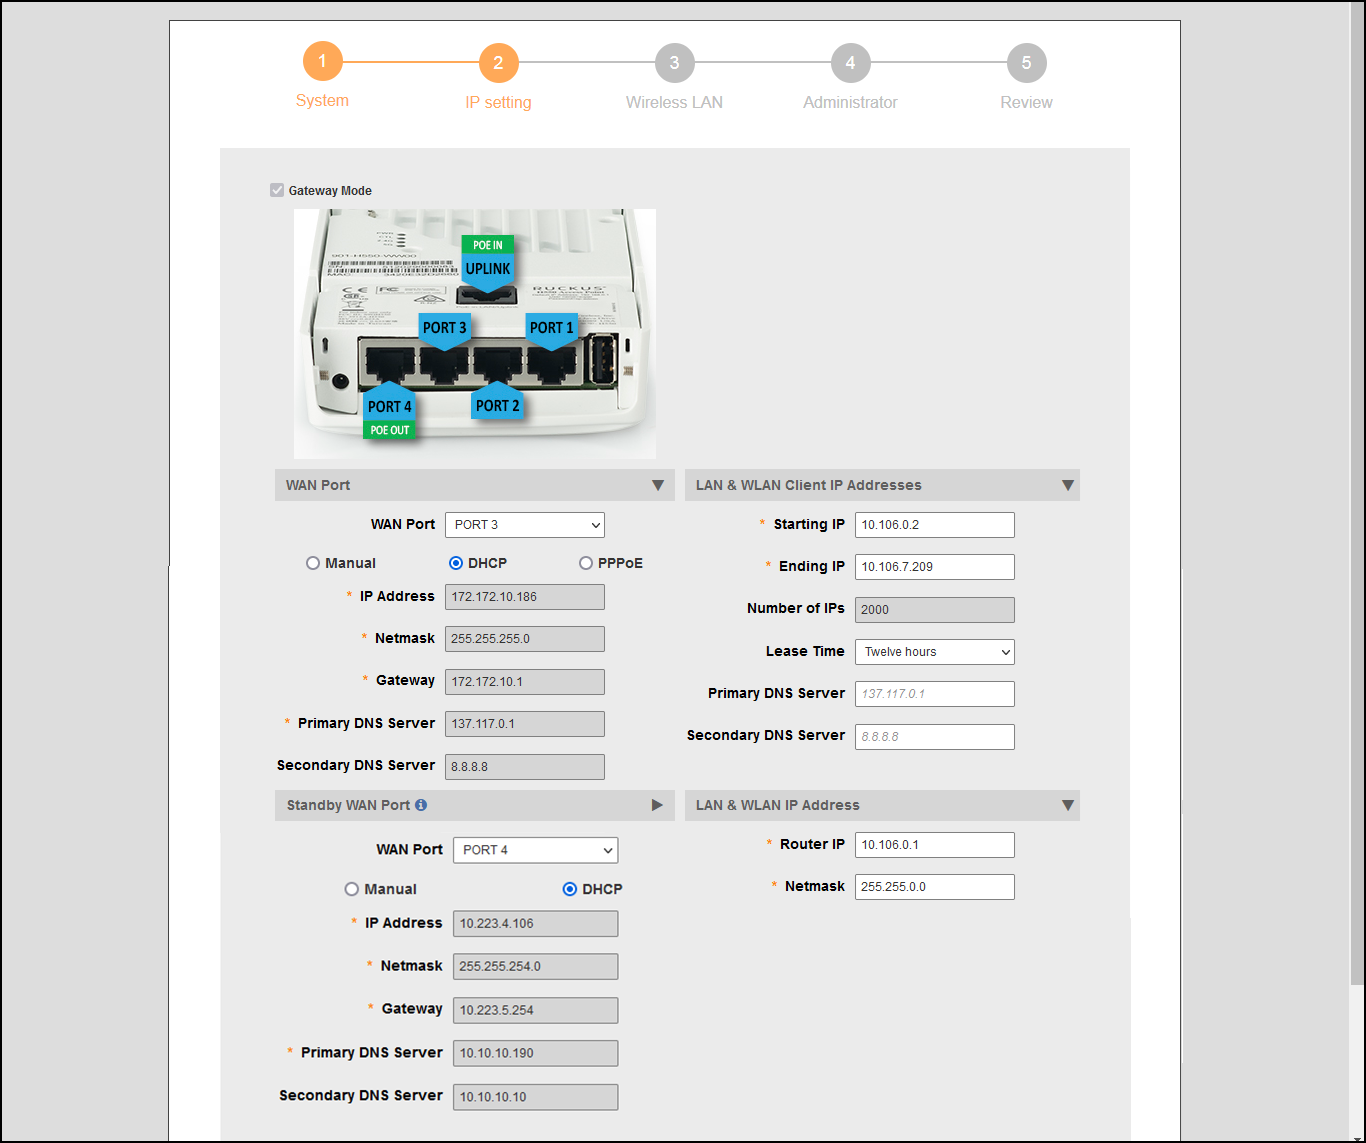
Setting page, select whether the AP will serve as a gateway using
one Ethernet port as a WAN port (connected to a cable or DSL modem, PPPoE
connection, and so on), and the other as a LAN port. Note: If your modem or router already provides gateway functionality, do not enable Gateway mode on the Unleashed Master AP. For more information, refer to Gateway Mode.
- Select whether to assign
a manual IP address or allow the system to obtain an IP address
automatically using DHCP. The default is DHCP
(Dynamic).
Note: If you plan to manually assign and maintain IP addresses for your wireless network, select Manual (Static) and enter the IP address of your Unleashed Master AP. Ensure that the IP address is outside the range assigned for Wi-Fi clients. Otherwise, leave the default of DHCP (Dynamic) and let Unleashed do all the work for you.
- If you select Manual, enter an IP address,
netmask, gateway address, and DNS server addresses in the fields
provided.Note: Optionally, if a manual IP address is configured, you can enable the built-in DHCP Server to provide IP addresses to clients on the Unleashed subnet. For more information, refer to DHCP Server.
- Enter the access VLAN ID for Dedicated Master and click Next.Note: The default value of the access VLAN ID is 1.
- If Gateway mode is enabled, select whether to assign a manual IP address or allow the system to obtain an IP address automatically using DHCP or PPPoE for the WAN port, and configure the local subnet settings for the LAN port. Under Standby WAN Port, select whether to assign a manual IP address or allow the system to obtain an IP address automatically using DHCP. The default is DHCP (Dynamic). For more information on Gateway mode, refer to Gateway Mode.
- Click Next to continue.
- Select whether to assign
a manual IP address or allow the system to obtain an IP address
automatically using DHCP. The default is DHCP
(Dynamic).
- On the Wireless LAN page, complete the following steps:
- In the Name (ESSID) field, enter a name for your first wireless LAN.
- For Password Protect
(WPA2/WPA3-Mixed), select Yes or
No.Note: Only the WPA3 ecryption is used on 6 GHz radio for the Wi-Fi 7 APs.
- If WPA2 encryption is selected, enter a password. The password must contain from 8 through 63 alphanumeric characters.
- Click Next to continue.
- On the Administrator page, complete the following steps:
- Enter your admin username and password.
- Re-enter the password in the Confirm Password field.
- (Optional) Click the Password Recovery check box to allow you to reset your password in the event that your username or password is forgotten.
- Enter a security email address, security question, and security answer.
- Click Next to continue.
- On the Review page, check that all the settings you have made are correct. If any settings must be changed, click Back to return to the previous wizard page.
- If you are satisfied with your choices, click Finish to
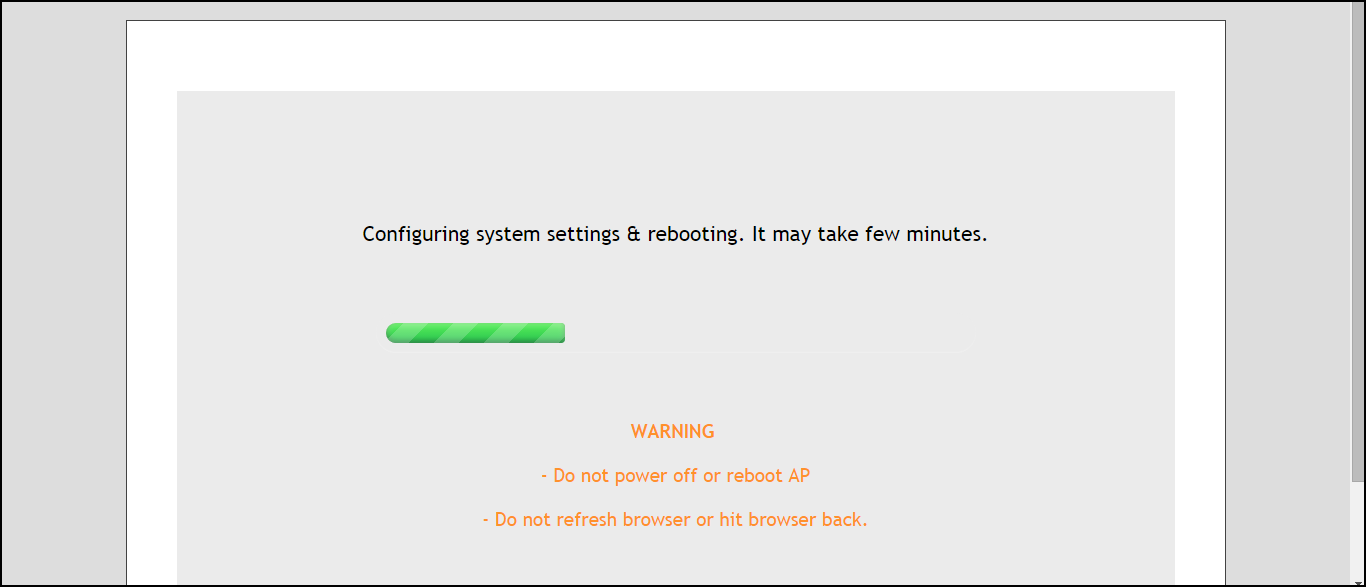
complete the setup. After clicking the Finish button, the Unleashed Master AP reboots and a Configuring system settings & rebooting page is displayed. Wait for the progress screen to complete before proceeding.Note: Do not disconnect power or network cables during this process, and do not click Back or Refresh in your web browser.
- After setup is complete, the Congratulations! page is displayed. Ensure that you are connected to the WLAN that you configured, and click Finish. You will be redirected to the login page.
- On the login page, enter your username and password, and click Unleash.
- Continue to Step 3: Customize Your Wireless LANs.