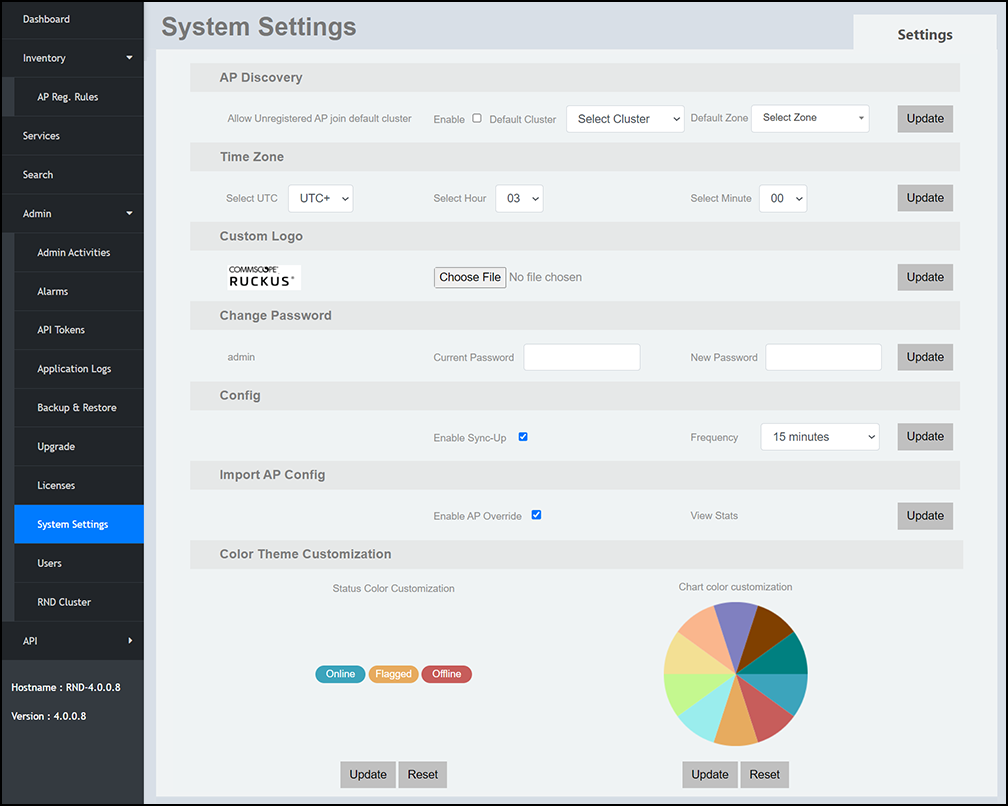
Managing System Settings
Complete the following steps to change the default settings.
- On the menu, go to Admin > System Settings.
- In the
Settings tab, make changes to the required system settings described below and click
Update to make the changes take effect.
- AP Discovery
- Time Zone: Allows you to change the system time zone based on the Coordinated Universal time (UTC).
- Custom Logo: Allows you to change the logo. Click Choose File and select the logo.
- Change Password: Allows you to change the password. In the Current Password tab, enter the current password and In the New Password tab, enter the new password.
- Config: Allows you to schedule and control the polling process that collects current SZ status information and updates the information in RUCKUS Network Director.
- Import AP Config: Allows you to import AP configurations to the RND.
The charts and graphs for SZ clusters and APs have a color-coded scheme to indicate their status (Online, Flagged, and Offline). The color of the charts and the status can be customized as per your preferences. Click each of the status (Online, Flagged, or Offline) and choose the color from the color palette. Similarly, you can choose the color for the Dashboard charts. After choosing the color, click Update to make the changes take effect. Click Reset to reset the color theme to the default color theme settings.