Adding Tenant Accounts
Adding a Tenant Account From the Root Account
A root account administrator adds tenant accounts from the root account Accounts tab.
From the multi-tenant root account Accounts page, click the Add Account button.
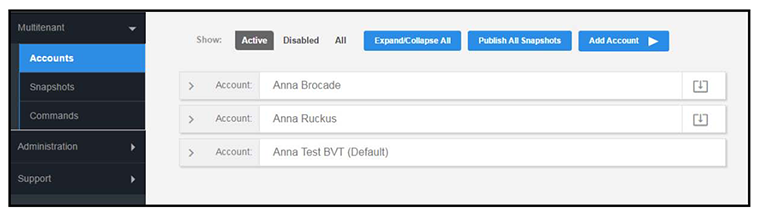
Create Tenant Account
Enter tenant account information:
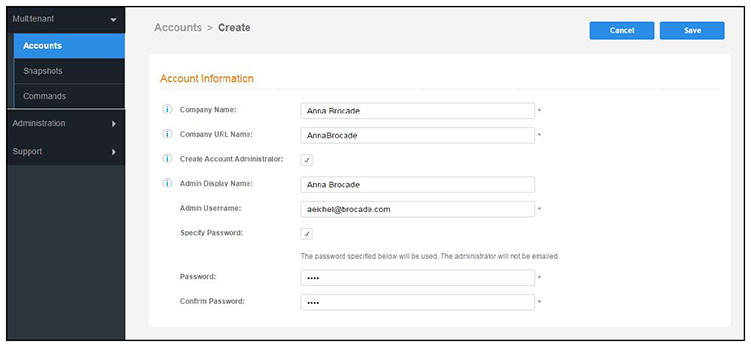
Tenant Account Admin Password
Different methods for creating tenant administrator accounts:
Create an admin account without specifying a password. A system generated password is emailed to the admin.
Create an admin account with a defined password. The system does not send an email notification for defined passwords.
Create no account admin. The account is created without an admin. The only way to access the account is by changing into the tenant account from the root account. For details, see the “Changing Into a Tenant Account From the Root Account” section of the Navigating the Root Account topic.
Setting Up the Tenant Account
After the tenant administrator account has been created, use the tenant administrator credentials from the new administrator account email to access and log in for the initial system setup.
Use the temporary password from the administrator email.
Example email with login credentials:
You have been added as an administrator.

URL: https://test245.cloudpath.net/admin/
Username: test_user@cloudpath.net
Temporary Password: Uw6hYcE9vS
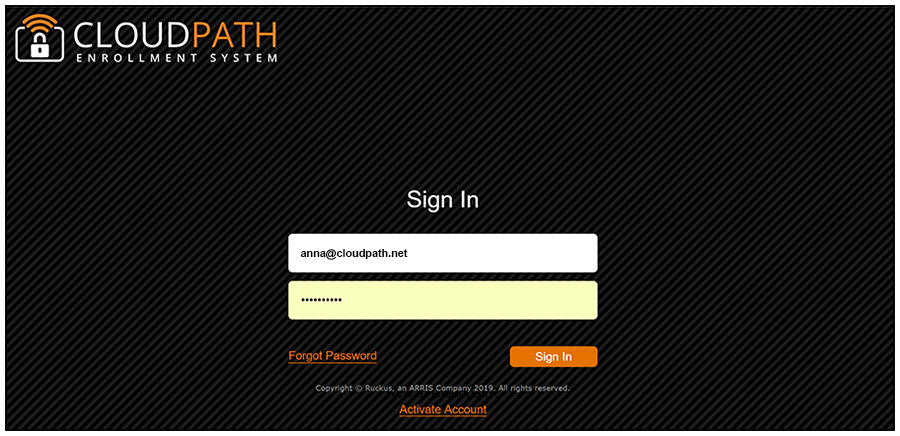
Account Admin Setup Credentials
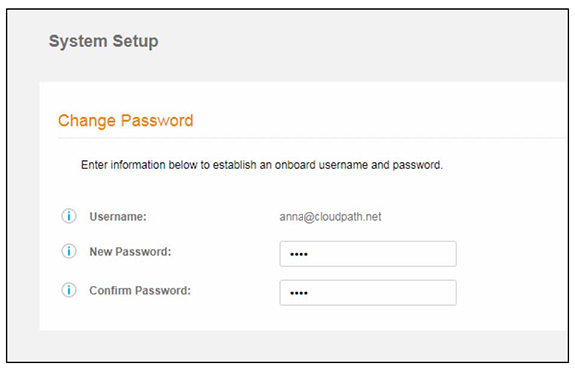
Tenant Account Setup Wizard
After the first login to a tenant account (by logging in, or by changing into the account), the system setup wizard guides you through a few basic steps.
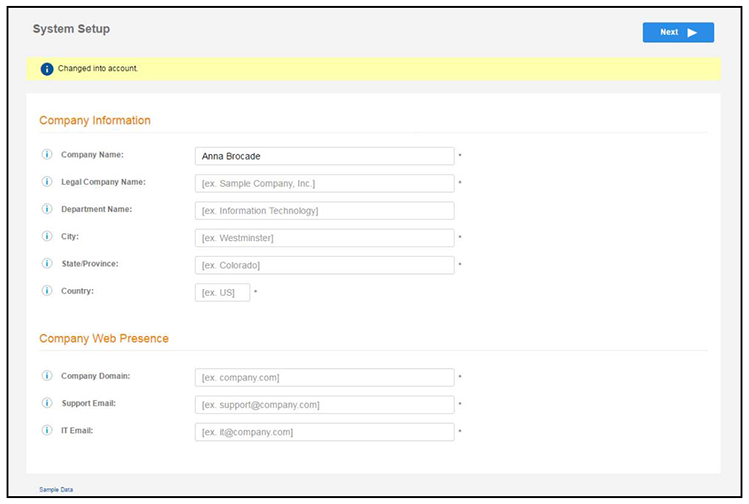
Enter Company Information. This information is embedded in the onboard root CA certificate.
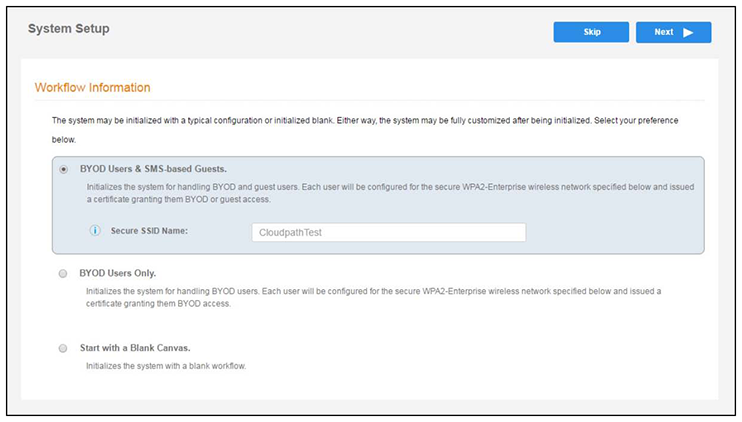
To initialize the system with a sample configuration, select BYOD Users & SMS Guests, or BYOD Users Only. This creates an initial workflow for BYOD users and sponsored guests (or BYOD users only) that you can use as a template, or simply add a device configuration and use immediately.
To create your own workflow, select Start with Blank Canvas.
If you plan to use an authentication server to authenticate end-users or sponsors, we recommend populating the authentication server information page.
If using multiple authentication servers, additional authentication servers may be added through the workflow or from the page.
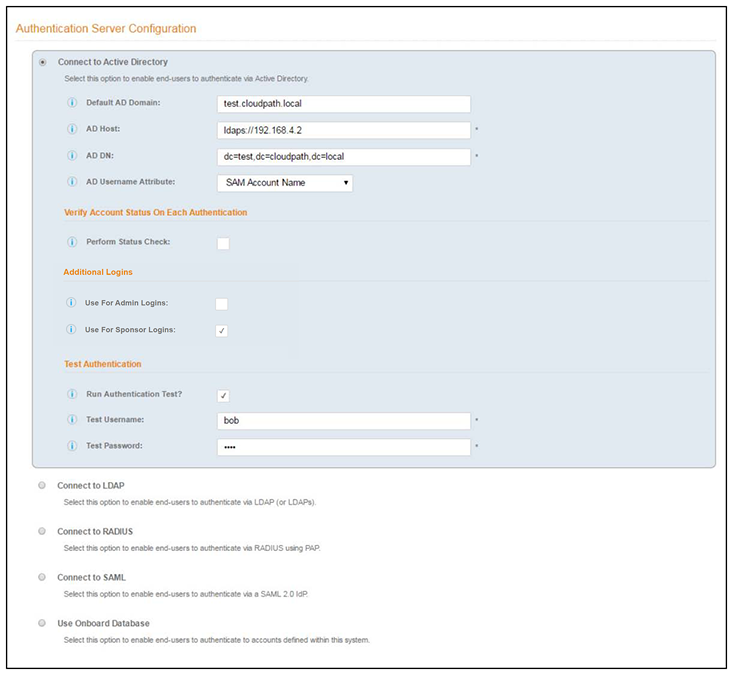
To setup the initial configuration of the authentication server, select and enter the required fields.
Consider these optional settings for the authentication server:
Verify Account Status on Each Authentication—If selected, Active Directory is queried during subsequent uses of the certificate to verify the user account is still enabled. You must provide the bind username and password for an authentication server administrator account.
Additional Logins—If Use for Admin Logins is selected, administrators can log into the Cloudpath Admin UI using credentials associated with this authentication server. If Use for Sponsor Logins is selected, sponsors can log into the Cloudpath Admin UI using credentials associated with this authentication server.
- To authenticate as an administrator to an external authentication server, each tenant account must go to an admin login page specific to their account. This URL is of the form: https://<cloudpath-host>/admin/login/<AccountUrlName>/
- The URL Name for an account can be found or edited under Administrators > Company Information. For example, if an account's URL Name is "TenantAccount1", the account-specific login URL is found at: https://<cloudpath-host>/admin/login/TenantAccount1/
- The standard login page at /admin/ is still available, and accepts logins from any admin account that is being tracked by Cloudpath.
Test Authentication—If selected, an authentication will be attempted using the username and password provided to test connectivity to the authentication server. This test can also be run from the workflow.
Authentication Server Certificate
=GUID-B1F21455-2C19-41D3-8686-044350EB22D7=1=en-US=Low.png)
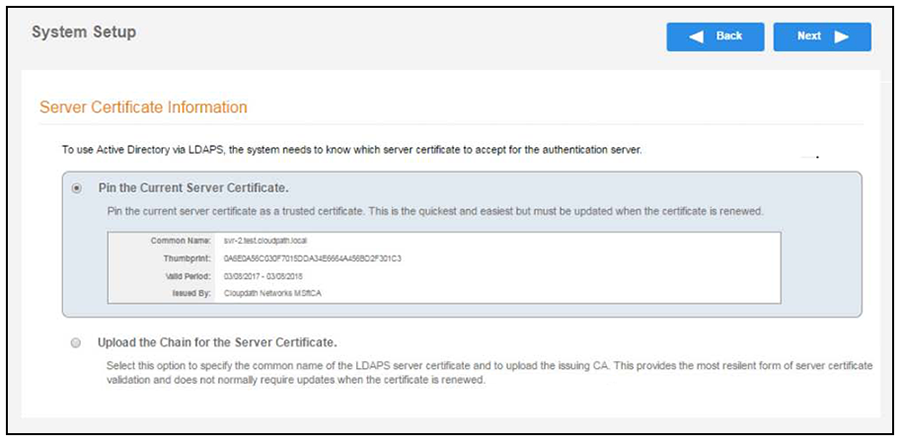
Select Upload the Chain for the Server Certificate to upload a certificate chain from an issuing CA. You must specify the common name for the LDAPS server certificate. This certificate does not need to be updated when the certificate is renewed.
Select Pin the Current Server Certificate to use the current server certificate as the trusted certificate. This setting must be updated if the certificate is renewed.
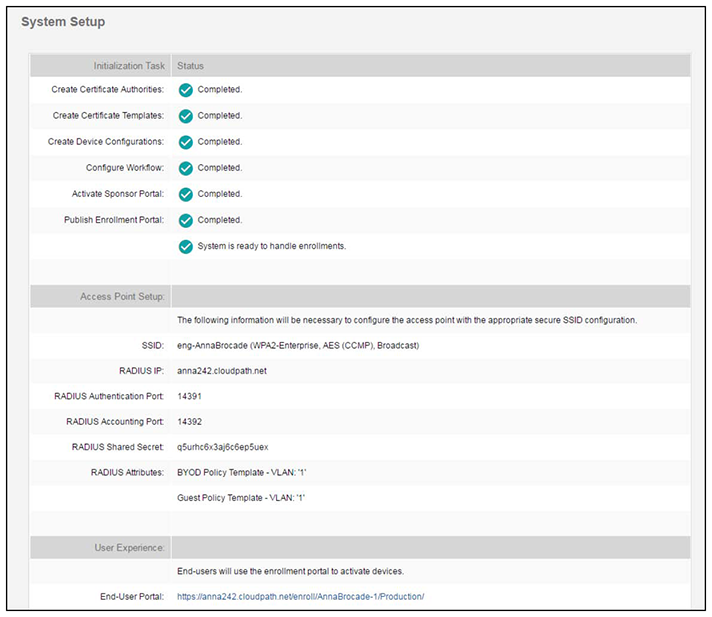
After the initial setup tasks, the system finishes the initialization process. When the publishing tasks are complete, the system is ready to use. The setup information is also emailed to the system administrator for this account.