Deploying IoT Controller on Proxmox Virtual Environment
Deploying the RUCKUS IoT Controller on
Proxmox Virtual Environment (VE) provides a cost-effective and scalable virtualization
solution. As an open-source platform, Proxmox VE offers a user-friendly interface,
support
for multiple disk formats, and efficient performance for both small and large
deployments.
To deploy IoT Controller on a Proxmox VE, follow these steps:
- Log in to Proxmox VE and click OK to skip the No valid subscription.
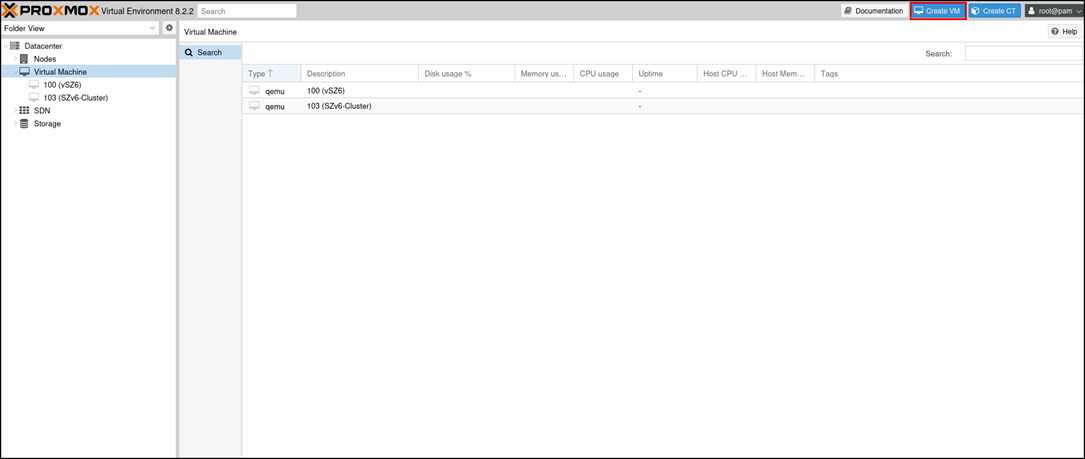
- Click Create VM.
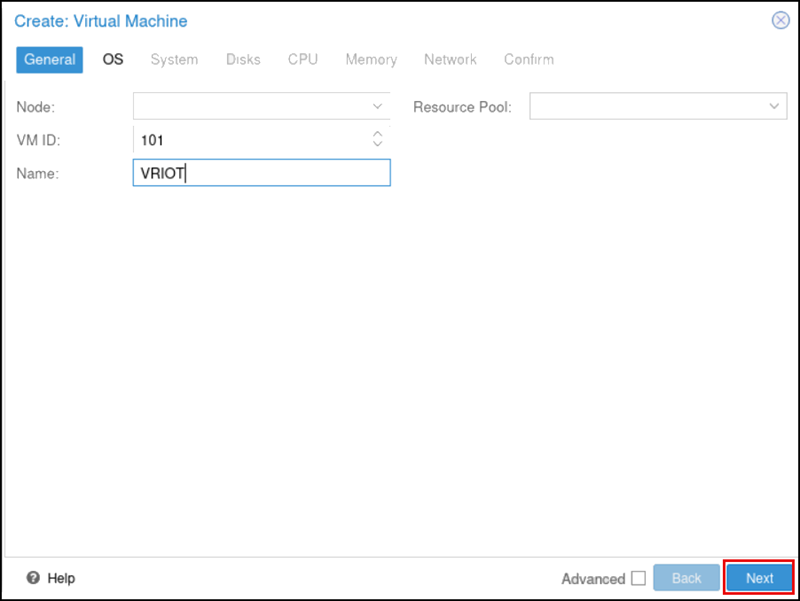
- Optionally, in the General tab, you
can configure these options:
- VM ID: Proxmox assigns VM IDs starting from 100, with each new VM receiving the next sequential ID. You can modify this number, but RUCKUS recommends using the default value.
- Name: Enter a descriptive host name.
- Resource Pool: Select a resource pool using the drop-down menu.
- Click Next.
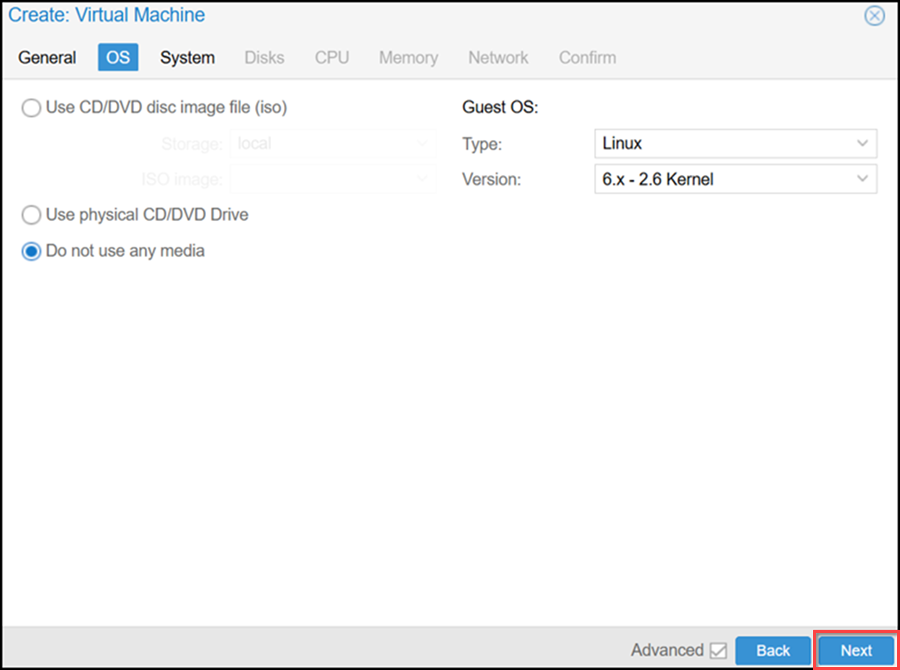
- In the OS tab, select Do not use any media and click Next.
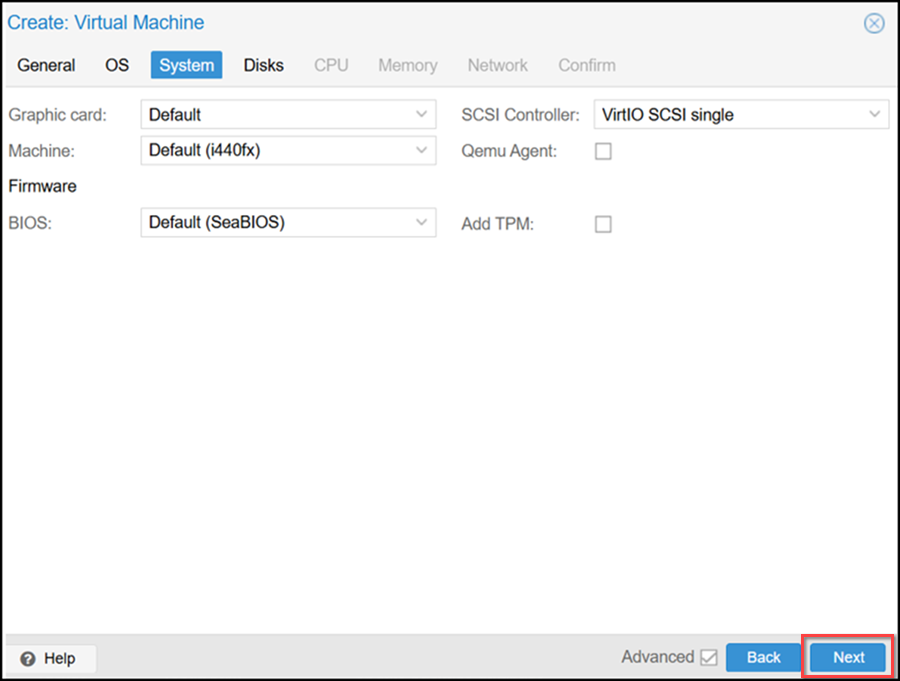
- In the System tab, keep the default settings and click Next.
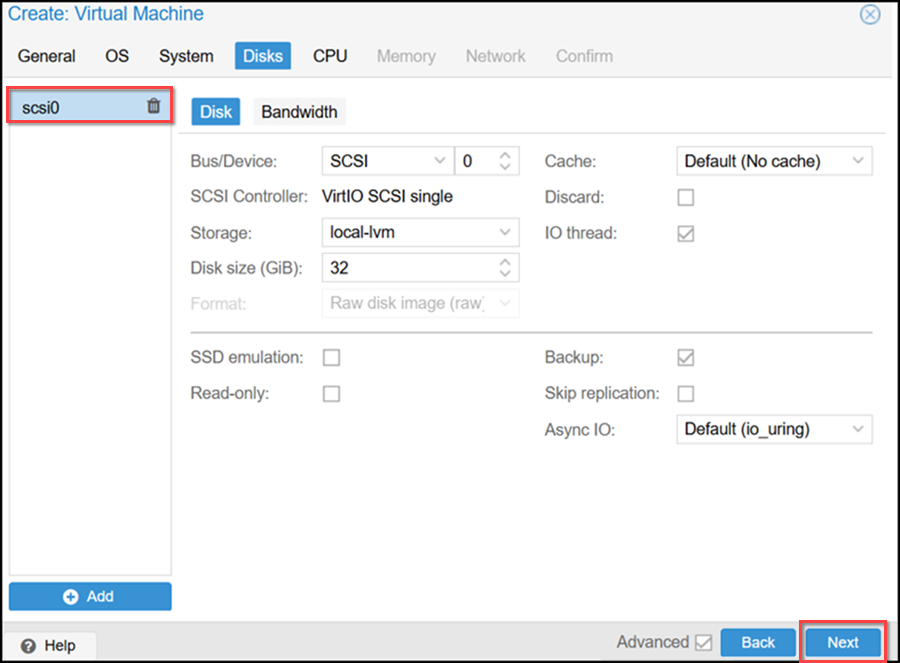
- In the Disks tab, delete the default disk on the left side of the window and click Next.
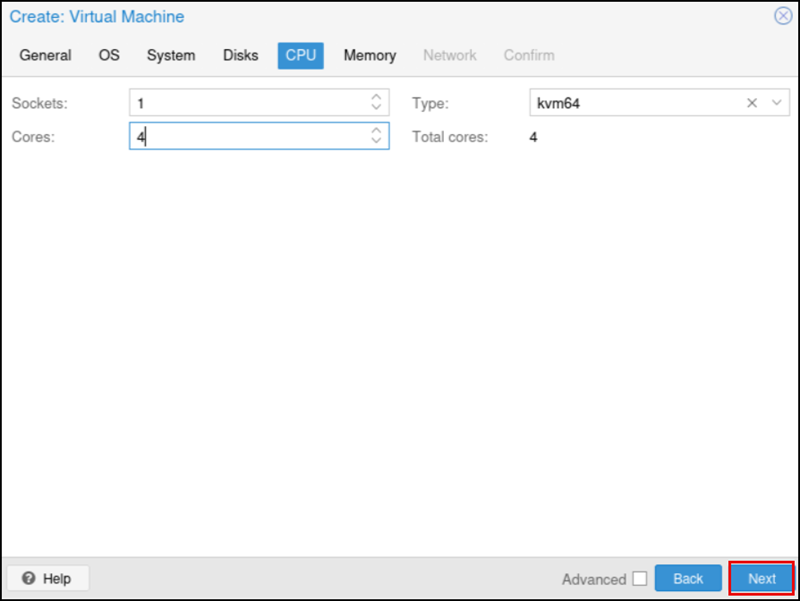
- In the CPU tab, configure these options:
-
Note: You can adjust the number of CPU sockets and cores based on deployment requirements and the available hypervisor capacity. For more information, refer to System Requirements for Installing RUCKUS IoT Controller on a Hypervisor.
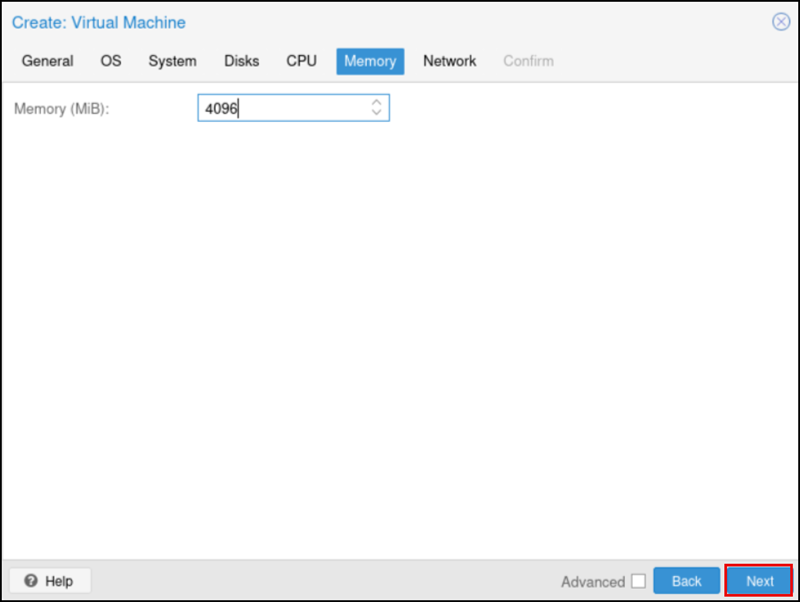
- In the Memory tab, go to Memory (MiB) drop-down menu, select 4096 as the required memory and Next.
-
- Note:
- Memory is measured in Mebibytes (MiB). One MiB is equal to 2^20 bytes, or 1,048,576 bytes.
- Selection of memory is based on deployment requirements and the available hypervisor capacity. For more information, refer to System Requirements for Installing RUCKUS IoT Controller on a Hypervisor.
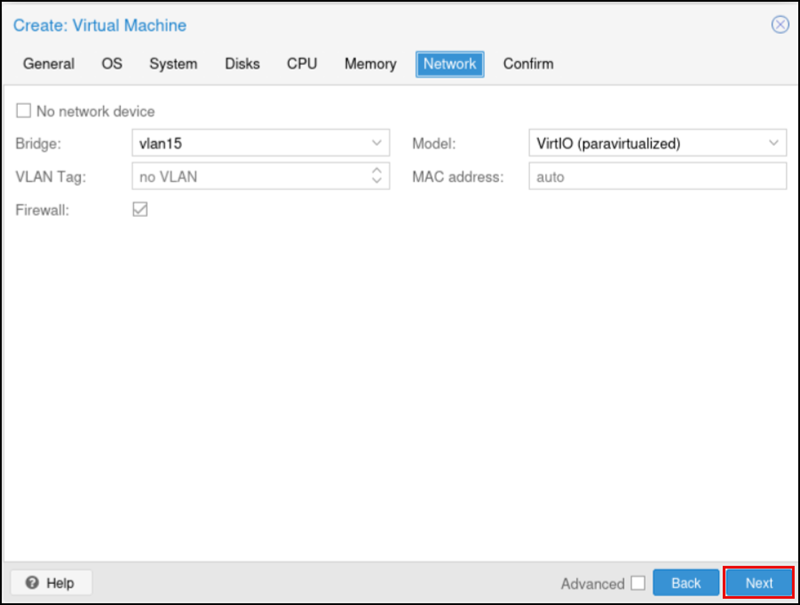
- In the Network tab, configure these options:
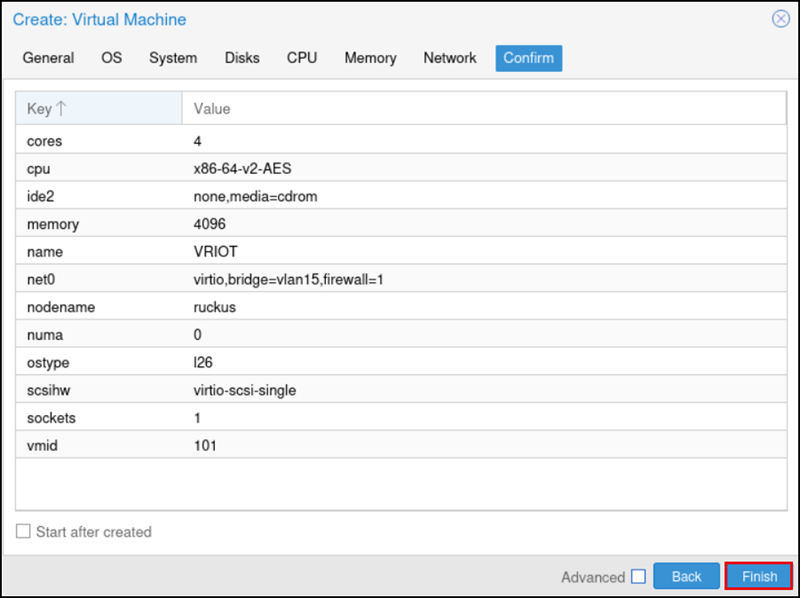
- In the Confirm tab, review the settings that you configured and click Finish.
- Download and unzip the QCOW2 file from https://support.ruckuswireless.com/.
- Log in through SSH or use the
terminal on Web UI to operate on the command line of the root account. Optionally, you can create a temporary directory and place the image in it. For example:
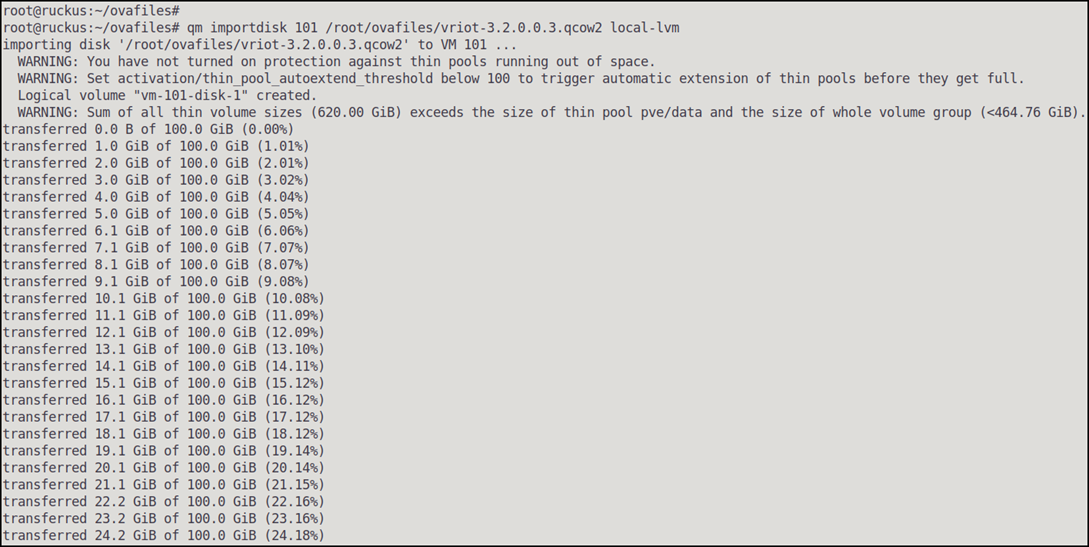
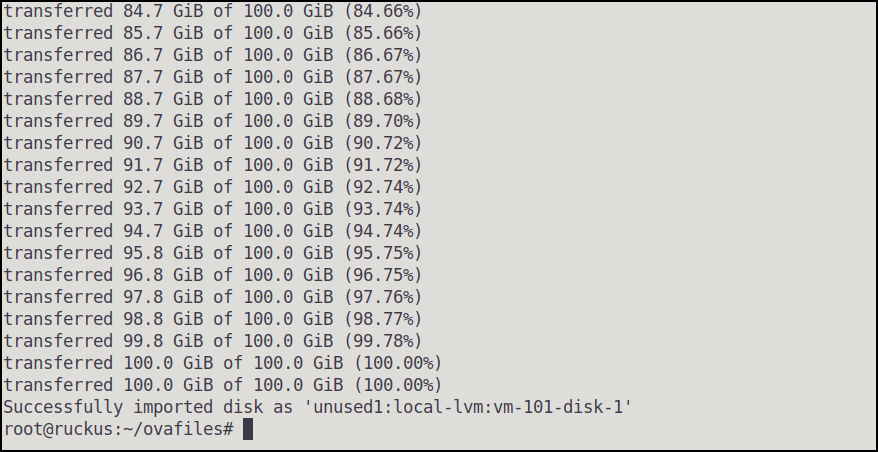
- Download and place the QCOW2 image into the Proxmox Hypervisor. Use the following command to import the disk image into the virtual machine:
- To add the imported disk to the VM configuration, run the following command:
- To change the boot order of the
virtual machine (VM), run the following command:
root@ruckus:~/ovafiles#
root@ruckus:~/ovafiles# qm set 101 --boot order=virtio0
update VM 101: -boot order=virtio0
root@ruckus:~/ovafiles#
- From the web page, select the VM, click Start, and select Console.
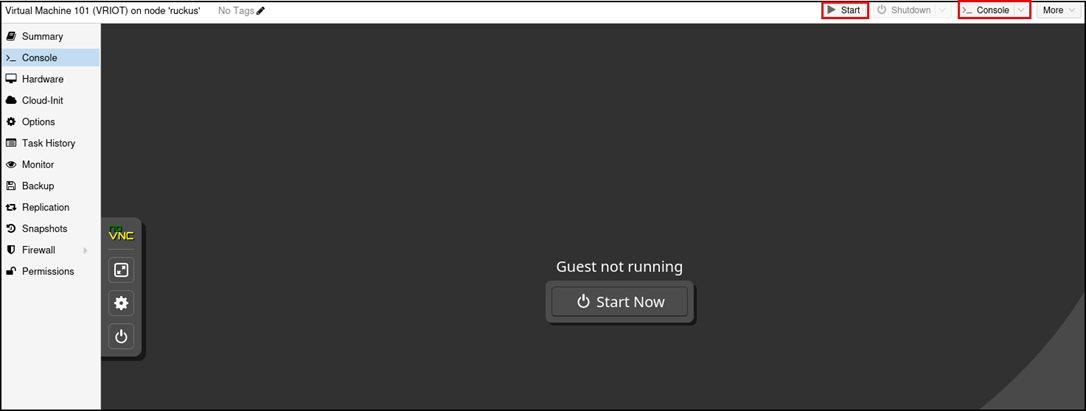
The RUCKUS IoT Controller boots as a virtual machine on Proxmox VE and is ready for use.