Configuring Hotspot 2.0 Release 1 on Cloudpath
Once you configure a Hotspot 2.0 Release 1 on your SmartZone controller, you need
to add a corresponding Hotspot 2.0 Release 1 configuration to a workflow on your Cloudpath
system.
Creating a Hotspot 2.0 Release 1 Device Configuration
You can first create your device configuration, and then add it to your workflow for Hotspot 2 Release 1.
- In the Cloudpath UI, navigate to Configuration > Device Configurations.
- Click Add Device Configuration.
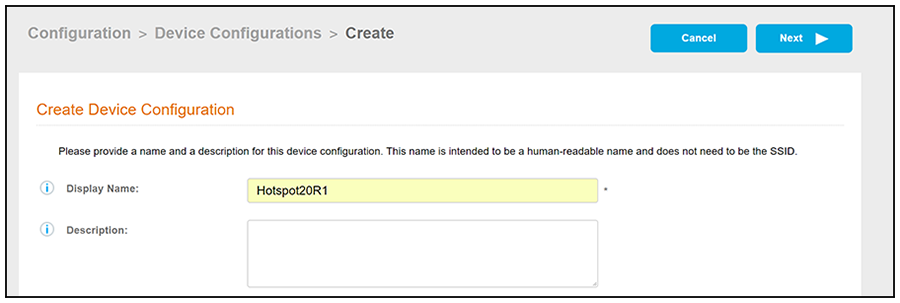
- In the ensuing Create Device Configuration screen, give a meaningful name to the device configuration (as shown below), then click Next.
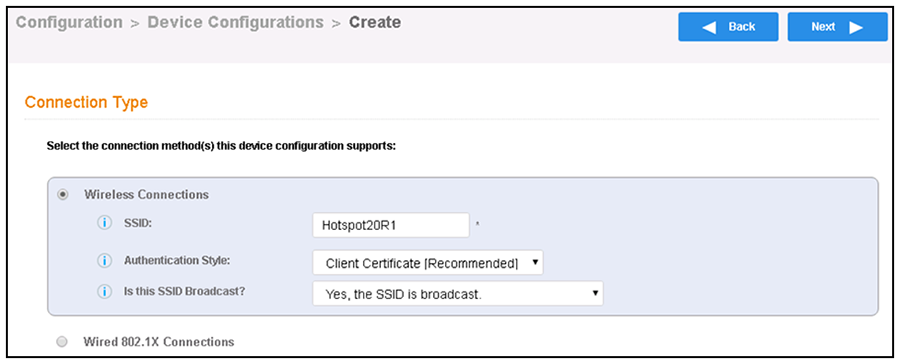
- Configure the Connection Type information of the Create Device Configuration screen
as shown and described below:
- The Wireless Connections button must be selected.
- SSID: This name must exactly match the SSID name you assigned during the Secure SSID configuration on your vSZ controller. Therefore, edit the name shown above accordingly.
- Authentication Style: Leave the default value of Client Certificate [Recommended].
- Is this SSID Broadcast?: Leave the default value of Yes, the SSID is broadcast.
- For the screens you are presented with next, you can keep all the default values and continue to click Next to progress through the screens, until you get to the Summary screen for the device configuration.
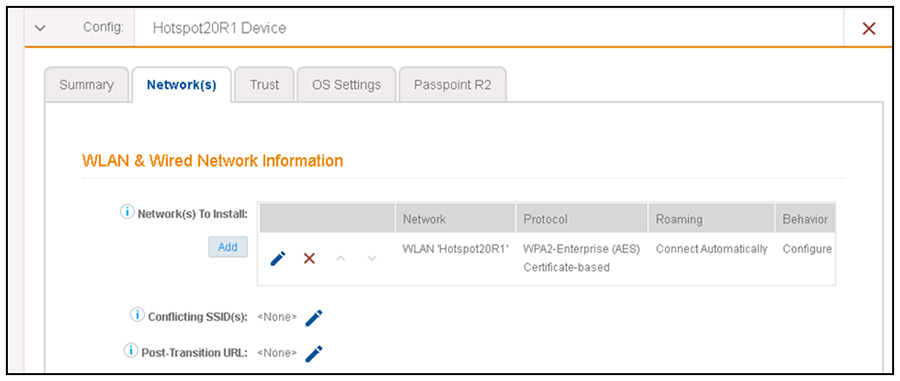
- Click the Network(s) tab:
- Click the pencil icon below and slightly to the right of the "Network(s) to Install" label to go to the Modify Network configuration screen.
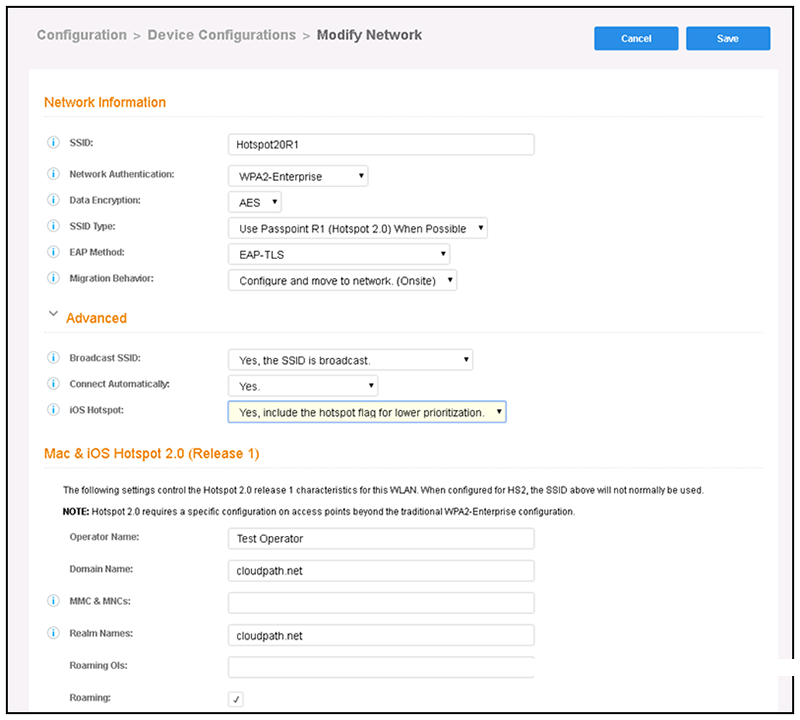
- Configure the Modify Network screen, an example of which is shown and described below:
- In the SSID field, enter a descriptive name. (The SSID name can be any name you want because Hotspot 2.0 uses the Wifi operator and identity provider settings to identify the WLAN.)
- For Network Authentication, select WPA2-Enterprise.
- For Data Encryption, select AES.
- For SSID Type, select "Use Passpoint R1 (Hotspot 2.0) When Possible."
- For EAP Method, select EAP-TLS.
- For Migration Behavior, select "Configure and move to network. (Onsite)"
- For Broadcast SSID, select "Yes, the SSID is broadcast."
- For Connect Automatically, select Yes.
- For iOS Hotspot, "select Yes, include the Hotspot flag for lower priortization."
- For Operator Name, enter the same name that you configured in the Wifi Operator screen. Refer to the Hotspot 2.0 Wi-Fi Operator Profile Screen.
- For Domain Name, enter the same domain name that you configured in the Wifi Operator screen. Refer to the Hotspot 2.0 Wi-Fi Operator Profile Screen.
- For MMC & MNCs (only needed if you configured these on the controller), enter the same two codes, separated by semicolons, that you configured in the Network Identifier tab of the Identity Provider configuration screen. Refer to the Creating the Identity Provider - Network Identifier Tab screen.
- For Realm Names, enter the name of the desired realm that you configured in the Network Identifier tab of the Identity Provider configuration screen. Refer to the Creating the Identity Provider - Network Identifier Tab screen.
- For Roaming OIs (only needed if you configured these on the controller), enter the hexadecimal Organizational ID address of the Home OI that you configured in the Network Identifier tab of the Identity Provider configuration screen. Refer to the Creating the Identity Provider - Network Identifier Tab screen.
- Enable Roaming.
- When you complete the configuration, click Save.
Adding a Hotspot 2.0 Release 1 branch to the Workflow
The concept of workflows and how to create one is described in detail in the Cloudpath Deployment Guide and the Cloudpath Quick Start Guide. Therefore, the purpose of the procedure in this section is to demonstrate how to add a Hotspot 2.0 Release 1 branch to an existing workflow. The same steps included below could also be used to create a new workflow with a Hotspot 2.0 Release 1 branch.
- Log in to the Cloudpath user interface.
- Go to Configuration > Workflows.
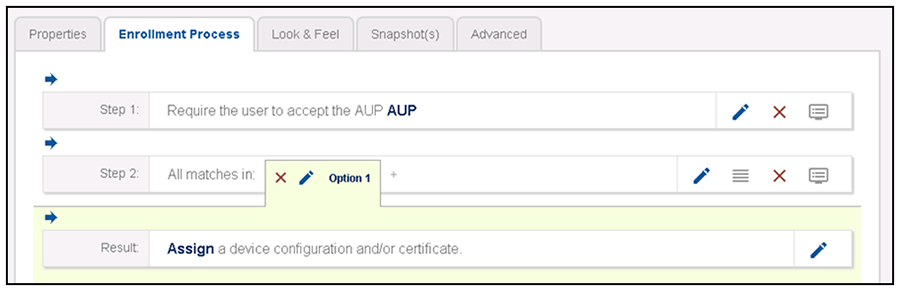
- Click on a workflow to which you want to add a Hotspot 2.0 Release 1 branch. An example of a very simple workflow before adding a Hotspot 2.0 Release 1 branch is shown below:
- Click the + button located to the right of the "Option 1" tab shown above to create a new branch in your workflow.
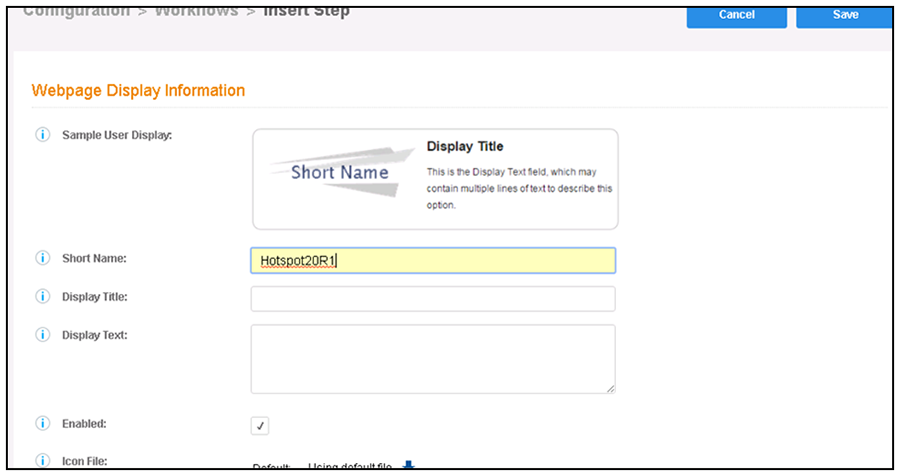
- You are presented with a screen called
Configuration > Workflows > Modify Step that shows the branch options. Click
Done if the display is correct.
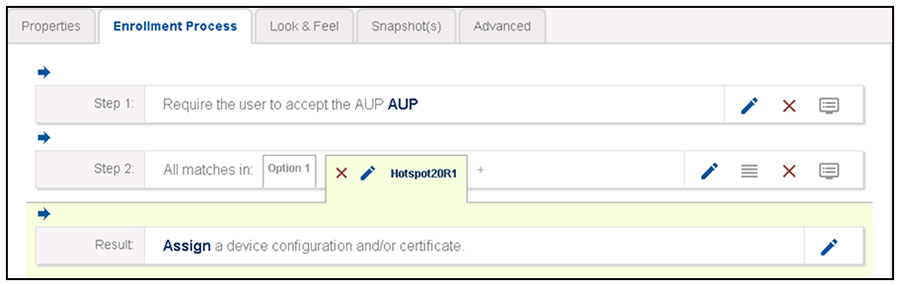
- Check that your newly named branch ("Hotspot 20R1" in this example) now appears in your workflow, as shown below:
Adding a Device Configuration to the Workflow
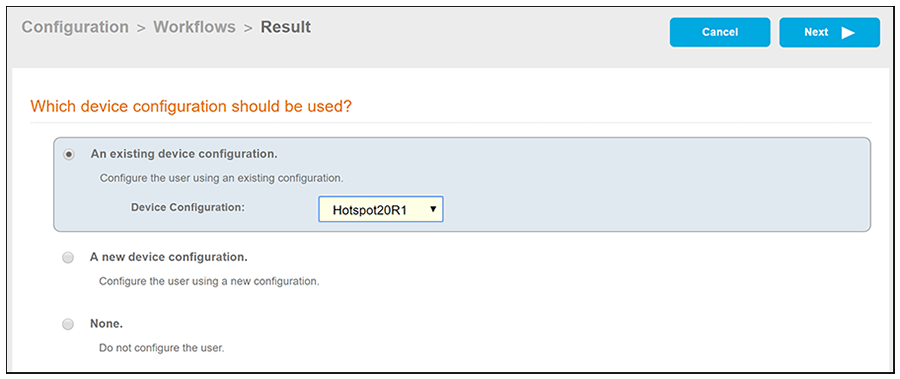
- In the workflow, click the pencil icon to the right of the Result called "Assign a device configuration and/or certificate."
- From the drop-down list of existing device configurations, select the device configuration you previously performed for Hotspot 2.0 Release 1, then click Next.
- Proceed to Configuring the Certificate Template .
Configuring the Certificate Template
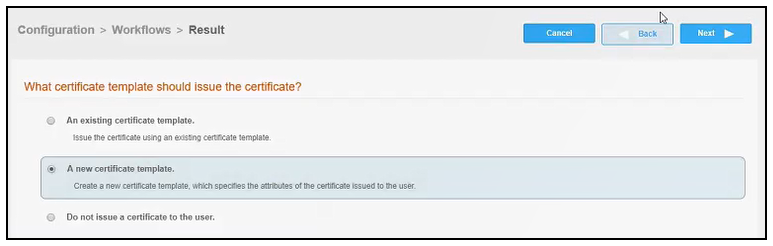
- On the screen shown below, select the "A new certificate template" option, then click Next.
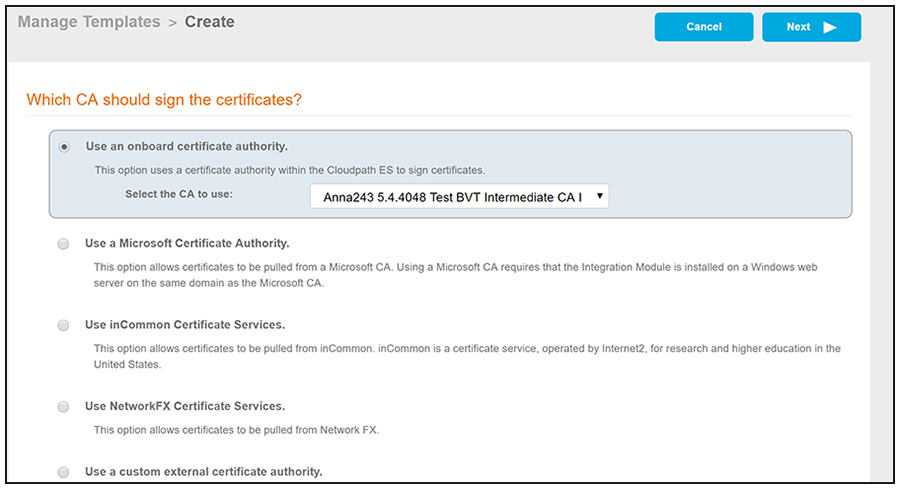
- On the Manage Templates > Create screen, which has the question, "Which CA should sign the certificates?," select the "Use an onboard certificate authority" radio button and select the certificate from the drop-down list (shown below) , then click Next.
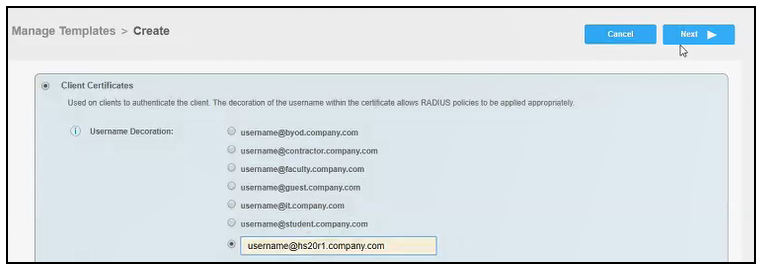
- On the ensuing Manage Templates > Create screen, you can change username decorations as desired, shown in the example below, then click Next:
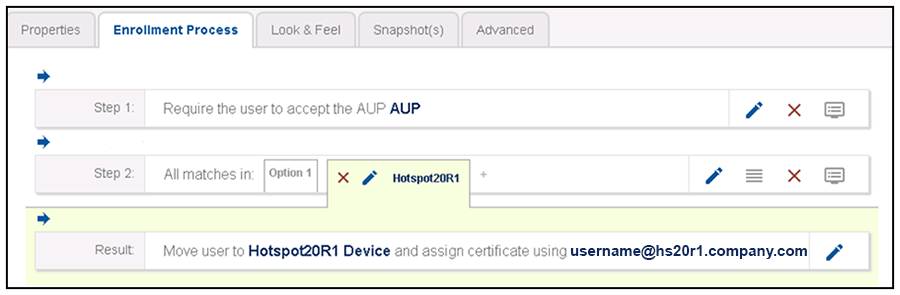
- You are returned to the workflow. Make sure the Result step has been added successfully, as shown below:
Testing the Hotspot 2.0 Release 1 User Experience
Test the Enrollment process by performing the following steps:
- On your iOS device, connect to the onboarding SSID.
- When you presented with the with the Welcome screen, click Start.
- When you are presented with various branches of your workflow, click the branch of the workflow that you created for Hotspot 2.0 Release 1.
- Follow any prompts to continue. You are directed to download the configuration and install the wi-fi credentials to connect to the secure SSID.