Other Actions You Can Perform in the Cloudpath Property Management UI
You can manage your property and its units
in many ways after the initial configuration.
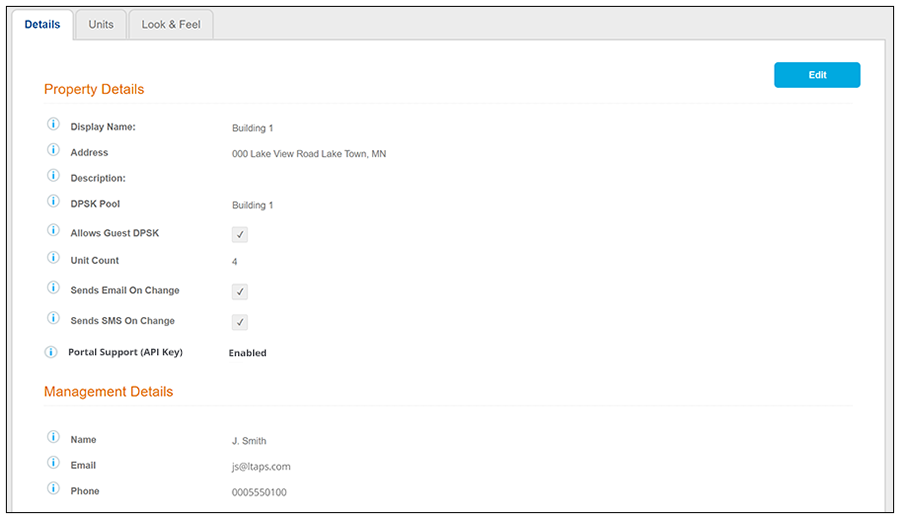
In the Cloudpath UI, go to Managed Access > Property Management to view any properties you have configured, then click the wrench icon of the desired property. The Property Details screen appears, as shown in the following example:
Some actions you can perform include:
- From the Details tab, you can click Edit to change any existing
values. You can also delete the property by scrolling down to the "Cleanup" section
and expanding the arrow, and followng on-screen instructions.
Note: Be very certain that you want to delete an entire property before doing so, since you will also be wiping out all associated units, their DPSKs, related device information, and so on.
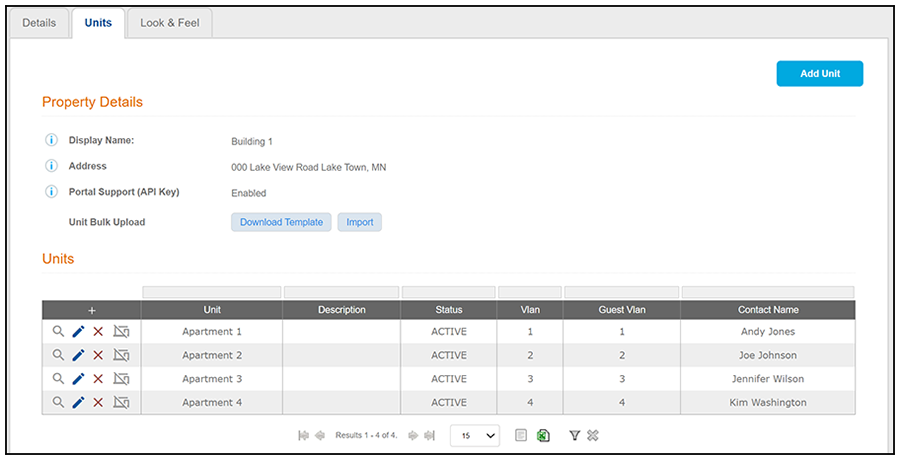
- If you click the Units tab, the following view
is displayed:
- Add additional units to the property by either clicking the + above the units grid or clicking Add Unit at the top of the screen.
- Click the magnifying glass next to any unit to view all values for that unit; you can view DPSK shared secrets as well as download the tenant portal QRCode from the magnifying glass view. For more information, refer to Unit-Specific Information
- Click the pencil icon to edit the existing unit.
- Click the X next to a unit to delete it altogether. Proceed with caution because this will also delete the DPSKs associated with the unit.
- Click the Suspend icon (to the right of the X) to suspend a unit. Procced with caution because this will also revoke the associated DPSKs.
- From the Look & Feel tab, make any changes you want, and then refresh the tenant portal UI to check your changes.