How to Set Up the LinkedIn App
- Navigate to
http://developer.LinkedIn.com. - Sign in to your LinkedIn account.
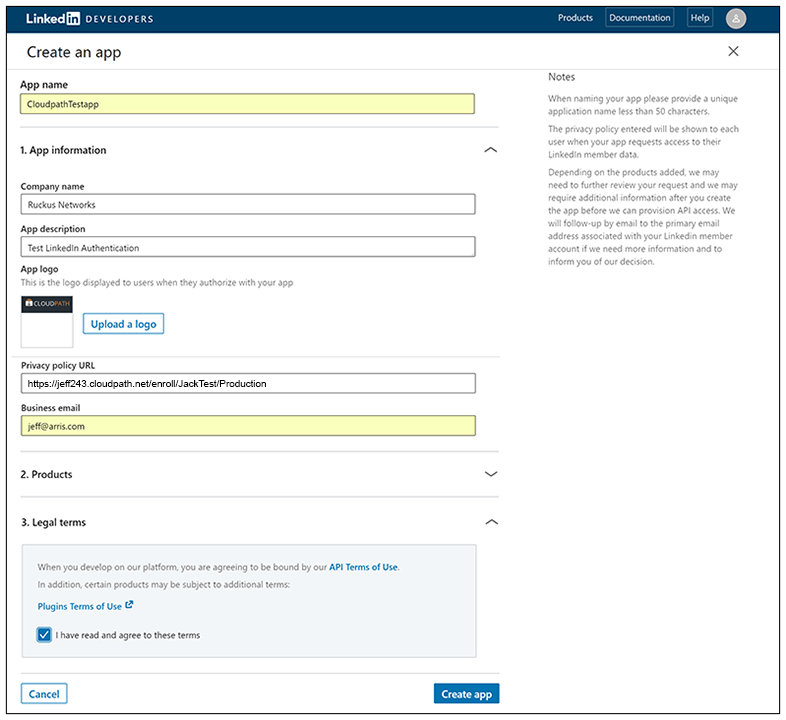
- Click Create app.
- The Create an app page displays.
- Enter the following information for your application:
- Agree to the
Terms of Service and click
Create app.
The application is created, and you are returned to a screen that provides the information you just configured.
- Click the Auth tab of your application screen. An example figure is shown below:
- In the OAuth 2.0 settings section, use the pencil icon to enter the Redirect URLs.
Note: These must be acceptable Redirect URLs and must include the full enrollment URL + "/linkedin". An example is:
https://jeff243.cloudpath.net/enroll/JackTest/Production/linkedin.You obtain the "Redirect URL" during workflow creation when you add a step to "Authenticate to a third party." For more information, refer to How to Add LinkedIn Authentication to the Workflow. (Cloudpath Third-Party Authentication Setup for LinkedIn shows the Redirect URL, which appears once you have checked the "LinkedIn Supported?" box when adding the third-party authentication step.)
You can add multiple URLs.
The following figure shows the Redirect URL section after adding a URL:
- Click Update to save configuration changes to your application.
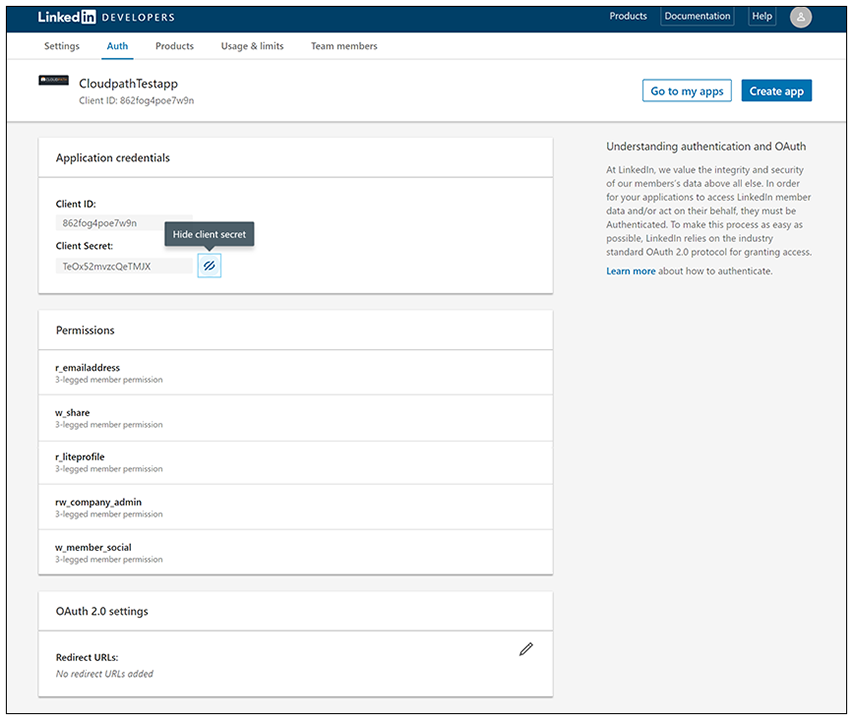

Make a note of your Client ID and Client Secret. You need this information to set up the LinkedIn authentication within Cloudpath.