Using Google G Suite as the SAML Identity Provider
Users can sign in with their managed Google account credentials to enterprise cloud applications via Single Sign-On (SSO).
Basic Tasks for Using Google G Suite
Configure SAML using Google G Suite as the IdP by performing the following tasks sequentially:
Creating a Google Admin App
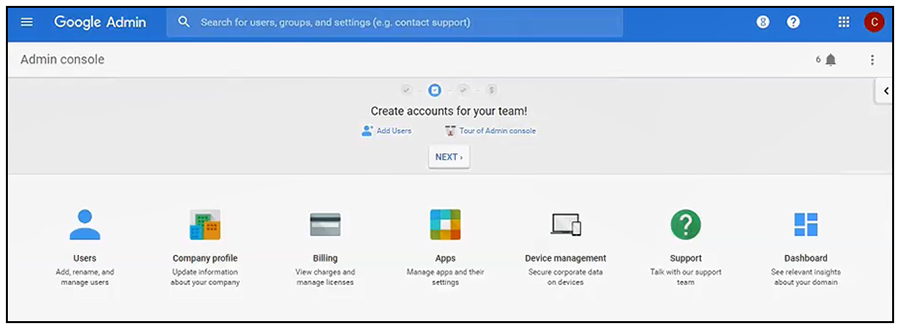
- Log in to (or create) a Google administration account at admin.google.com.
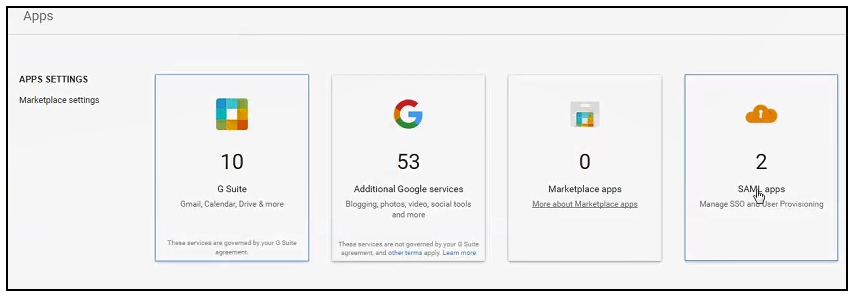
- Click Apps.
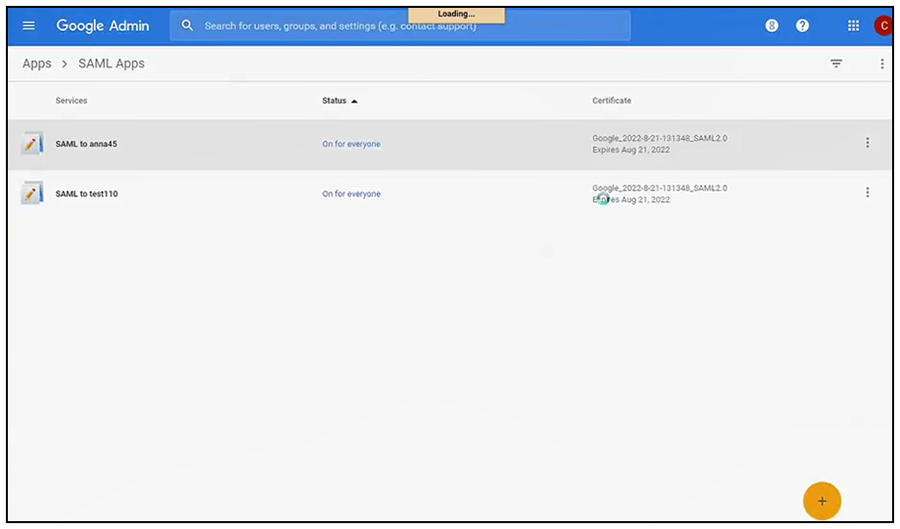
- Click SAML apps. The SAML Apps screen appears:
- Click the + sign at the bottom of the screen to add a new SAML app (or, you can edit an existing one).
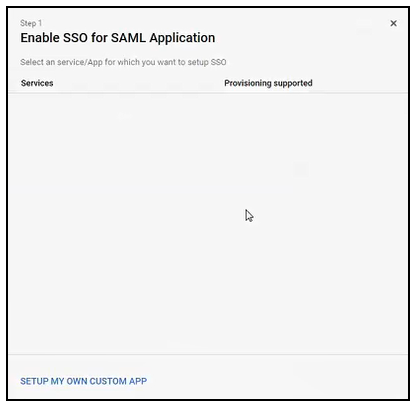
- Click SETUP MY OWN CUSTOM APP.
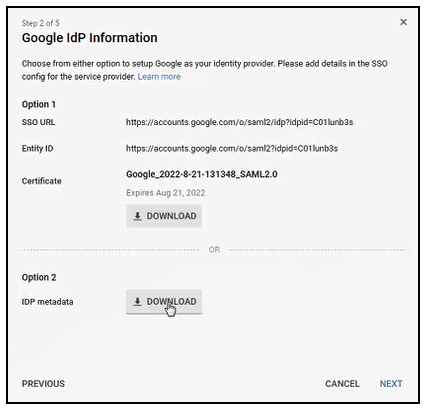
- In the Option 2 portion of the screen, click DOWNLOAD to download the IdP metadata. Later on, you will need to copy and paste this metadata into a field on a configuration screen in your Cloudpath workflow.
- Click Next.
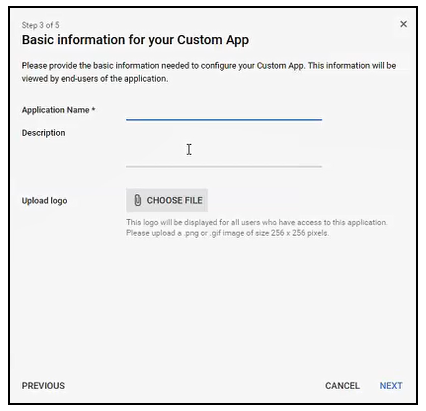
- In the Basic Information for your Custom App screen, do the following:
- In the Application Name field, provide a meaningful name.
- Optionally, you can add a Description and/or use the Upload logo function.
- At this point, you need to proceed to the "Adding a SAML Step To Your Workflow" below before you can proceed with the screen above. However, keep the window open that contains the screen above, because you will be directed to return to this screen.
Adding a SAML Step To Your Workflow
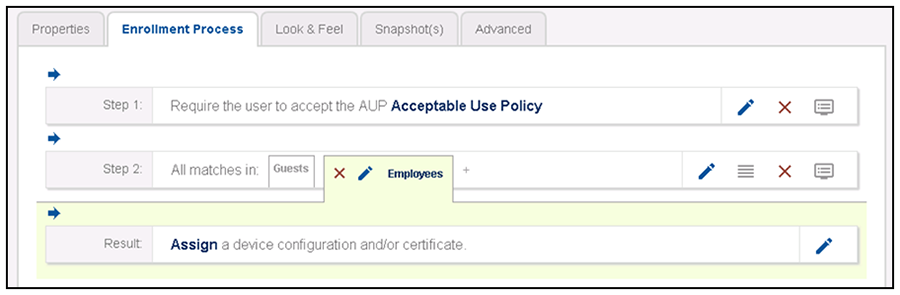
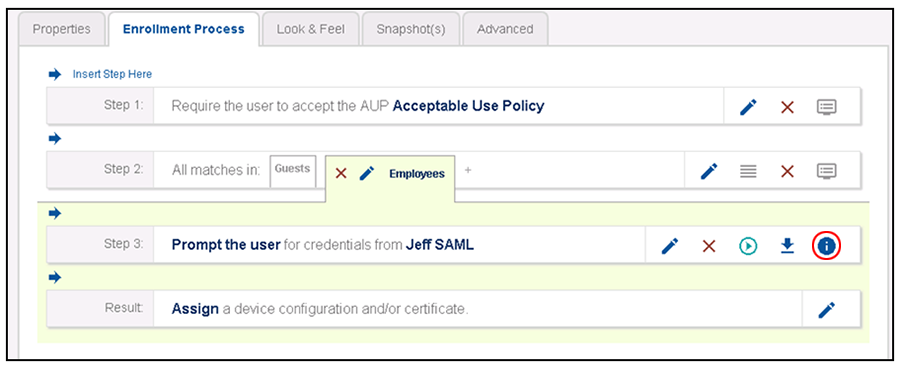
Determine in which branch and in which step to add a SAML authentication server plug-in to the workflow. For example, in the default workflow, you might create a split for Guests and Employees, and you could then use a SAML authentication server instead of the Active Directory authentication server, as shown below.
- Log in to the Cloudpath user interface.
- Go to Configuration > Workflows.
- Click on a workflow (or create a new one) for which you want to configure SAML as the authentication server.
- Highlight the tab in the workflow where you want to add the SAML authentication-server step. In this example below, it is the Employees tab.
- With the Employees branch of the workflow highlighted, click the blue arrow to insert a step below the Guests/Employees split.
Adding the Google G Suite SAML Authentication Server to the Workflow
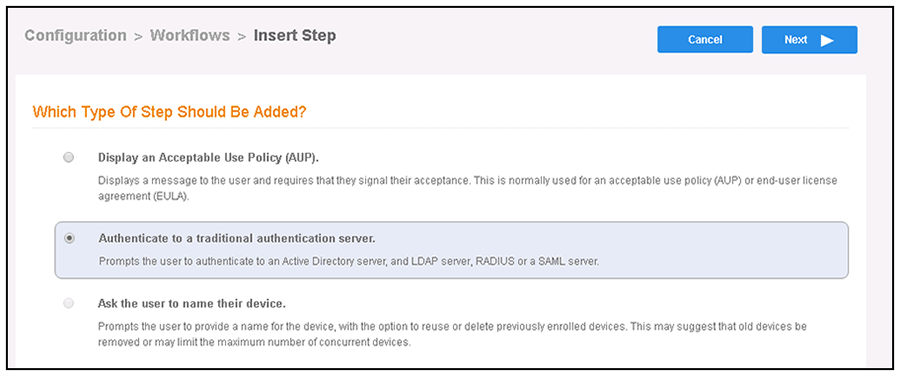
- Once you click the arrow to insert the SAML step, you receive the following prompt:
"Which Type Of Step Should Be Added?"
- Select the button to authenticate to a traditional authentication server, as shown in the following screen:
- Click Next.
- If you have already defined an authentication server, you will get a prompt asking whether you want to reuse an existing authentication server or define a new authentication server. Choose the radio button to define a new authentication server, then click Next.
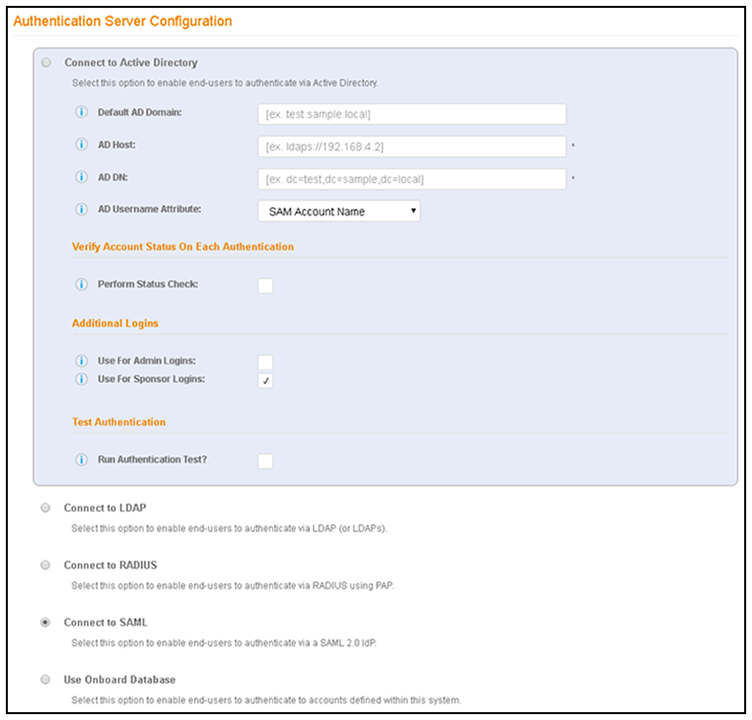
- On the Authentication Server Configuration screen, select the Connect to SAML radio button:
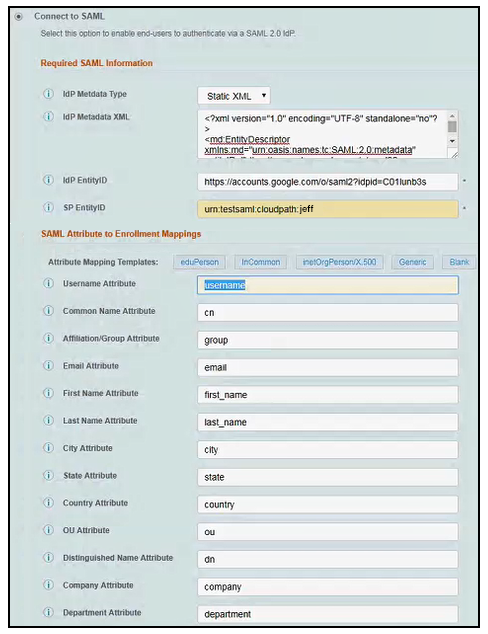
- Complete the configuration as shown in the example below (refer to the field descriptions
after the screen):
Note: You can click the "i" icons next to the field names to obtain the information required for each field.
- Required SAML Configuration section:
- IdP Metadata Type: Use the Static XML option.
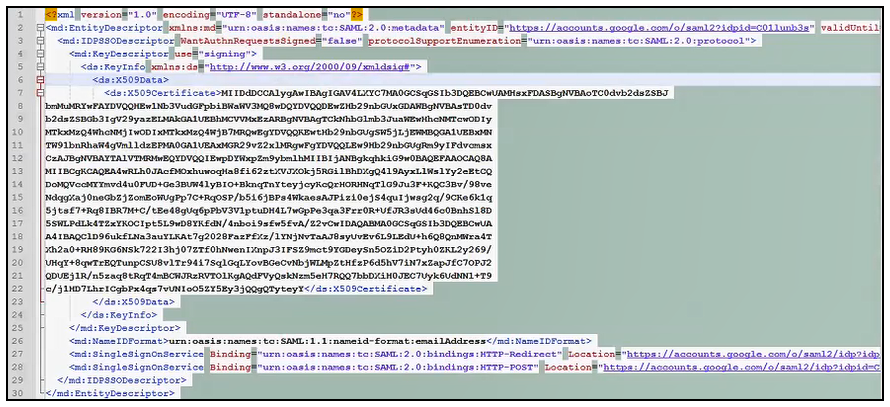
- IdP Metadata XML: Copy and paste the google metadata that you downloaded in Google Metadata After Being Opened in Notepad into this field. Be sure you copy the entire contents of the metadata file, but do not have any extra spaces.
- IdP EntityID: Obtain this value from your downloaded metadata file. Look for the string "entityID" near the top of the file. That string is followed by an = sign and a URL in quotation marks. It is the value within these quotation marks that you need to paste into this field. For example, in Google Metadata After Being Opened in Notepad, the Entity ID = https://accounts.google.com/o/saml2?idpid=c011unb3s
- SP EntityID: Enter the string urn:testsaml:cloudpath:followed by your first name. For example: urn:testsaml:cloudpath:jeff
- SAML Attribute to Enrollment Mappings: Click the Generic tab to automatically have the fields filled in.
- SAML Options (not shown in the screen shot above): Use all default settings.
- Required SAML Configuration section:
- Click Next.
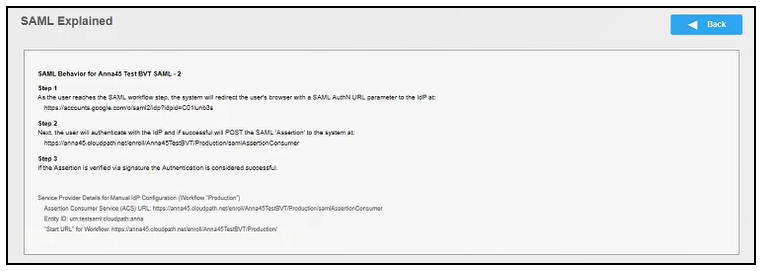
- In the SAML authentication server step (Step 3), click the "i" icon on the far right (shown in the previous screen, with red circle around the "i").
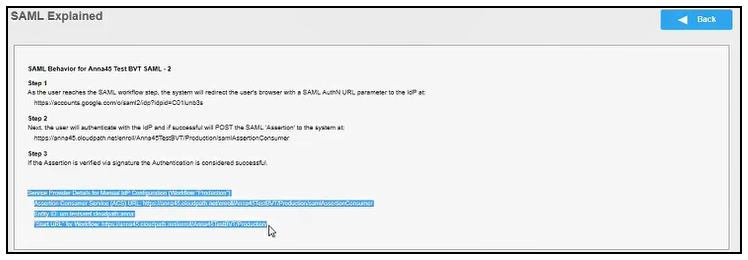
- Copy the bottom portion of this screen (highlighted below) and, optionally, paste it into a text file. You will need this information later in the configuration process:
- Proceed to the "Returning to Google G Suite Configuration" section.
Returning to Google G Suite Configuration
- Back on your Google configuration, you left off at Basic Information for your Custom App Screen. Once you have entered an Application Name, click Next.
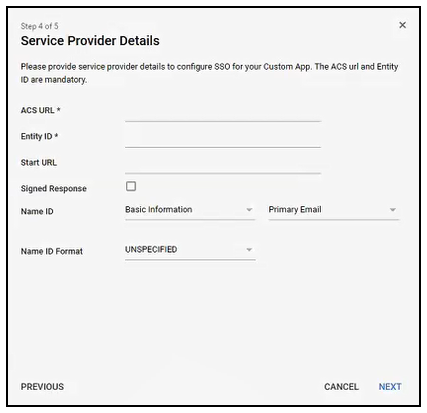
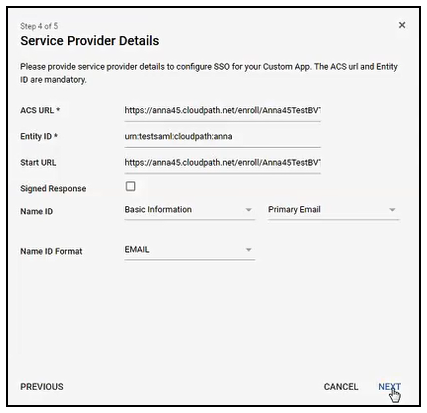
- Use the information from the SAML Explained screen to complete the Service Provider
Details configuration, as shown and described below:
- ACS URL, Entity ID, and Start URL: You obtain all three of these values from SAML Explained - Text You Will Need to Copy. Copy and paste each value into the screen.
- Signed Response: Leave this box unchecked.
- Name ID: Be sure to use the "Basic Information" and "Primary Email" settings from the drop-down lists.
- Name ID Format: From the drop-down list, select EMAIL.
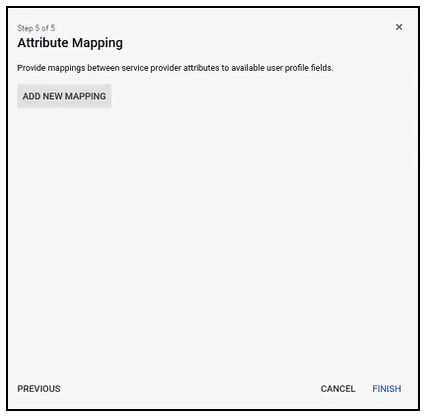
- Click ADD NEW MAPPING
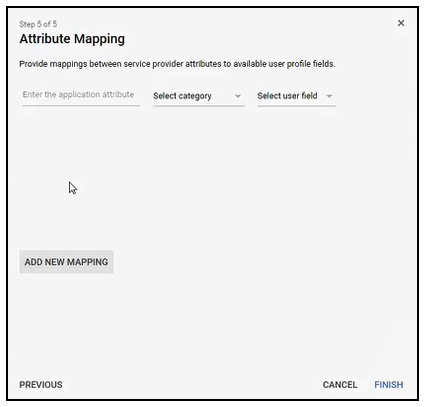
- The Attribute Mapping screen gets modified to allow you to enter information:
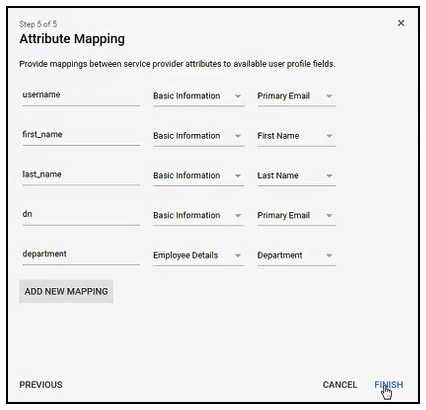
The following table lists the attributes and their corresponding settings that you need to add.
Required Attributes
Name of Application Attribute Select Category drop-down list Select User Field drop-down list username Basic information Primary Email first_name Basic information First Name last_name Basic information Last Name dn Basic information Primary Email department Employee Details Department - In the left-most column of the Attribute Mapping screen, enter the name of the first attribute, which is username, then select the following from the two drop-down lists:
- Once you have completed your first entry, click ADD NEW MAPPING again, and repeat the process until you have added all the mappings that are shown in the previous table as well as in the following screen:
- When you have added these attributes as shown above, click FINISH.
- Make sure that the SAML App you have created is "On for everyone," as shown in the Status column on the following example screen. You can use the three vertical buttons on the right side of the screen to toggle this setting.
- Log out of the Google interface.
Publishing the Workflow for SAML Google G Suite
- Return to the workflow on your Cloudpath system by navigating to the Configuration > Workflows screen.
- Complete the workflow by adding a device configuration. Refer to Adding a Device Configuration to Your Workflow.
- Publish the workflow by clicking the Publish icon to the left of the workflow name.
Testing the User Experience for SAML Google G Suite
- Test the enrollment process by clicking on the enrollment portal URL for the workflow at the top of the Configuration > Workflows screen.
- When are you presented with the with the Welcome screen, click Start.
- When you are presented with various branches of your workflow, navigate down a branch
that uses the SAML authentication server you just configured.
You are directed to the Google login page.
- Log in with the your Google administrative credentials.
- If the SAML authentication is successful, you are returned to the Cloudpath system, where you can continue with the enrollment.