Configuring a DPSK WLAN on a Ruckus ZoneDirector Controller
You can configure a DPSK WLAN on a Ruckus Wireless ZoneDirector controller so that
you can then use DPSK as one method of onboarding users to Cloudpath.
Note: The procedure shown in this section is based on the user interface of a ZoneDirector
controller version 10.0. Different versions of ZoneDirector may have minor differences
in terms of which configuration options appear in what sections of a screen.
- Log in to your Ruckus ZoneDirector controller.
- Navigate to Configure > WLANs.
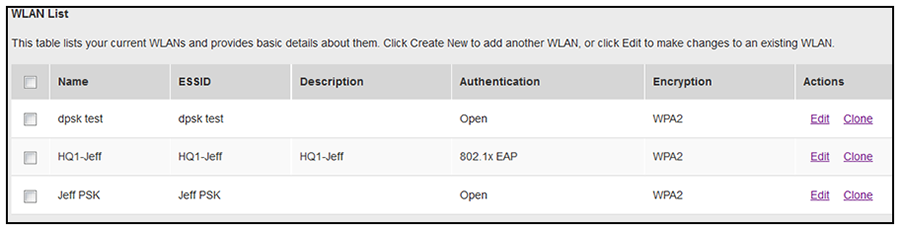
- Under the WLAN List section, click
Create New.
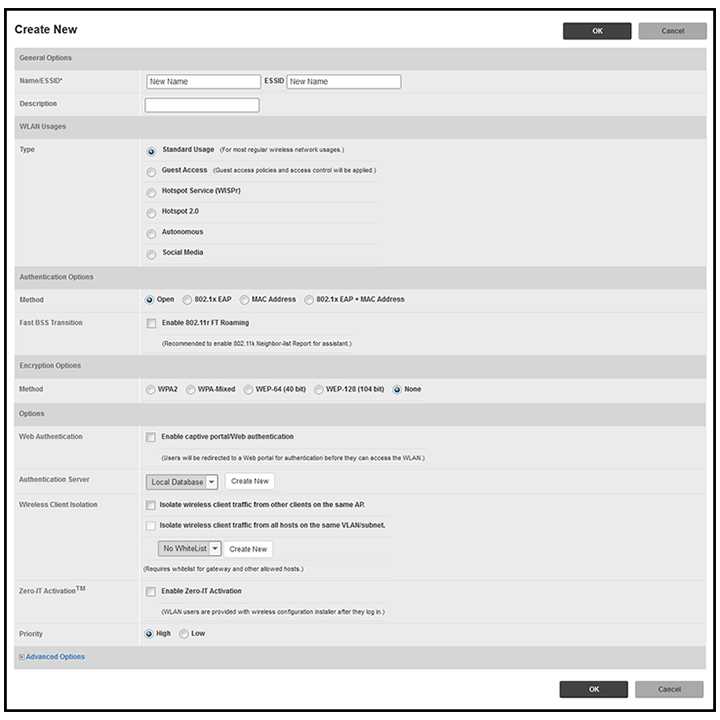
The Create New section of the screen is displayed.Note: Unless otherwise specified in the remaining steps, you do not have to change default values. The procedure described here is specific to Cloudpath; for information about any fields that are not described here, refer to your controller documentation.
- Complete the General Options section:
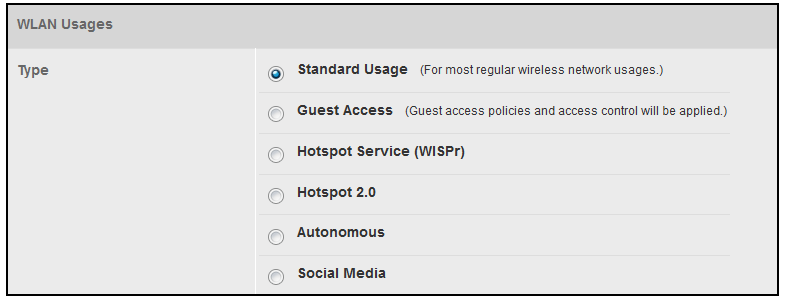
- In the WLAN Usages section, use the default selection of Standard Usage.
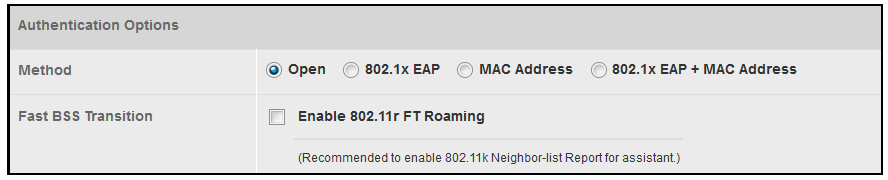
- In the Authentication Options section, be sure that the default selection of Open is selected.
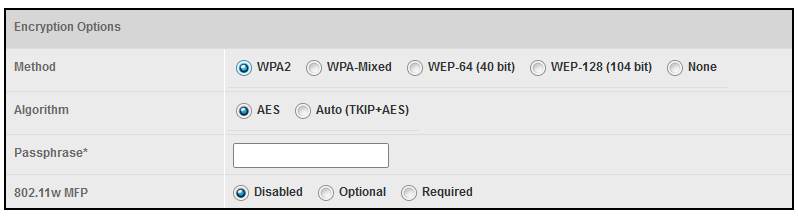
- In the Encryption Options section, choose WPA2 for the Method. When you choose WPA2, the Encryption Options section expands:
- In the Algorithm field in the Encryption Options section shown above, be sure that the default value of AES is selected.
- In the Passphrase field in the Encryption Options section shown above, enter a passphrase for the DPSK WLAN that you are creating, and make note of this passphrase. The minimum length is eight characters.
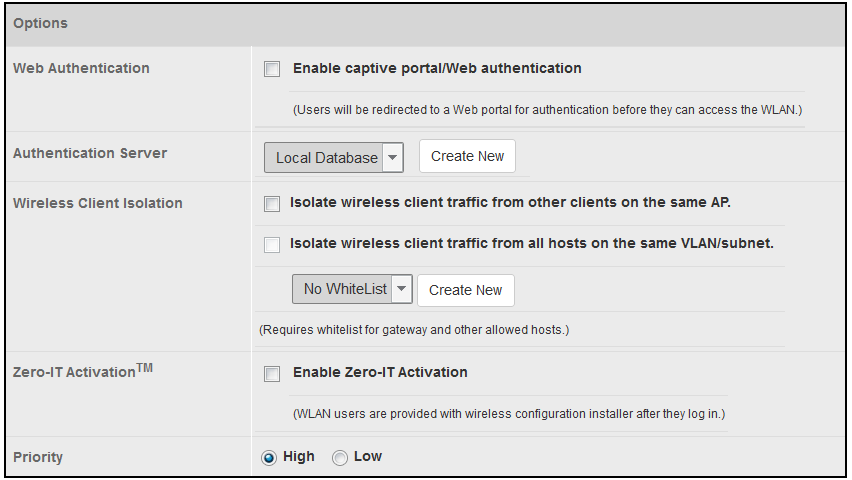
- The Options section appears as follows in its default state, which is prior to you
enabling Zero-IT Activation:
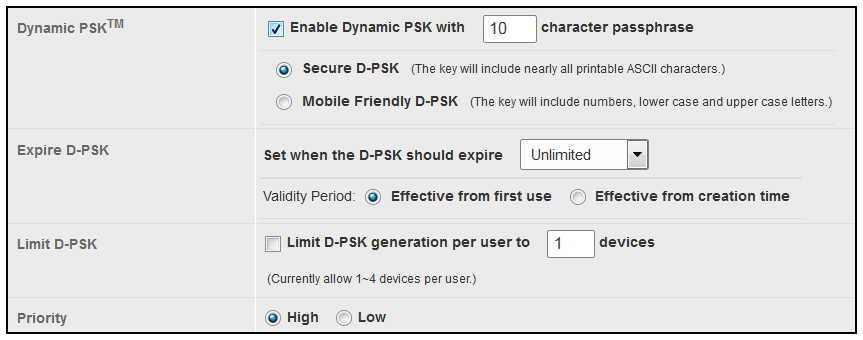
- Check the Enable Zero-IT Activation box.
- Check the Enable Dynamic PSK box, and enter the number of characters you want to be required for the passphrase. Make sure that the value you select complies with the security policy of your company. The default is 62.
- You can keep the Secure D-PSK option selected, or you can choose Mobile Friendly D-PSK instead, based on the security policy of your company.
- For the Expire D-PSK and Limit D-PSK options, you can again keep the default values or change them, based on the security policy of your company.
- In the Advanced Options section, there are many fields (not shown here), but you can also use all the default values.
- Click OK.


Obtaining Information about the ZoneDirector Controller
You will need the following information when you perform the necessary configuration in Cloudpath.
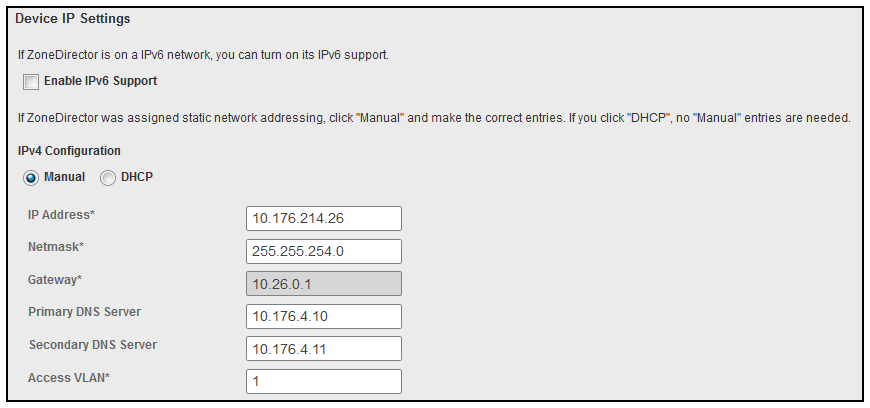
- Obtain the local device IP address of your ZoneDirector controller. Navigate to Configure > System. In the Device IP Settings section of the screen, shown below, locate the IP address, which is 10.176.214.26 in the screen below. Be sure to write down this IP address because you will need it for the configuration in Cloudpath.
- Enable Northbound Portal Interface Support. Navigate to
Configure > System. Scroll down until you locate the "Network Management" section of the screen, then
click on it to expand it.
Then, scroll up until you locate the Northbound Portal Interface section, shown in the illustration below.
Check the box to enable Northbound Portal Interface Support, then create a Password. Click Apply.
Note: Be sure to write down the password you create for the Northbound Interface because you will need it when you perform the corresponding configuration on your Cloudpath system.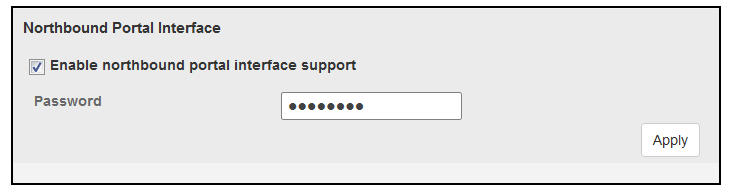
Now, proceed to Configuring DPSK on Cloudpath to Integrate with ZoneDirector.