Configuring an External DPSK WLAN on a Ruckus SmartZone Controller
You can configure multiple eDPSK WLANs on a Ruckus Wireless SmartZone controller so
that you can then use eDPSK as the encryption method for devices used to onboard users
to Cloudpath.
Note: The procedure shown here is based on the user interface of a SmartZone controller
version 5.1. Different versions of SmartZone may have minor differences in terms of
which configuration options appear in what sections of a screen. However, you must
be running SmartZone 5.1 or greater.
- Log in to your SmartZone controller.
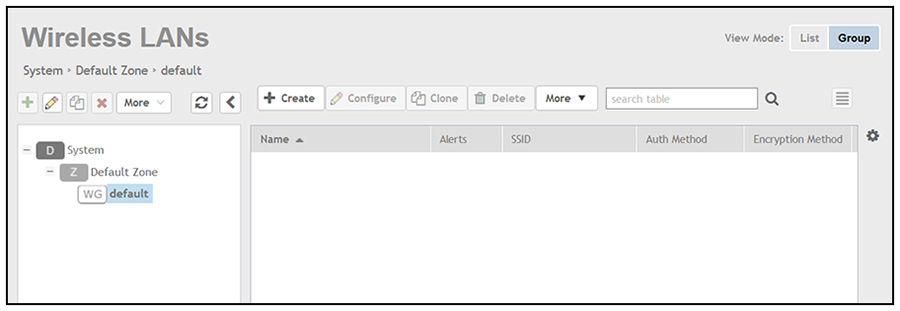
- Click the Wireless LANS tab.
- On the Wireless LANs screen, highlight the desired zone, then click the
+ Create button.
Note: Unless otherwise specified in the remaining steps, you do not have to change default values. The procedure described here is specific to Cloudpath; for information about any fields that are not described here, refer to your controller documentation.
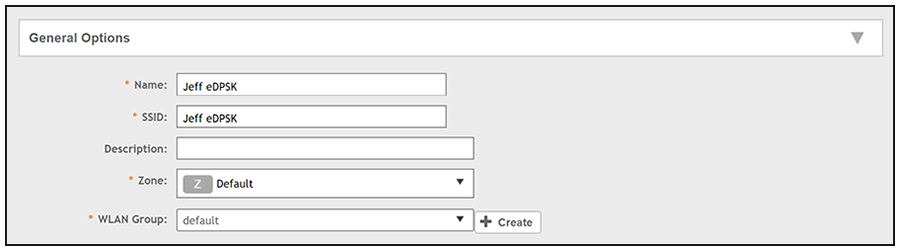
- The Create WLAN Configuration screen appears; example data of the General Options portion of the screen is shown below:
- In the Authentication Options section of the screen, use the settings shown in the following screen.
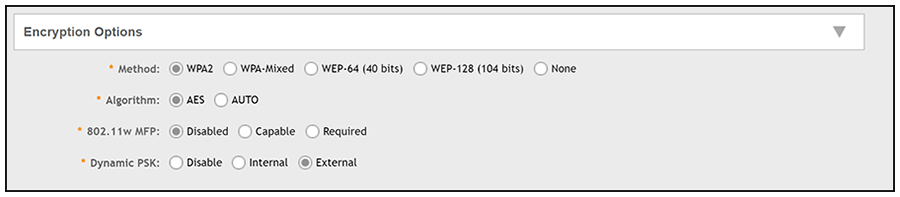
- In the Encryptions Options section of the screen, select the options shown in the following screen.
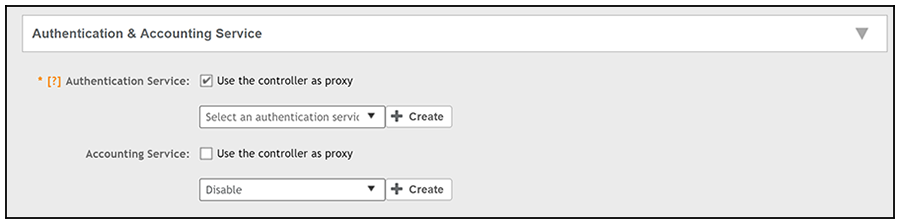
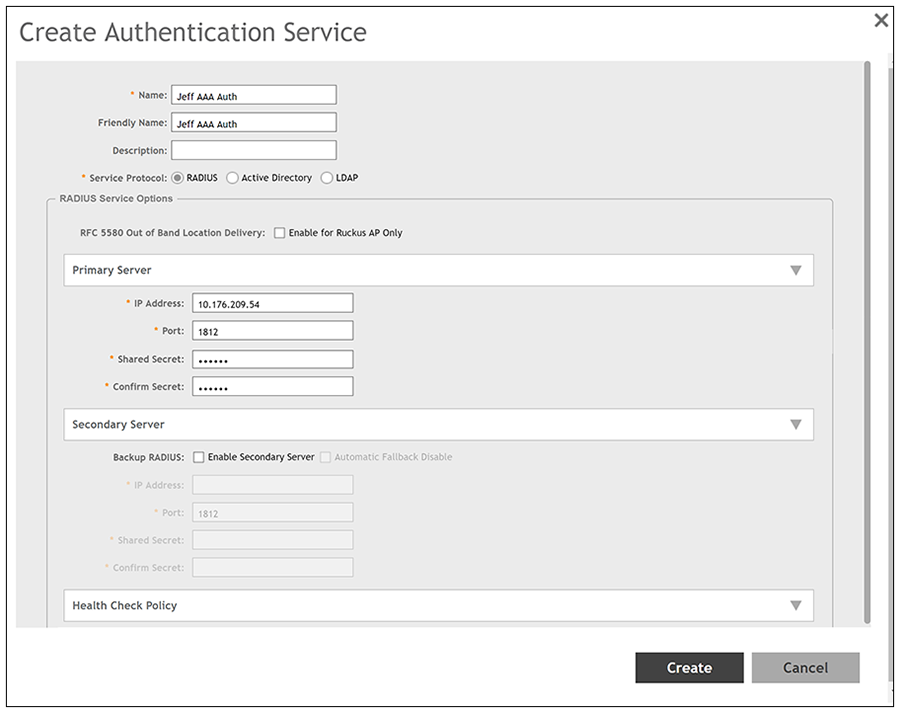
- In the Authentication and Accounting Services section, you can use the drop-down list to select an already-configured AAA authentication server, or you can use the + Create button to create one. The "Use the controller as proxy" box must be selected.
- If you are creating an AAA authentication server, configure the values as described
below the following example screen, and click
Create when you are done.
- Name: Any descriptive name you wish.
- Service Protocol: RADIUS
- IP address: The IP address of your external RADIUS server. (This is the IP address of your Cloudpath system.)
- Port: 1812 is typically used and is the default.
- Shared Secret: The shared secret of your external RADIUS server.
- Confirm Secret: Must again enter the shared secret of your external RADIUS server.
Note: A backup RADIUS is optional: Refer to your controller documentation if you want to use a backup RADIUS server.Once this AAA authentication server is created, you can locate its configuration under Services and Profiles > Authentication, Proxy tab portion of the controller UI.
- (Optional) You can create or select an accounting server using the same basic procedure that you used to create or select an authorization server. For an accounting server, port 1813 is the default. (The "Use the controller as proxy" box is not required for the accounting server.)
- On the Create WLAN Configuration screen, in the Advanced section, be sure that the "Enable Dynamic VLAN (AAA Override)" box is checked. It should be checked by default.
- On the Create WLAN Configuration screen, click OK to create the Wireless LAN with External DPSK enabled.