Customizing Your Wireless LANs
After the Master AP has been configured,
you can fine-tune the settings of your first WLAN (that you created during the setup),
and
create any additional WLANs needed prior to attaching additional member APs.
When you deploy additional member APs in whatever order you prefer, they automatically retrieve all WLAN configuration settings (and any other settings you have configured) from the Master AP.
Complete the following steps to customize an existing wireless LAN.
-
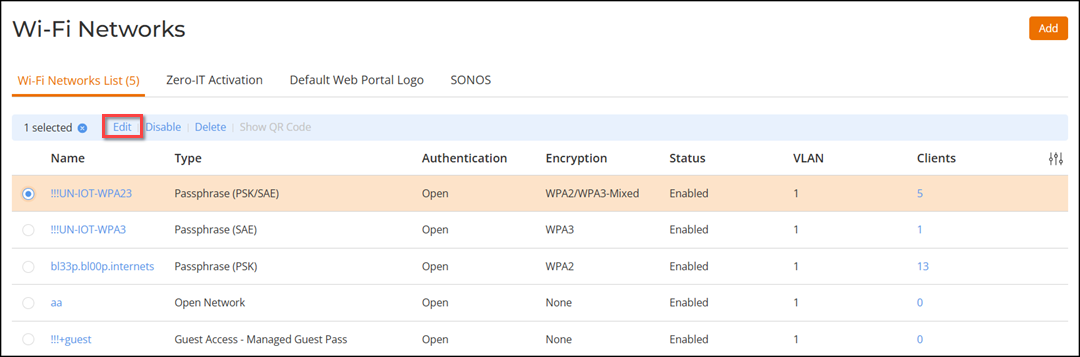
UI path and images specific to UnleashedFrom the RUCKUS Unleashed web interface, click that displays your deployed WLANs.
- Select a WLAN and click Edit to edit the WLAN settings.
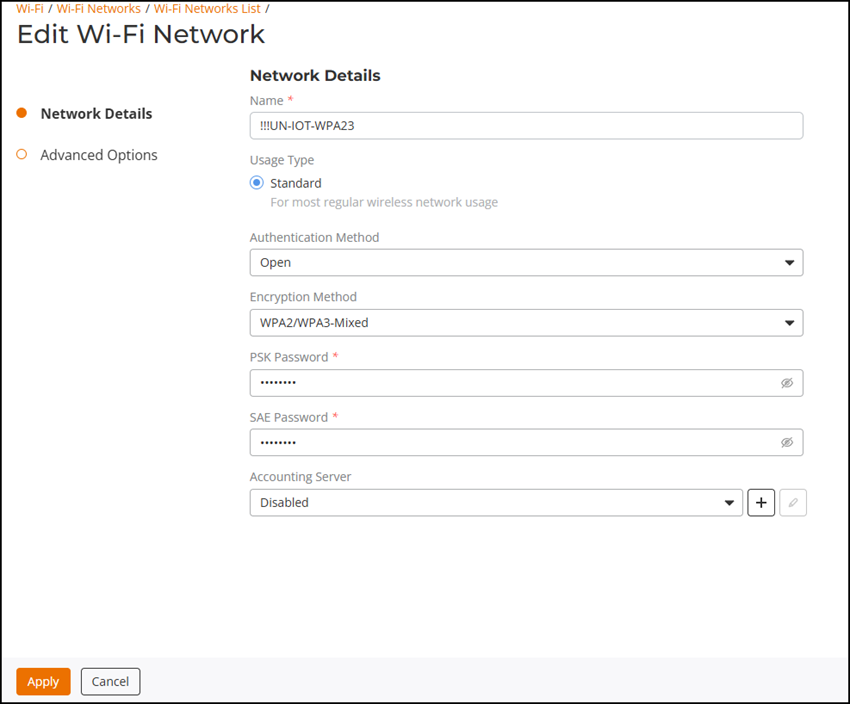
- Configure the following WLAN settings:
- Name: Enter a recognizable name for this WLAN.
- Usage Type: Select Standard for most typical wireless network usage scenarios. Select Guest Access to create a Guest WLAN, or select Hotspot to create a Hotspot WLAN.
- Authentication: Select Open, for open authentication, or authenticate users against an internal local database or an external authentication server using 802.1X or MAC address.
- Authentication Server: Select an AAA server (or Local Database) to authenticate users when the 8021.X or MAC authentication method is selected.
- Encryption Method: Select WPA2 for standard wireless security. Select None for no encryption.
- Password: Enter a WPA2 password for use when connecting to this WLAN if WPA2 is selected.
- Click Apply to save your changes.
- Repeat the above steps for any additional WLANs you want to create. All WLANs are deployed to each new member AP as soon as the AP joins the RUCKUS Unleashed network.
Your RUCKUS Unleashed network is now configured and ready for use. Proceed to Deploying Additional Member Access Points.