Pre-Approving IoT Devices
Pre-approving IoT devices involves granting network access permissions to specific
devices before they connect. This process is essential during the onboarding or deployment
of new devices in secure environments like industrial settings or smart homes.
Administrators gather device details, such as MAC addresses or install codes, and register them using a management interface. They associate the devices with specific access points, configure settings such as blacklisting or tagging, and set permissions. Once they pre-approve these devices, the system automatically allows them to connect, ensuring only trusted devices access the network. Pre-approval enhances security, streamlines device management, and reduces the risk of unauthorized access.
Complete the following steps to pre-approve IoT devices.
- From the main menu, click
Devices.The Devices page is displayed.
- Click Pre-Approve Devices.
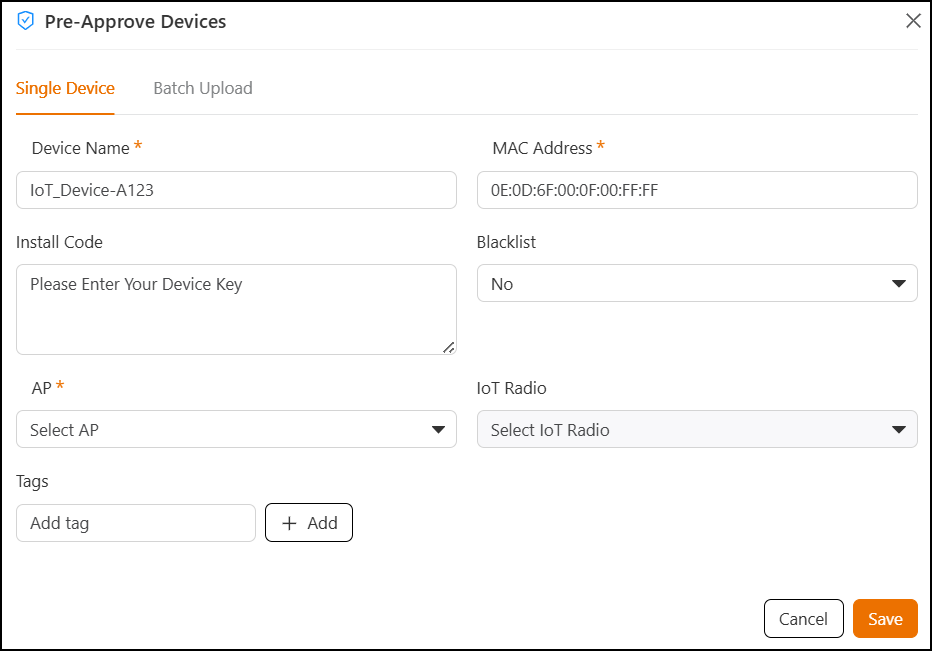
- Click Single Device to
add a single device.Configure the following.
- In the Device Name field, enter the device name.
- In the MAC Address field, enter the MAC address of the device.
- In the Install Code field, enter a device key.
- In the Blacklist field, select Yes or No from the drop-down list. If Yes is selected, the device is prevented from accessing the network.
- In the AP field, use the drop-down list to select an IoT AP to which the device will connect.
- In the IoT Radio field, select an IoT radio from the drop-down list.
- In the Tags field, enter a new tag name to help categorize or identify the device. Click Add to add more than one tag name.
- Click Cancel to close the window without saving the changes.
- Click Save to save the entered information.
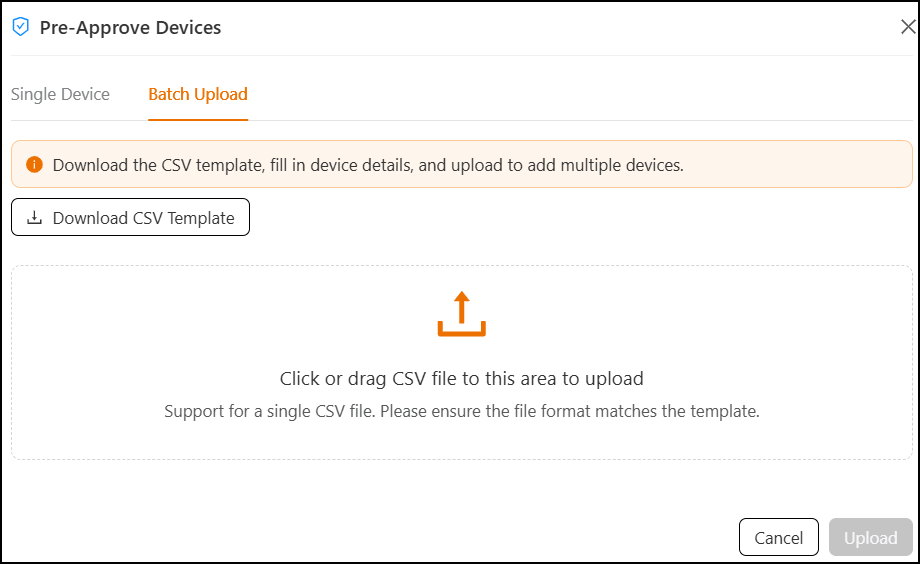
- To add devices in bulk, click
Batch
Upload and perform the following actions.
- Click Download Template to download the provided CSV file.
- Fill in the required details in the downloaded CSV file. Ensure all mandatory fields are completed correctly and the file is saved on your device.
- Upload the completed CSV file using one of the following methods:
- Click Upload to process the CSV file. Otherwise, click Cancel to stop the addition and exit the page.