Configuring the Chrome Extension on Google Admin Console
Log in to the Google admin console using your Google administrator account (not your Google developer's account).
Uploading Certificates
To upload certificates, do the following:
- Go to Devices > Networks > Certificates.
- Select the organization for which you want to import the certificate. If you do not select an organization, the certificate settings apply to all organizations and groups.
- Add all the certificates that you
previously downloaded. You need to add them one at a time. When adding the CA,
check the box to add the CA for Chromebooks.
Note: You must install the entire certificate chain. If the root CA contains an intermediate certificate, you must install both the root and intermediate certificates. Additionally, the common name must match on the root and intermediate certs. If your Cloudpath configuration contains additional CAs, you must also import the additional CAs.
Setting up the Wi-fi Network
To create the Chromebook wi-fi network, do the following:
- Go to Devices > Networks > Wi-Fi.
- Select the organization.
- Click Add Wi-fi. This will invoke a page where you will enter many
values. For "Platform access," check the applicable Chromebook platforms. Other
important information to configure here, copied from Managed Chromebook Setup Instructions
for Interactive Chromebook Enrollment, includes the following (your instructions will includes
names that are specific to your own network setup):
- Check Automatically Connect.
- Set Security Type to 'WPA/WPA2-Enterprise'.
- Set Extensible Authentication Protocol to 'EAP-TLS'.
- Set Username to
'@byod.company.com' or the desired value.
Note: If using a Microsoft CA instead of the Cloudpath onboard CA, use ${CERT_SAN_UPN} in the Username field to bring the Microsoft CA User Principle Name into the identity box. For more information, refer to the following link: https://support.google.com/chrome/a/answer/2634553?hl=en#top&add&wifi&thirdparty&variables&change&managecerts&autoconnect&
- Set Server Certificate Authority to 'Jack Test Root CA I'.
- Set Client Enrollment URL to 'https://jeff245.cloudpath.net/enroll/JackTest/Production/.
- Set Issuer Common
Name to 'Jack Test Intermediate CA I'.
Note: If you are using a Microsoft CA instead of the Cloudpath onboard CA, use the "Issued by" value of the CA certificate.
- Set Issuer Organization to 'Sample Company, Inc.'.
- Set Issuer Organization Unit to 'IT'.
- Configure any additional fields.
- Click Save.
Adding Cloudpath Certificate Generator
To add the Cloudpath Certificate Generator, do the following:
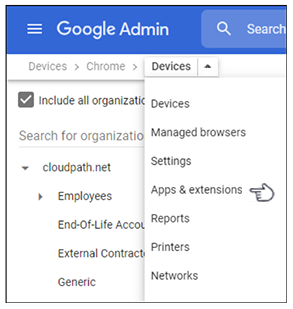
- Go to Devices > Chrome > Apps & Extensions.
- Be sure you are in the Users and Browsers area.
- Open the Chrome Web Store by using the yellow plus button (+) on the bottom right of the screen.
- Search the Chrome Web Store for "Cloudpath Certificate Generator."
- Add the Cloudpath Certificate Generator.
- With the generator selected, from the drop-down list to the right of the generator, select "Force Install."
- If you are using verified access, enable the "Allow enterprise challenge" option under "Certificate Management" in the column on the right side.
- Click Save.
The extension is now deployed to the managed Chromebooks, along with the 'chromebook' wireless network. When the user clicks on the wireless network, the operating system looks for a certificate with the necessary issuer characteristics. If no such certificate is found, the browser opens to the client enrollment URL. Once authorized, the extension installs the certificate, and the SSID can be joined.