Migrating RUCKUS IoT Controller 1.8.2.0 MR to 2.0.x
You can only migrate from RUCKUS IoT Controller 1.8.2.0 MR to 2.0.x and not directly from a prior version.
Prerequisites
Backing Up RUCKUS IoT Controller 1.8.2.0 MR
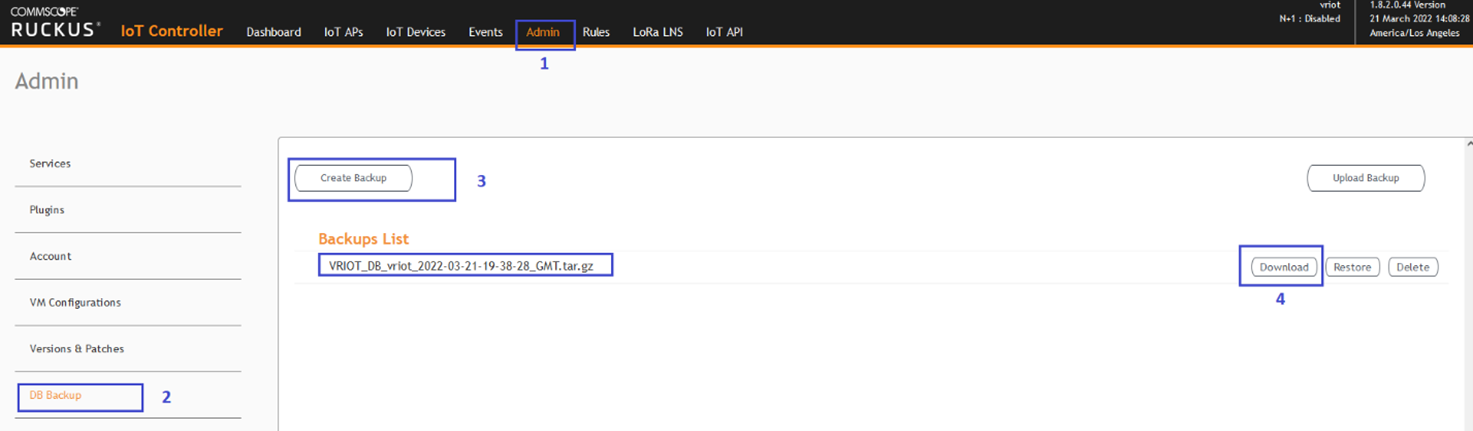
To back up RUCKUS IoT Controller 1.8.2.0 MR, complete the following steps.
Obtaining a New License
To obtain a new license for RUCKUS IoT Controller 2.0.x, complete the following steps.
- Deploy RUCKUS IoT Controller 2.0.x
- Obtain the controller serial number.
- Contact RUCKUS support for a new device license, refer to https://support.ruckuswireless.com/articles/000012195.
Migrating to RUCKUS IoT Controller 2.0.x
Complete the following steps to migrate from RUCKUS IoT Controller 1.8.2.0 MR to 2.0.x
Note: Do NOT upload the new license
before doing the 1.8.2. DB restore. Doing so will lead to devices being
onboarded in decommissioned state.
- Deploy RUCKUS IoT Controller 2.0.x
- Prestart RUCKUS IoT Controller 2.0.x. Configure the Hostname and TimeZone as configured in the 1.8.2 controller.
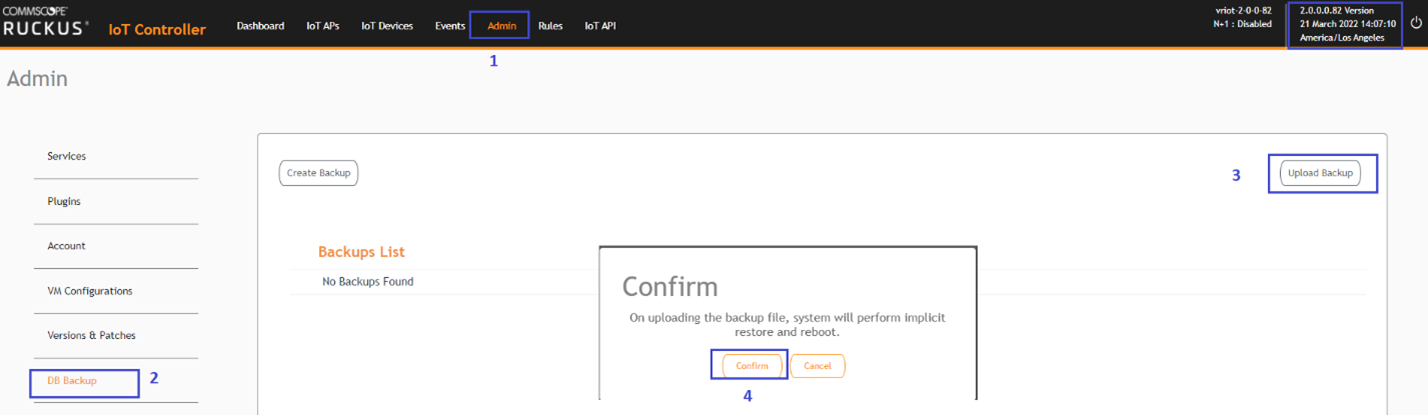
- Log in to RUCKUS IoT Controller 2.0.x.
- Navigate to .
- Click .
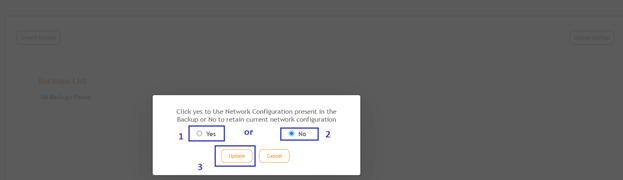
- Select and click to retain the current configuration.
The controller uploads the file to its database. After the upload process is complete, the RUCKUS IoT Controller logs out of the web interface automatically. When the controller login page displays again, you have completed upgrading the controller.
Note: Ensure that the database upload process is completed correctly before you proceed. - Shut down RUCKUS IoT Controller 1.8.2.0 MR.
- Log in to RUCKUS IoT Controller 2.0.x.
- Navigate to .
- Either update the RUCKUS IoT Controller
1.8.2.0 MR configuration network settings to configure RUCKUS IoT Controller 2.0.x similar to the existing configuration, or
update the new configuration network settings to configure RUCKUS IoT Controller 2.0.x to a new network.
Note: RUCKUS highly recommends that you stop using the older instance to configure the network after the migration to RUCKUS IoT Controller 2.0.x is complete, and you shut down or delete RUCKUS IoT Controller 1.8.2.0 MR.
- Go to the RUCKUS IoT Controller UI, click and upload the new license.