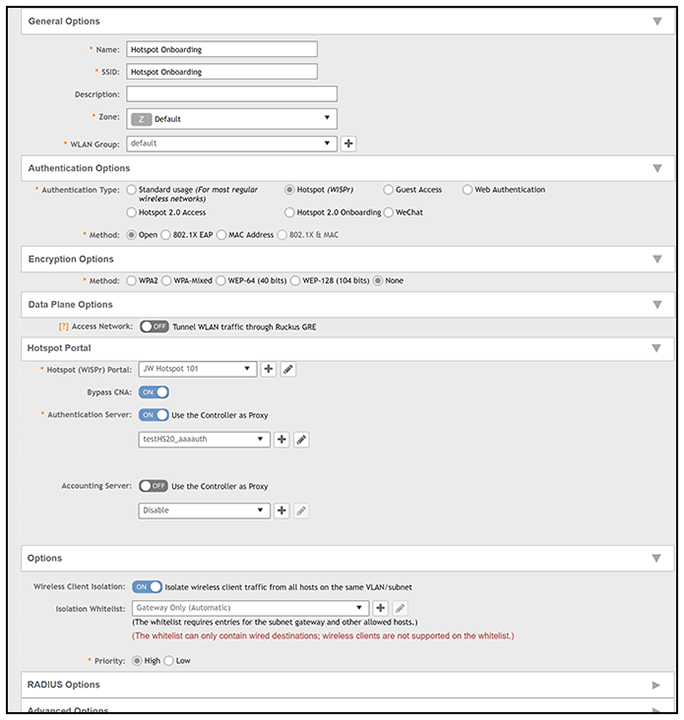
Configuring an Onboarding SSID for Hotspot 2.0 R1
- In the Controller UI, go to Wireless LANs.
- Be sure to highlight the zone where you want to add the onboarding SSID. This example uses the Default zone.
- Click Create.
- In the Name field, enter a descriptive name for the onboarding SSID.
- From the Zone drop-down list, make sure the correct zone for your onboarding SSID is selected.
- From the WLAN Group drop-down list, make sure that you select the WLAN group where the onboarding SSID resides.
- For Authentication Type, select Hotspot (WISPr).
- For Authentication Method, select Open.
- For Encryption Method, select None.
- From the Hotspot (WISPr) Portal drop-down list, select the hotspot portal you previously configured.
- For the Authentication Server, be sure the corresponding button is ON, then select the authentication server from the drop-down list that you configured while you were setting up the Identity Provider.
- For the Accounting Server, you can optionally set the corresponding button is ON, then select the accounting server from the drop-down list if you configured one while you were setting up the Identity Provider.
- Use the default values for the remaining fields, and click OK.