Creating an eDPSK Pool for Use With External DPSK
You can create eDPSK pools to associate with specific SSIDs in your environment.
Note: A maximum number of DPSKs is enforced
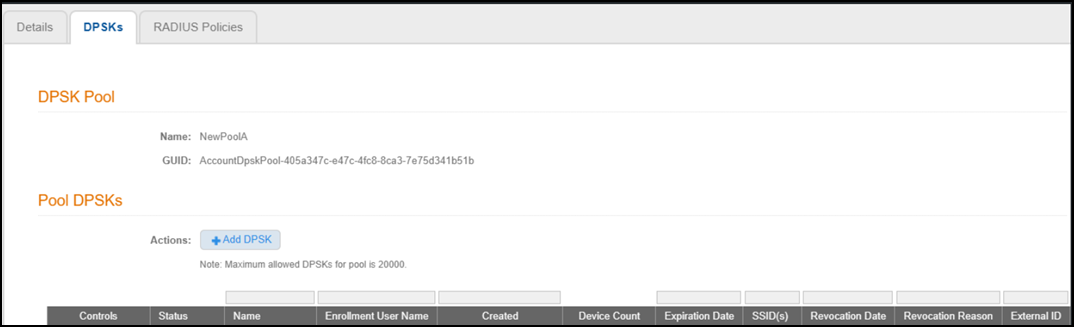
per pool. Once a pool is created, the DPSKs tab will display
this maximum limit below the Add DPSK button.
- In the Cloudpath UI, go to Configuration > DPSK Pools.
- Click Add DPSK Pool.
- In the ensuing Create
Pool screen, enter the required information to create the pool,
then click Save. The
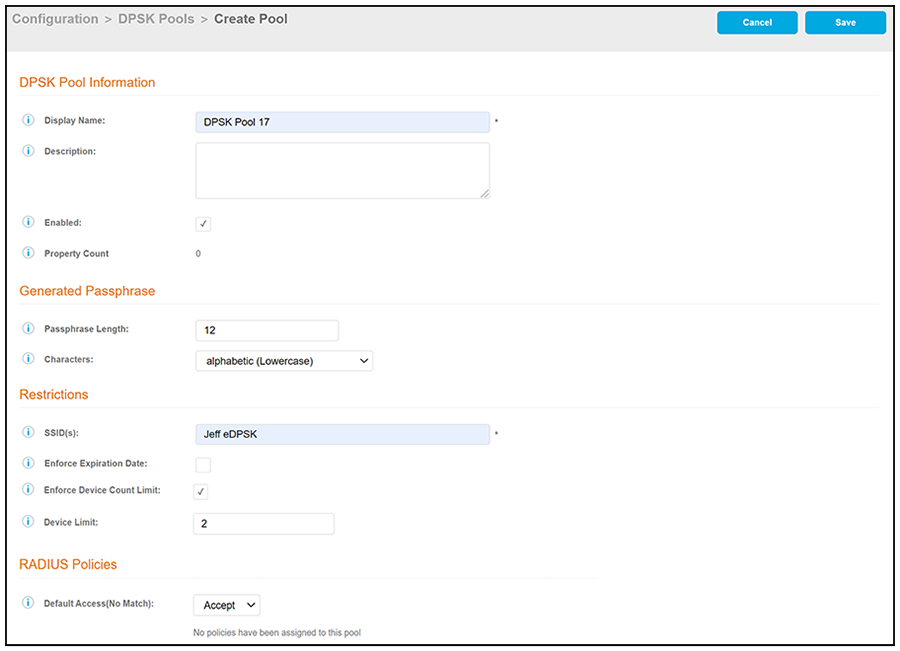
following screen shows an example and describes the fields.
- Display Name: The name of the eDPSK pool. This should be a descriptive name. It is visible only to Cloudpath administrators.
- Description: Optionally, enter a description of this pool. It is visible only to Cloudpath administrators.
- Enabled: This box is checked by default. It must be checked for this DPSK pool to be used.
- Property Count: This field is used for the property management feature. For more information, refer to the Cloudpath Enrollment System Property Management Configuration Guide.
- Passphrase Length: This is the default length (in number of characters) for the pre-shared keys generated for this pool. The maximum length is 63.
- Characters: From the drop-down, select the types of characters that can be used for the pre-shared keys.
- SSID(s): Enter the specific SSID or SSIDs, separated by semi-colons, for which you want this pool to be used. Wildcard characters are not supported.
- Enforce Expiration Date: If checked, newly generated DPSKs will have an expiration date based on the creation date and the offset that you define in the Default Expiration Date popup box.
- Enforce Device Count Limit: If checked, each DPSK will be assigned a maximum device count as specified in the Device Limit popup box. If the Enforce Device Count Limit box is un-checked, an unlimited number of devices can use the DPSK.
- Default Access (No Match): A drop-down where you can select whether to allow a user onto the network even if there is no matching policy for the user.
- After you save your configuration, you are returned to the following screen, where you can check the pool you just configured:
- Click Add DPSK.