Configuring a Certificate Template for Chromebook Enrollment
Using the Certificate Authority portion of
the Cloudpath UI, you can create and configure a certificate template for Chromebook
device
enrollment without the use of workflows.
Follow the steps below to create the certificate template:
- In the Cloudpath UI, go to Certificate Authority > Manage Templates.
- Click Add Certificate Template.
- Use an onboard certificate authority and click Next.
- Continue the process until the certificate template is created. You do not necessarily need to use all the default values, but you do need to set the certificate template to generate client certificates.
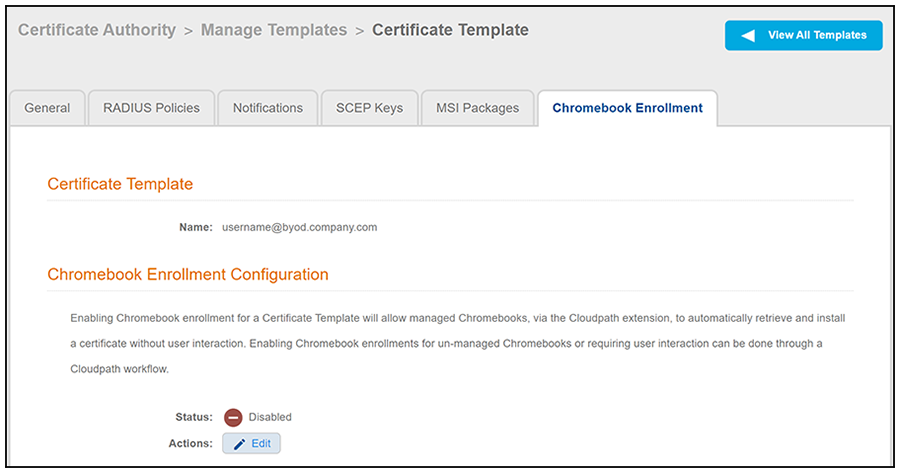
- Once the certificate is created, click the Chromebook Enrollment tab. The following view of the template is displayed:
- Click the Edit button on the screen.
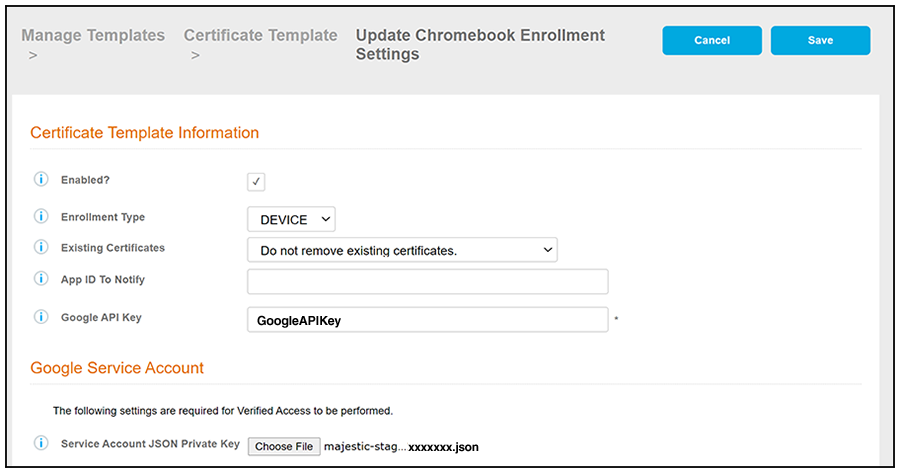
- On the ensuing screen, check the "Enabled?" box.
- Configure the Chromebook Enrollment
Settings screen values, as shown in the example below. Field descriptions follow the
illustration.
- Enrollment Type: This selection determines the type of verified access and certificate enrollment that is performed, as well as which variables are populated for use in the common name pattern. For more information, click the Information icon for this field on the screen.
- Existing Certificates: Choose the desired action from the drop-down list. For more information, click the Information icon for this field on the screen.
- App API to Notify (optional): If specified, the application is notified when the certificate installation is complete.
- Google API key: Enter or paste in the API key of the verified-access API from your Google APIs & Services page. Refer to API Key Created.
- Service Account JSON Private Key: Click Choose File, then locate and upload the JSON key from the service account that you created on your Google APIs & Services page. For more information, refer to Private JSON Key Created and Saved.
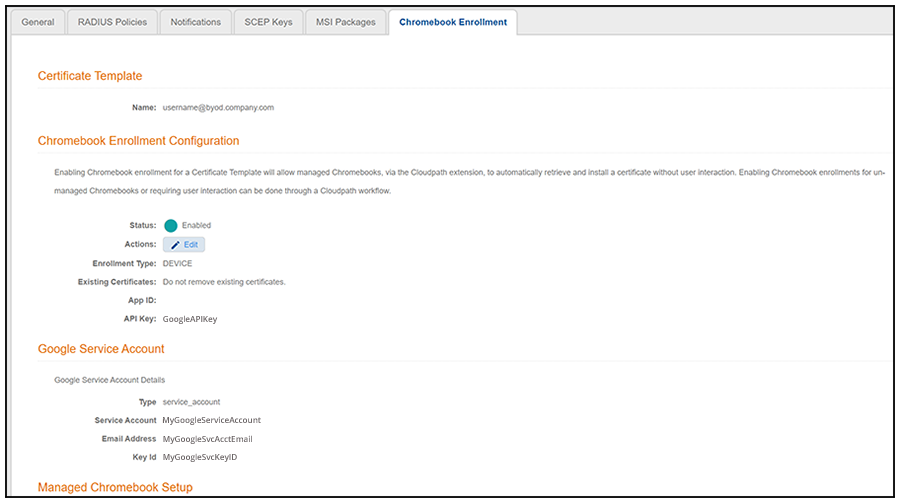
- Click Save. You are now
presented with the following information, which includes instructions on the
remaining configuration steps, shown in the following two illustrations:
Managed Chromebook Setup Configuration and Instructions for Non-Interactive Chromebook Enrollment - Screen 1
Managed Chromebook Setup Configuration and Instructions for Non-Interactive Chromebook Enrollment - Screen 2
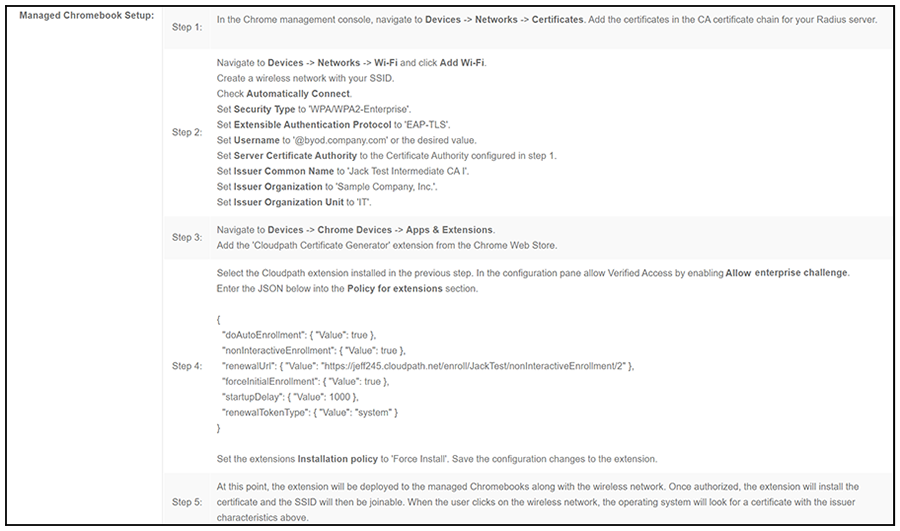 Note: Specific names shown in the instructions are pulled in from the Cloudpath system being used, and are shown here as an example.