Using Google LDAP Client as an Authentication Server
If you use G Suite to manage your users with Google Directory, you can use Google
LDAP as an authentication server for onboarding users to your Cloudpath Enrollment
System.
Prerequisites
Before you begin any configuration on the Cloudpath UI, be sure you have the following:
- Google LDAP client with access permissions as follows:
- Specify the LDAP client access level for verifying user credentials. When a user tries to sign in to the application, this setting specifies which organizational units the LDAP client can access to verify a user's credentials. Users who not part of one of the selected organizational units cannot sign in to the application.
- Specify the LDAP client access level for reading user information. This setting specifies the organizational units that the LDAP client can access to retrieve additional user information.
- Specify whether the LDAP client can read group information. This setting specifies whether the LDAP client can read group details and check a user's group memberships for purposes such as a user's role in the application.
- Google LDAP client certificate zip file (which contains both the public and private keys). The certificate is used for encryption by the LDAP service provider.
- (Optional) Access credentials from Google LDAP client: If you will require Cloudpath to use the "Binding Username" and "Binding Password" fields (Connect to LDAP Selection) in addition to the certificate to connect to the secure LDAP service you must generate access credentials.
Note: Refer to your G Suite LDAP documentation for information about setting up Google LDAP
clients.
Configuration Steps
Follow these steps to configure the Google LDAP authentication server in the Cloudpath UI:
Note: Because access credentials are optional, the configuration steps below do not include
using the applicable fields: Binding Username, Binding Password, and Lookup Bind Credentials.
- Go to Configuration > Authentication Servers, and click Add Server.
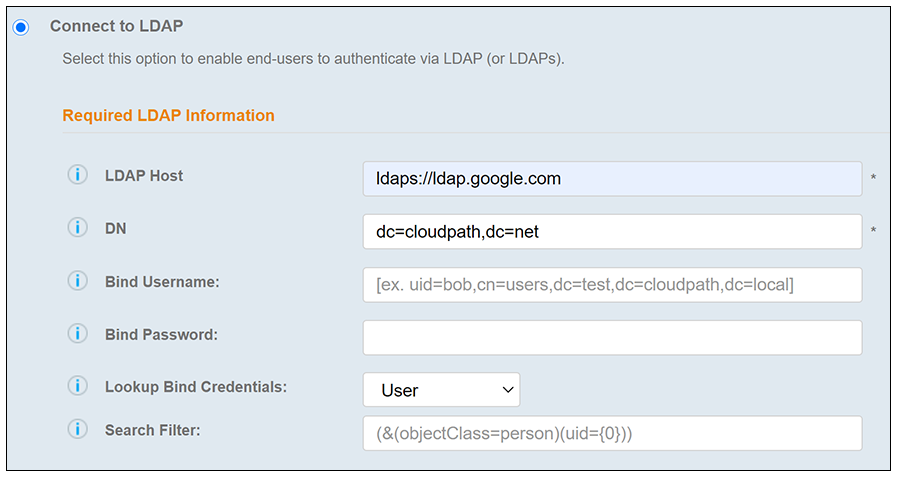
- In the next screen, where you select the type of Authentication server, scroll down and select the " Connect to LDAP" button, then fill in the LDAP Host and DN fields as shown in the example below:
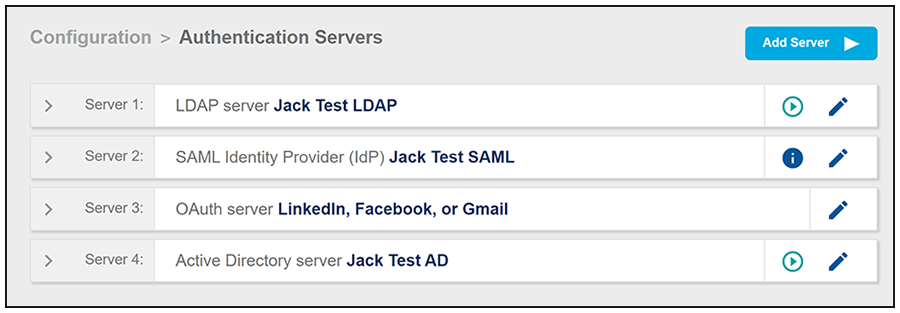
- If you are not using binding, leave the Bind Username and Bind Password fields empty, then click Save. The new LDAP server ("Jack Test LDAP") is now added to the list of authorization servers, as shown in the example below:
- Enter edit mode for the newly created LDAP server by clicking the pencil icon to the right of the server name.
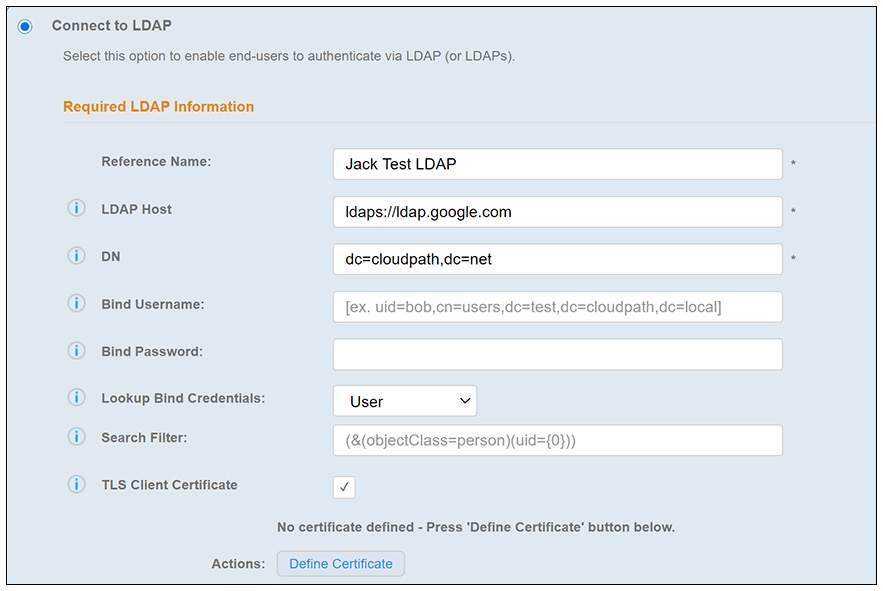
- In the ensuing Modify Authentication Servers screen, check the TLS Client Certificate box. When you check this box, the screen allows you to upload the certificate using the "Define Certificate" button, as shown at the bottom of the following illustration:
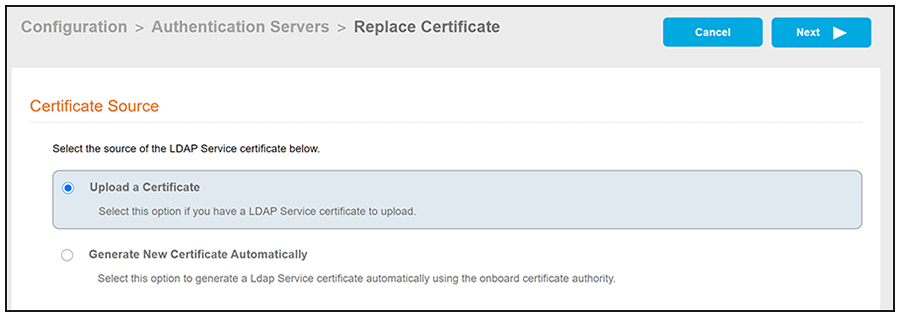
- Click "Define Certificate" to invoke the following screen, where you select the source of your certificate:
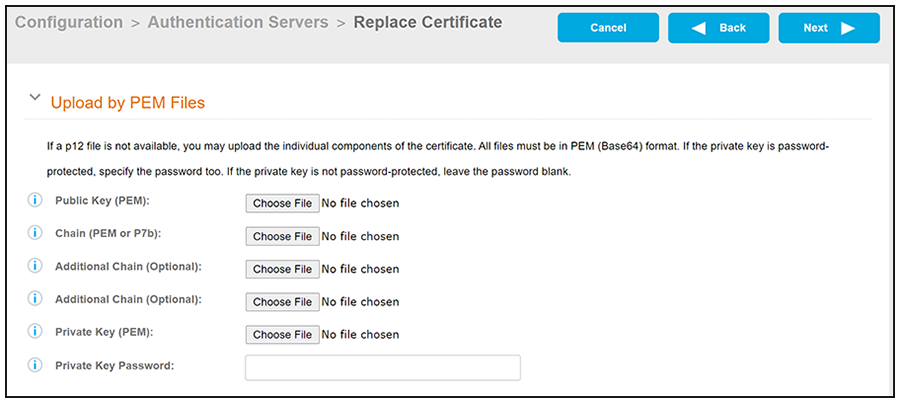
- With the "Upload a Certificate" button selected, click Next. The following screen appears:
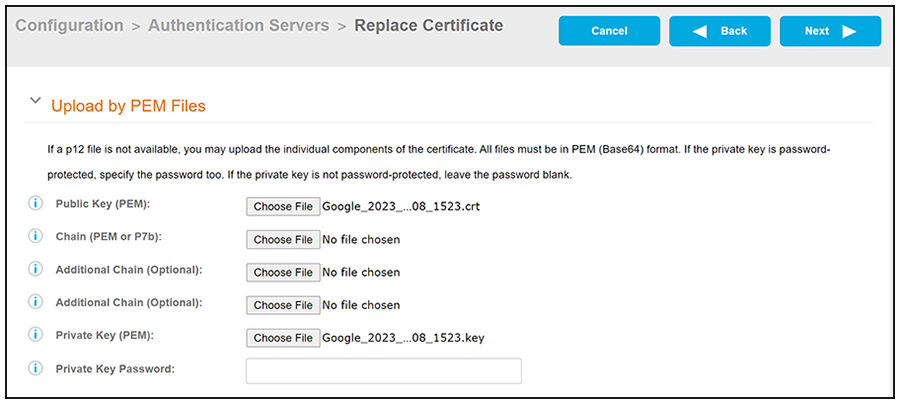
- Using the Public Key (PEM) field, click Choose File to upload your certificate (a .crt file).
- Using the Private Key (PEM) field, click Choose File to upload your private key (a .key file). The screen should now appear as follows:
- Click Next. A message indicating success of the certificate upload briefly appears, and you are returned to the LDAP Configuration screen.
- If you are not using binding, you should remove any values that may have been placed into the Bind Username and Bind Password fields, then click Save.
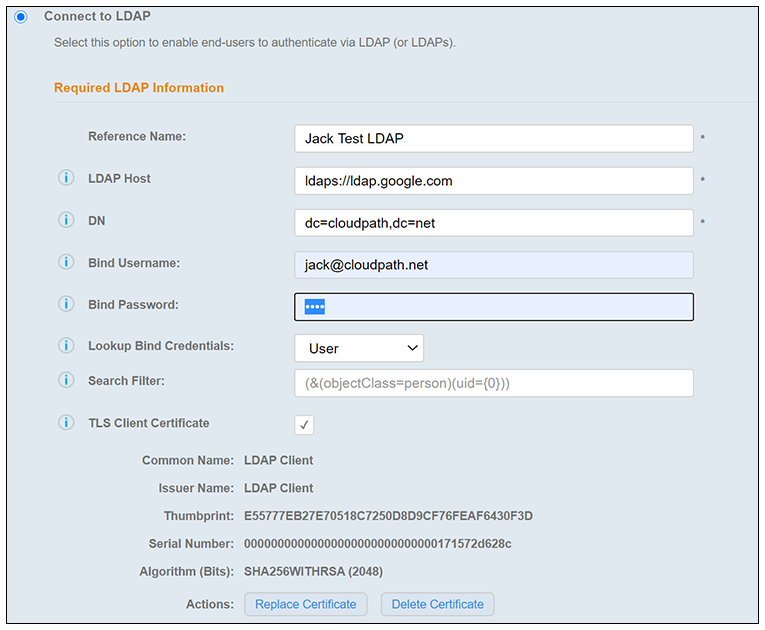
Note: As shown in the screen above, you can now view details such as thumbprint and serial
number of the certificate, and you can also replace or delete the certificate from
this screen. To return to this screen later, go to
Configuration > Authentication Servers and click the pencil icon next to the sever to go into edit mode, then follow the
instructions.
Testing
To test the connection to the LDAP server, do the following:
- Go to Configuration > Authentication Servers and click the arrow to the right of the server name, as shown below:
- Enter a valid Google G Suite LDAP client username and password, then click Continue. If the connection is good, a message will indicate successful authentication.
Note: If the connection test fails, be sure that the Binding Username and Binding Password
fields are empty (if you are not using binding) in the LDAP configuration screen.
Next Steps
You can include the LDAP authentication server in a workflow. For more information about workflows, refer to the Cloudpath ES Deployment Administration Guide.