Modifying a Workflow Template
To create a workflow from a template using sample data:
Section updated for 5.5 - some rewording and new screen shots were needed to reflect
the new possible workflow template selections.
- Go to .
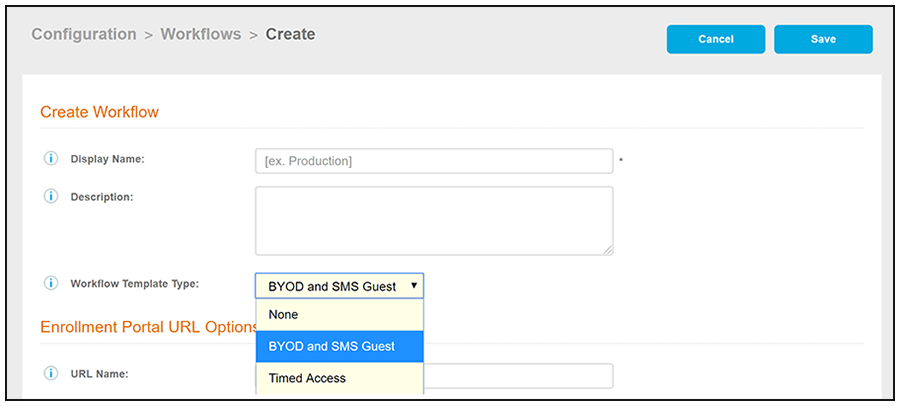
- On the right hand side of the Workflow page select Add Workflow.
- On the
Create Workflow screen, enter a
Display Name and
Description.
- From the Workflow Template Type drop-down list, select "BYOD and SMS Guest."
- Fill out the URL Name field.
- Click Save.
- Modify the existing workflow template as needed using the icons on the right side of each step. You can add or remove steps, change the labeling, create filters on the splits, or modify the authentication server.
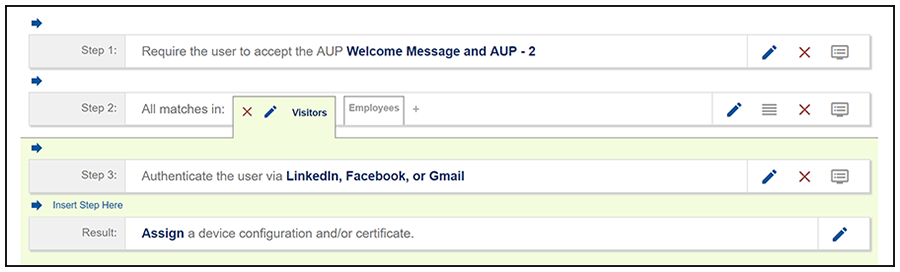
The workflow template contains basic workflow steps with sample data that can be modified to fit your network plan. These basic steps are described in the following table.
Example Workflow Template Steps
| Step 1 | Acceptable Use Policy. |
| Step 2 | Split in the workflow to provide a different sequence of enrollment steps for Visitors and Employees. Splits can be modified for other industries (for example, Students, Faculty, and Guests). |
| Step 3 | An authentication step for users. |
| Result | The final step, which migrates the user to the secure network and assigns a client certificate, is not pre-populated as this information is specific to your network. |