Using Shibboleth as the SAML Identity Provider
Shibboleth allows users to securely send trusted information about themselves to remote resources. This information can used for authentication, authorization, content personalization, and enabling single sign-on from many different providers.
Basic Tasks for Using Shibboleth
Configure SAML using Shibboleth as the IdP by performing the following tasks sequentially:
Adding a SAML Step To Your Workflow
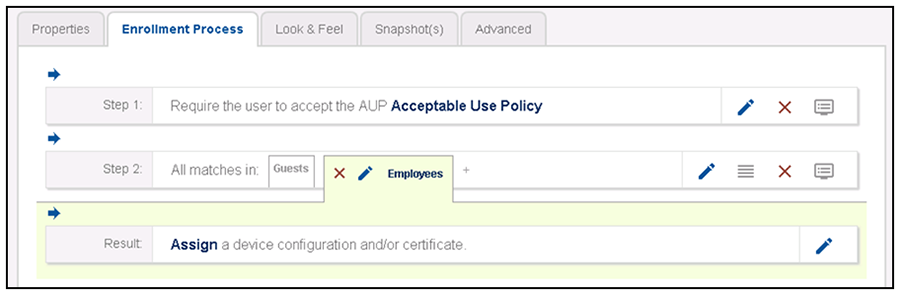
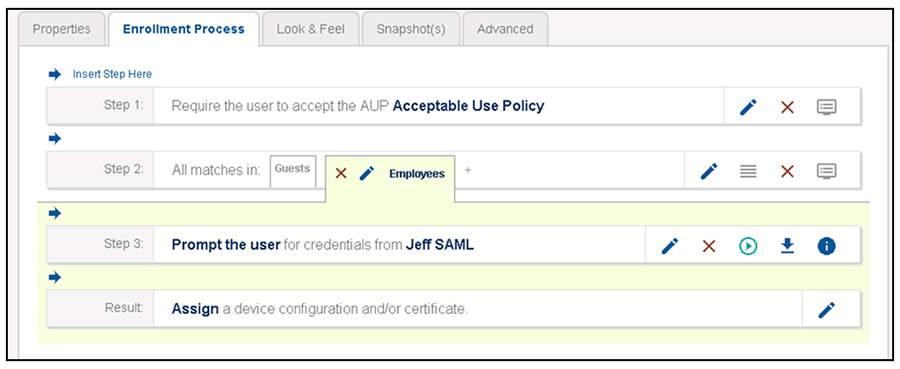
Determine in which branch and in which step to add a SAML authentication server plug-in to the workflow. For example, in the default workflow, you might create a split for Guests and Employees, and you could then use a SAML authentication server instead of the Active Directory authentication server, as shown below.
- Log in to the Cloudpath user interface.
- Go to Configuration > Workflows.
- Click on a workflow (or create a new one) for which you want to configure SAML as the authentication server.
- Highlight the tab in the workflow where you want to add the SAML authentication-server step. In this example below, it is the Employees tab.
- With the Employees branch of the workflow highlighted, click the blue arrow to insert a step below the Guests/Employees split.
Adding the Shibboleth SAML Authentication Server to the Workflow
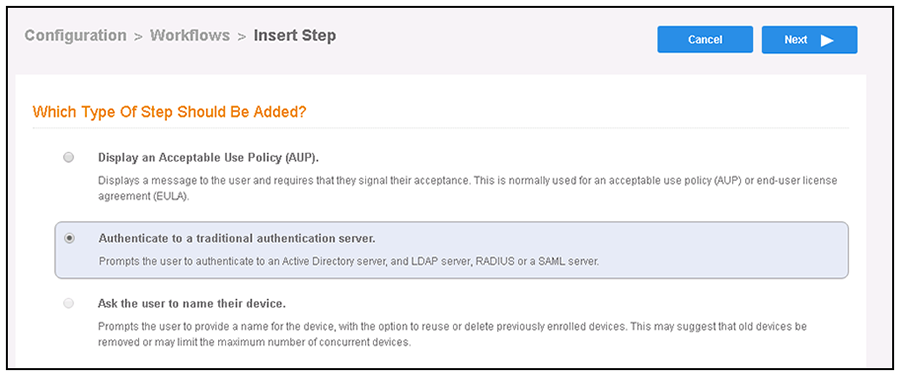
- Once you click the arrow to insert the SAML step, you receive the following prompt:
"Which Type Of Step Should Be Added?"
- Select the button to authenticate to a traditional authentication server, as shown in the following screen:
- Click Next.
- If you have already defined an authentication server, you will get a prompt asking whether you want to reuse an existing authentication server or define a new authentication server. Choose the radio button to define a new authentication server, then click Next.
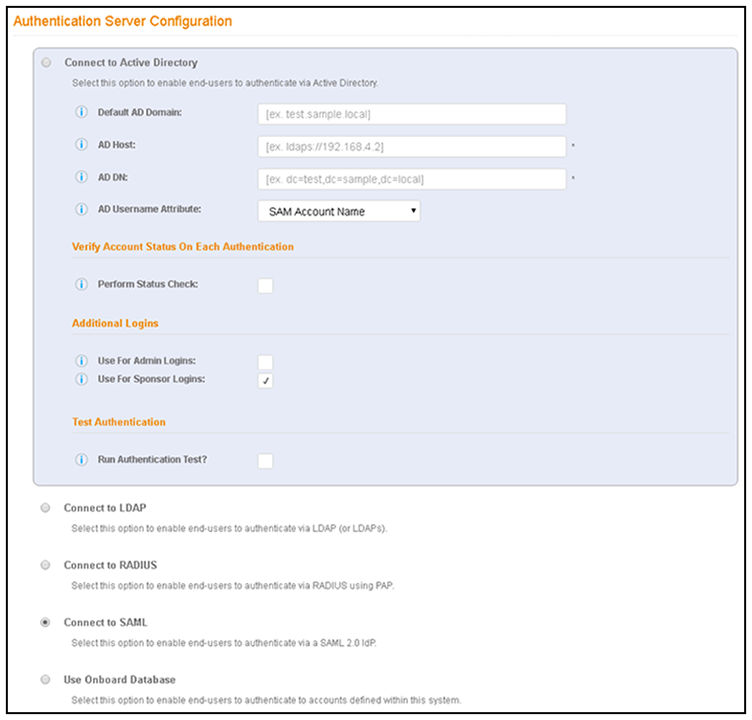
- On the Authentication Server Configuration screen, select the Connect to SAML radio button:
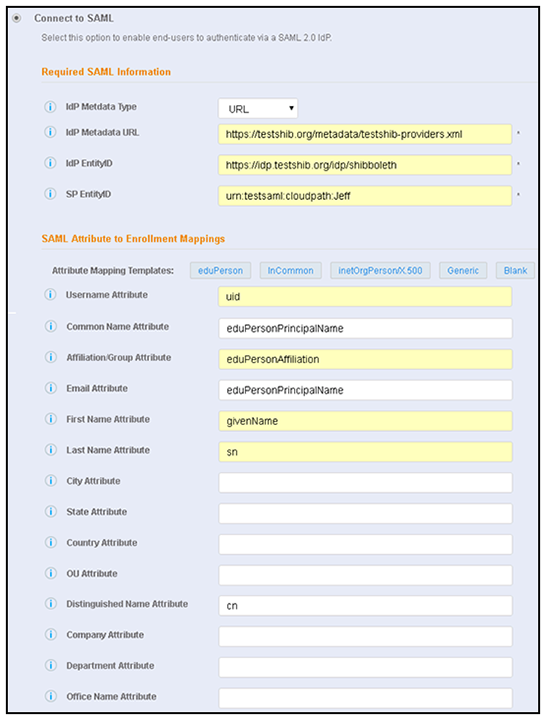
- Complete the configuration. An example configuration screen is shown below, and descriptions
of the fields follow the screen.
Note: You can click the "i" icons next to the field names to obtain the information required for each field.
- Required SAML Configuration section:
- SAML Attribute to Enrollment Mappings - Required fields:
- Username Attribute: Must be uid
- Common Name Attribute: Must be eduPersonPrincipal_Name
- Affiliation/Group Attribute: Must be eduPersonAffiliation
- Email Attribute: Must be eduPersonPrincipal_Name
- First Name Attribute: Must be givenName
- Last Name Attribute: Must be sn
- Distinguished Name Attribute: Must be cn
Note: You can use defaults for the remaining fields. - SAML Options (not shown in the screen shot above): Use all default settings.
- Click Next.
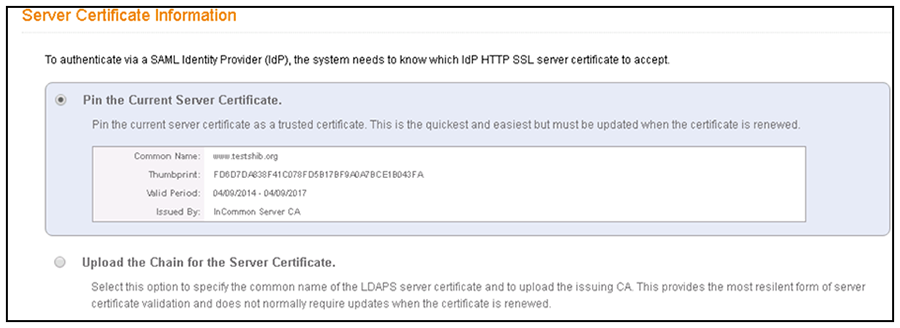
- You can leave the Pin the Current Server Certificate radio button selected, or you can select the other radio button and upload the CA certificate for the SAML server (if you have that certificate). Whichever method you choose, click Next when you are done.
Downloading the Shibboleth SAML Metadata

Adding the Metadata to Your Shibboleth Identity Service Provider
- In a browser, go to the URL of your Shibboleth server.
- On the Shibboleth site, click the Choose File button at the bottom of the screen.
- Browse to select the metadata file that you previously downloaded, then click the
Upload File
button.
You should receive a message on the next screen that indicates that your metadata was uploaded successfully.
Publishing the Workflow for SAML Shibboleth
- Return to the workflow on your Cloudpath system by navigating to the Configuration > Workflows screen.
- Complete the workflow by adding a device configuration. Refer to Adding a Device Configuration to Your Workflow.
- Publish the workflow by clicking the Publish icon to the left of the workflow name.
Testing the User Experience for SAML Shibboleth
- Test the enrollment process by clicking on the enrollment portal URL for the workflow at the top of the Configuration > Workflows screen.
- When are you presented with the with the Welcome screen, click Start.
- When you are presented with various branches of your workflow, navigate down a branch that uses the SAML authentication server you just configured.
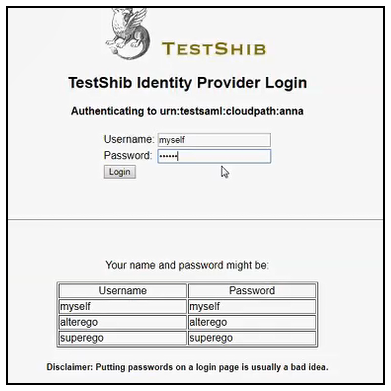
- Enter your credentials for your Shibboleth server, then click LogIn.
- If the SAML authentication is successful, you are returned to the Cloudpath system, where you can continue with the enrollment.