Creating a Hotspot Portal for Hotspot 2.0 Release 1
A hotspot portal is required for Hotspot 2.0 Release 1.
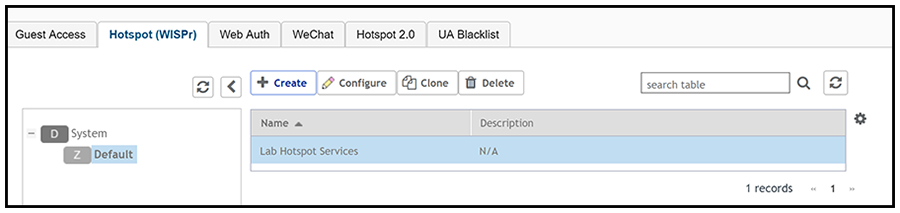
- In the Controller UI, be sure to navigate to Configuration > Services & Profiles > Hotspots & Portals, then click the Hotspot (WISPr) tab.
- Be sure to highlight the zone in which you wish to create the hotspot portal. (You cannot highlight "System" to create the hotspot portal.) In the example below, the Default zone is used.
- Click Create.
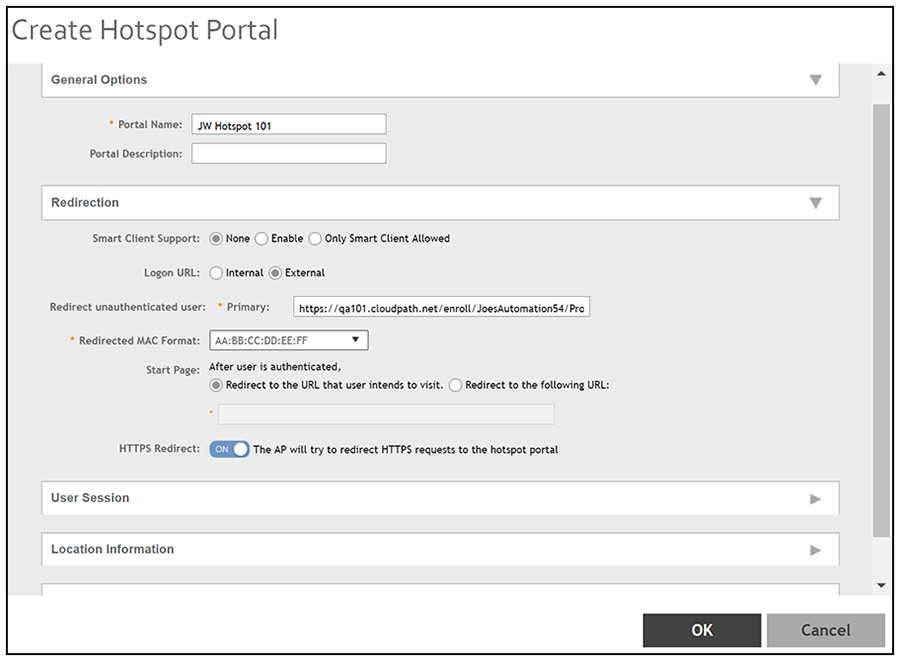
- In the Name field, enter a descriptive name for the hotspot portal.
- For the Smart Client Support field, select None.
- For the Login URL field, select External.
- In the Redirect unauthenticated user field, enter the URL to which you want to send an unauthenticated user. This is the URL that the user will be taken to begin the Cloudpath enrollment process. To find this URL, on your Cloudpath system go to Configuration > Workflows, then click the Advanced tab. Copy the Enrollment Portal URL from there and paste it into the Redirect unauthenticated user field in the screen shown above on your vSZ controller.
- For the Start Page field, be sure that the radio button called "Redirect to the URL that user intends to visit." is selected.
- Use the default values for the remaining fields, then click OK.