Generating a QR Code Workflow

You can now create a workflow to generate a QR code, which is like a Wi-Fi password you can scan from your mobile device to connect to the network.
To generate a QR code, you need the SSID and DPSK (passphrase) parameters. The DPSK is assigned from the DPSK pool. The SSID is usually assigned from the SSID(s) list defined in the DPSK pool. If multiple SSIDs are defined in the list, then the alphanumerically ordered first SSID will be chosen for the SSID parameter. If you want to assign an SSID that does not adhere to the alphanumeric order, you can use the ssidOverride parameter in the HTML message to do so.
To create a QR code workflow:
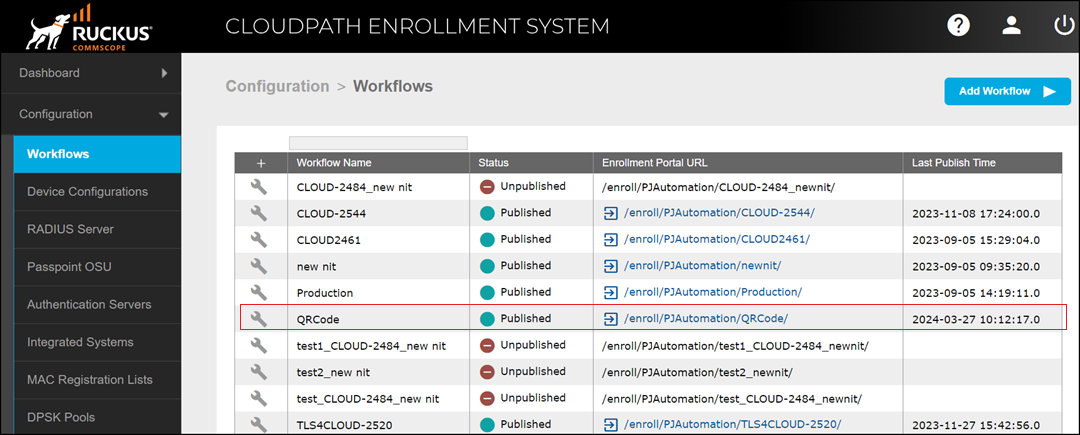
  1. From the Cloudpath web interface, navigate to Configuration > Workflows.
  2. Click Add Workflow to create a workflow (in this example it is QRCode).
    Fill the required fields and click Save. The workflow is displayed in the Workflows page.

    QR Code Workflow Creation

  3. Click the icon.
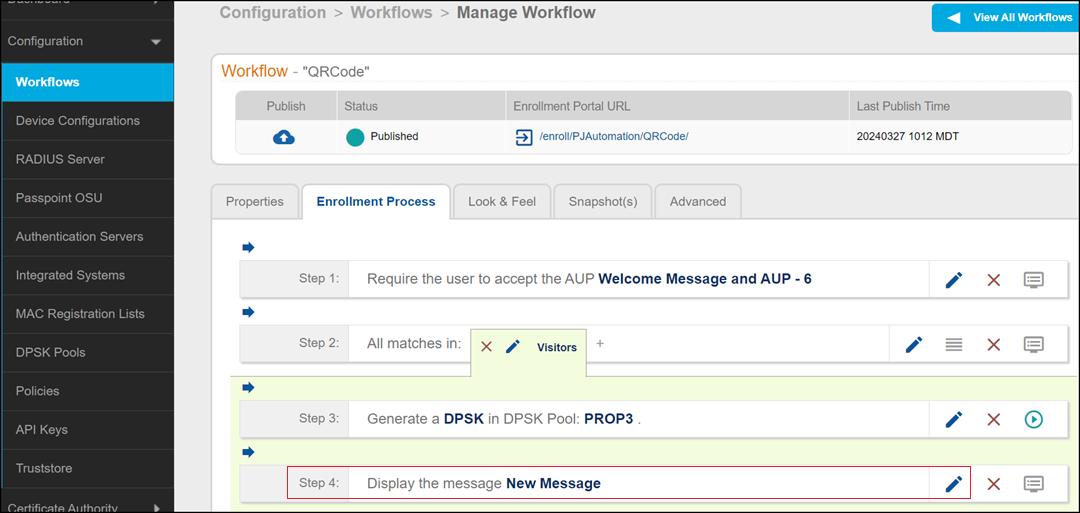
  4. In the Enrollment Process tab, go to Step 3: and generate a DPSK.
  5. In the Enrollment Process tab, go to Step 4:, edit the New Message plug-in.

    New Message Plug-in

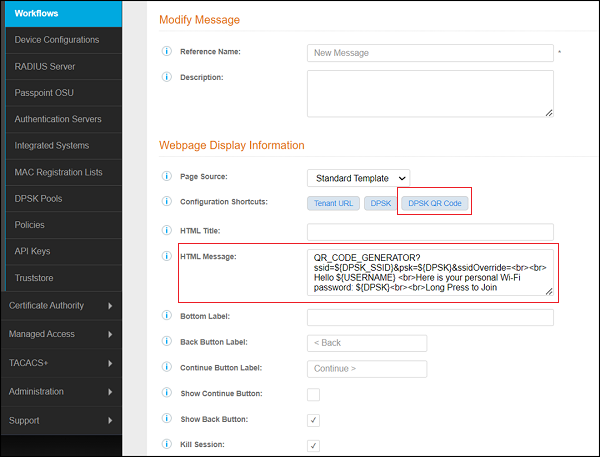
  6. In the Webpage Display Information, select the configuration shortcut as DPSK QR Code.
    The HTML Message field is automatically populated with the DPSK, SSID and ssidOverride parameters. The ssidOverride parameter is initially empty. Only assign an SSID to this parameter if you want to use an SSID that deviates from the alphanumeric order in the DPSK pool’s defined SSID list.

    Selecting the DPSK QR Code

  7. Click Save.
    The QRCode workflow is now updated with the SSID and DPSK parameters.

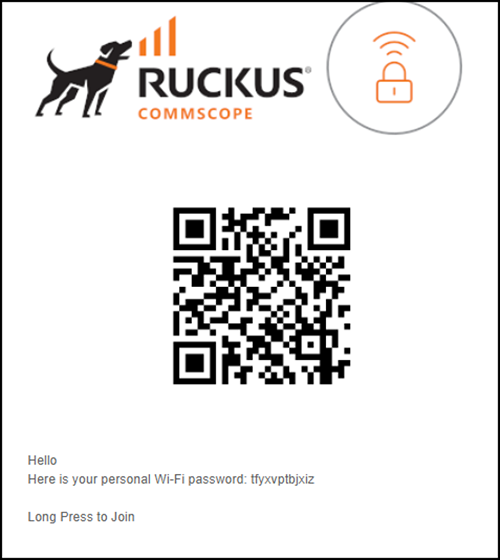
    After the workflow is created and published, the Enrollment Portal URL is accessible for the user enrollment process. The following graphic illustrates a sample of the QR code generated and presented during the enrollment process.

    QR Code Generated to Log in to the Network