Configuring MAC Registration Lists in the Cloudpath UI
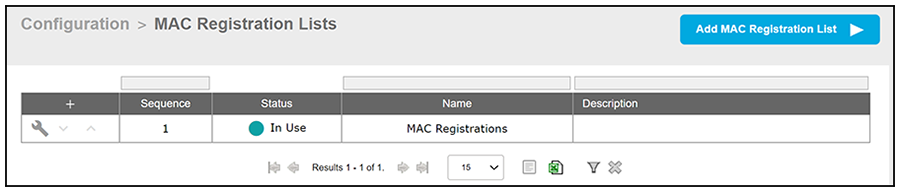
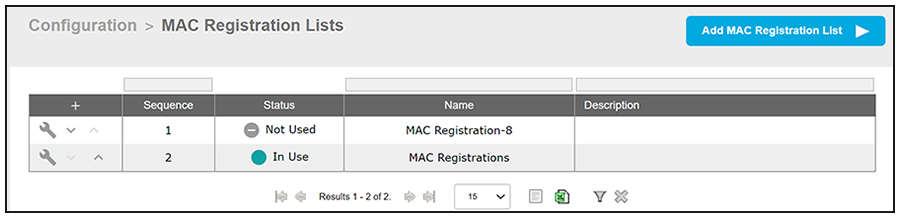
Navigate to Configuration > MAC Registration Lists. From here, you can add new MAC registration lists, view current lists, and click the wrench icon next to any list to perform actions on that list. The following screen is an example of the MAC Registrations List main screen where one list called "MAC Registrations" already exists and is in use in a workflow (see the Status column).
Adding a New MAC Registration Configuration
Follow these steps to create a new MAC Registration configuration which you can then use to import MAC addresses.
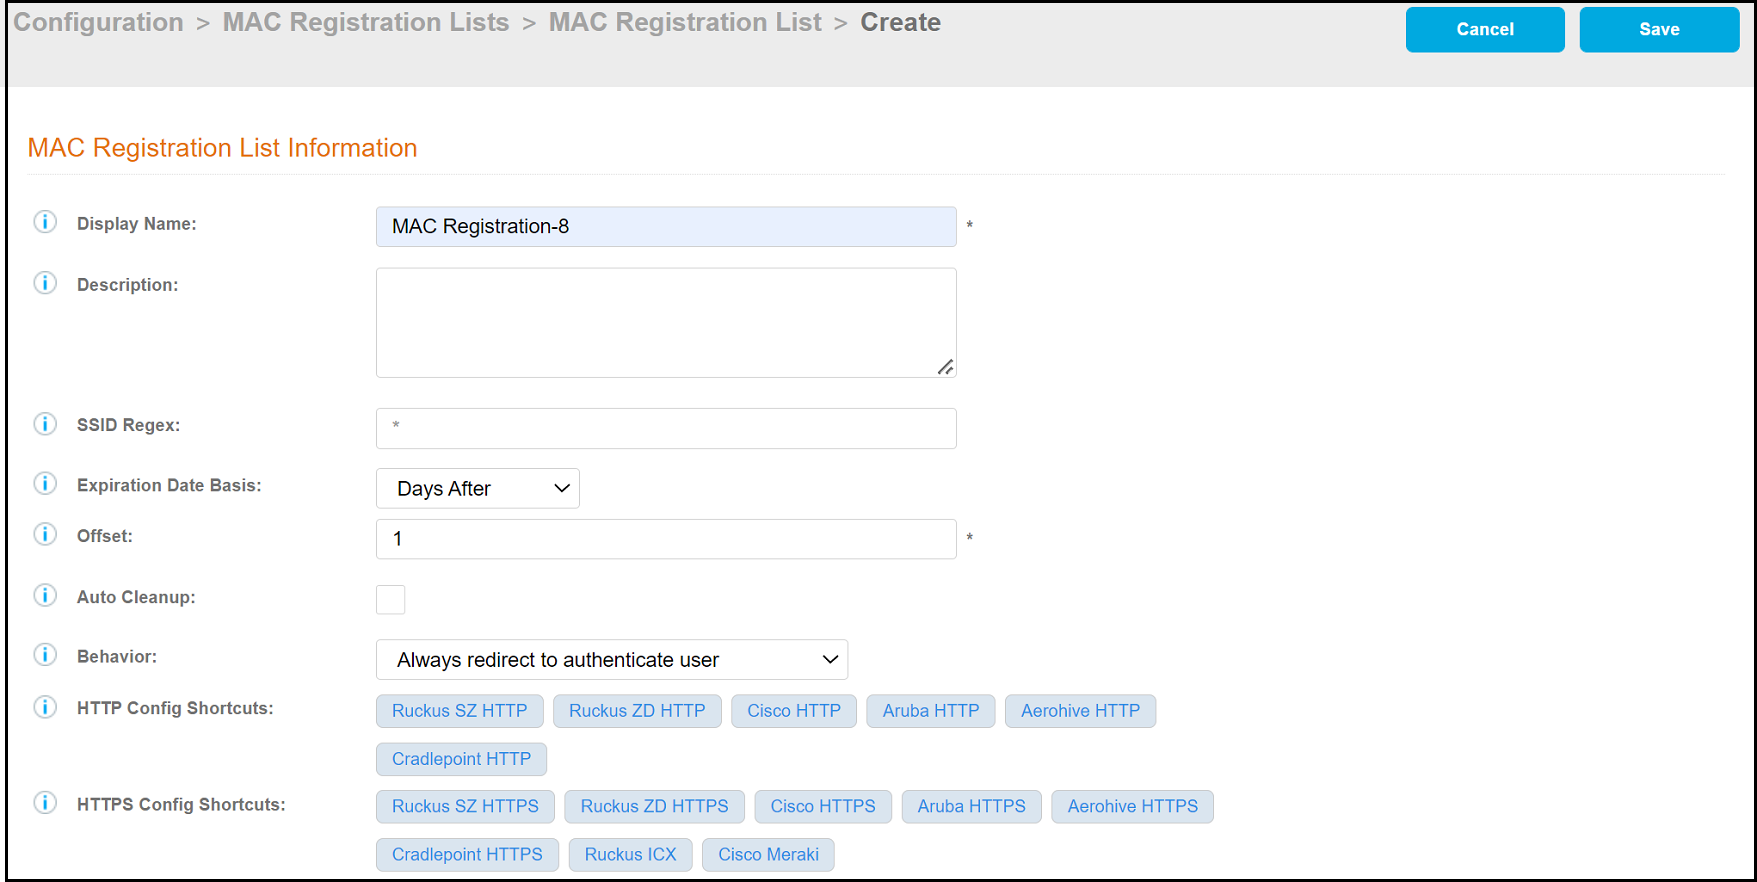
- Click Add MAC Registration List in the upper right of the screen shown above.
- In the Create MAC
Registrations screen (see the example screens below), configure the values
(described after the example screens), then click Save.
- Display Name: Any descriptive name you want.
- Description: Optional description of this particular MAC registration configuration.
- SSID Regex: SSID to which
MAC registered devices are assigned.
Note: This field is case sensitive. Separate multiple SSIDs by a vertical pipe (|). The default (*) is any SSID that is pointed at the RADIUS server.
- Expiration Date Basis: The basis for calculating the default validity period for MAC registration.
- Offset: The number of
hours/days/months/etc to be offset from the event date when
calculating the registration validity period. If Specified
Date is selected, this should be the date in
YYYY/MM/DD format.
Note: This field may be unnecessary and therefore disappear, depending on your selection for Expiration Date Basis.
- Behavior: Specifies the prompt and redirect settings for the MAC registration configuration. Behavior settings include:
- Use the Config Shortcuts buttons to populate the Redirect URL and POST Parameters according to your controller vendor and preferred protocol.
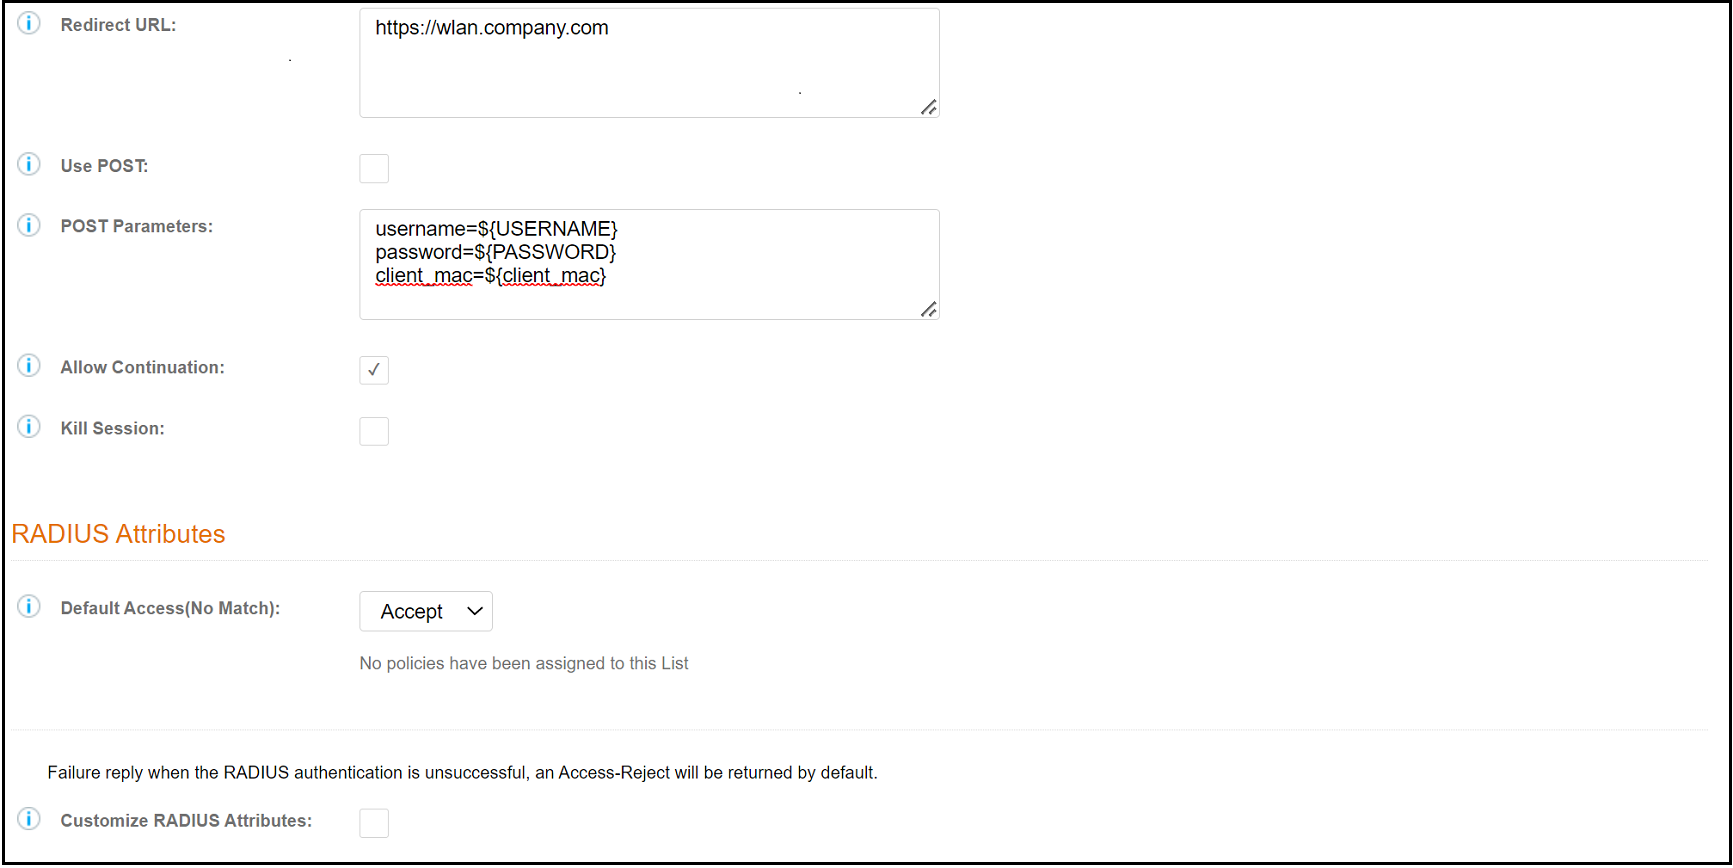
- Allow Continuation - If checked, the submit-redirect call is processed; if unchecked, the submit- redirect call is ignored.
- Kill Session - If checked, the user's session is killed as the user is redirected. If returned, the user is forced to start over.
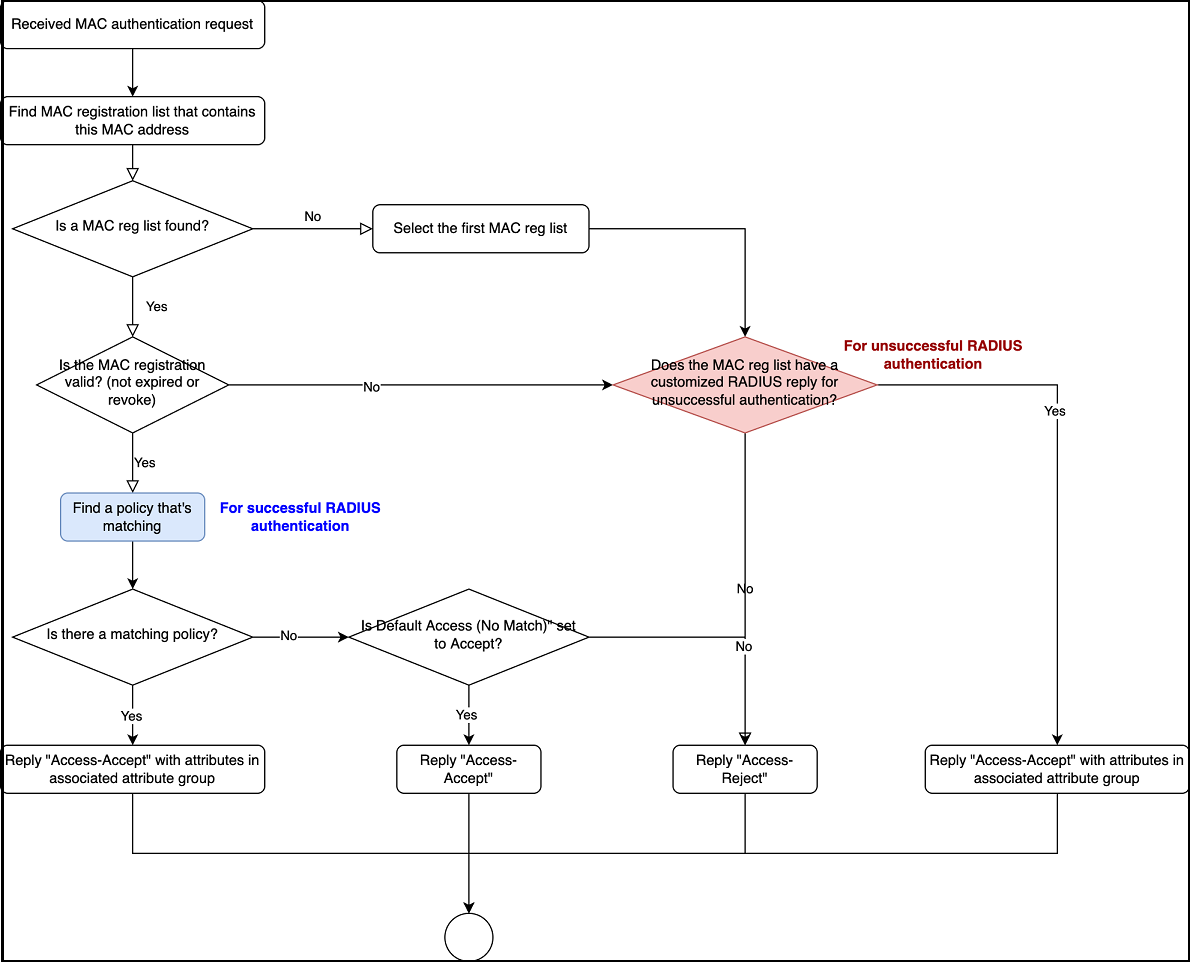
- RADIUS Attributes (also see the flowchart
below):
CHECK THIS and provide the proper xref
- Default
Access (No Match): A drop-down where you can select whether
to allow a user onto the network even if there is no
matching policy for the user. When no policies are assigned,
or when policies are assigned but no match is found against
any of the policies, the default RADIUS access response will
either be accepted or rejected. When the authentication is
successful, the RADIUS attributes from the matched policy
are sent in the RADIUS reply.
Note: Once you assign policies (described later) to a MAC registration list, a policies table will be shown in the screen.
- Customize
RADIUS Attributes: By default, the RADIUS server sends an
“Access-Reject” reply if authentication fails. You may use
the “Customize RADIUS Attributes" feature to customize the
RADIUS attributes reply when the RADIUS authentication is
unsuccessful. If you check this box, a drop-down list of all
configured RADIUS attribute groups appears; select the group
you want. In this case, be sure you have already configured
the RADIUS attribute group you want to use. With this field
enabled and an attribute group selected, the attributes
defined in the group are sent along with an “Access-Accept”
RADIUS reply.
Note: The RADIUS authentication is unsuccessful if the MAC address is not presented in the registration list, or if it is presented in the registration list as either "revoked" or "expired."ADD XREF to RADIUS attr group
- Default
Access (No Match): A drop-down where you can select whether
to allow a user onto the network even if there is no
matching policy for the user. When no policies are assigned,
or when policies are assigned but no match is found against
any of the policies, the default RADIUS access response will
either be accepted or rejected. When the authentication is
successful, the RADIUS attributes from the matched policy
are sent in the RADIUS reply.
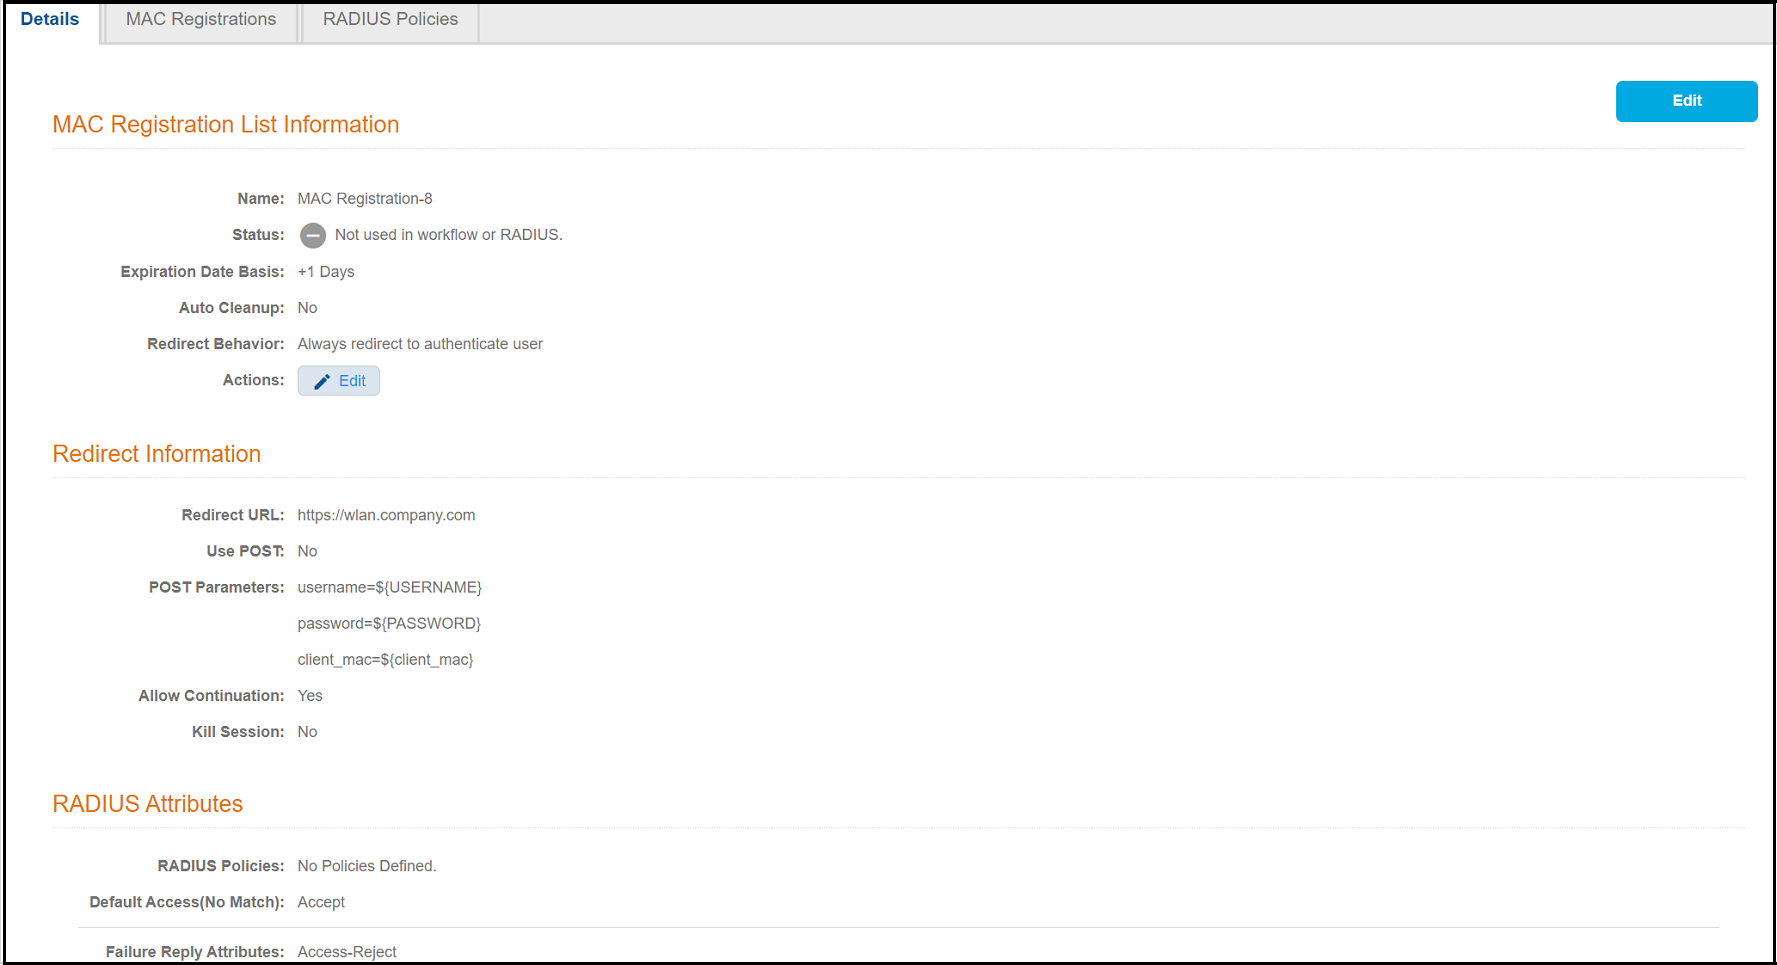
- After you click Save, you are returned to a three-tab of the MAC Registration List screen for the list you just configured, as shown in the following example screen:
- If you click View All MAC Registration Lists (in the preceding screen though not shown in the illustration), you are returned to the main screen, with the new configuration (MAC Registration-8 in this example) appearing in the list, as shown below:
Importing a MAC Registration List
Follow these steps to import a MAC registration list into a MAC registration configuration.
- From the main MAC Registrations Lists screen, click the wrench icon for the list in which you want to import a MAC address list.
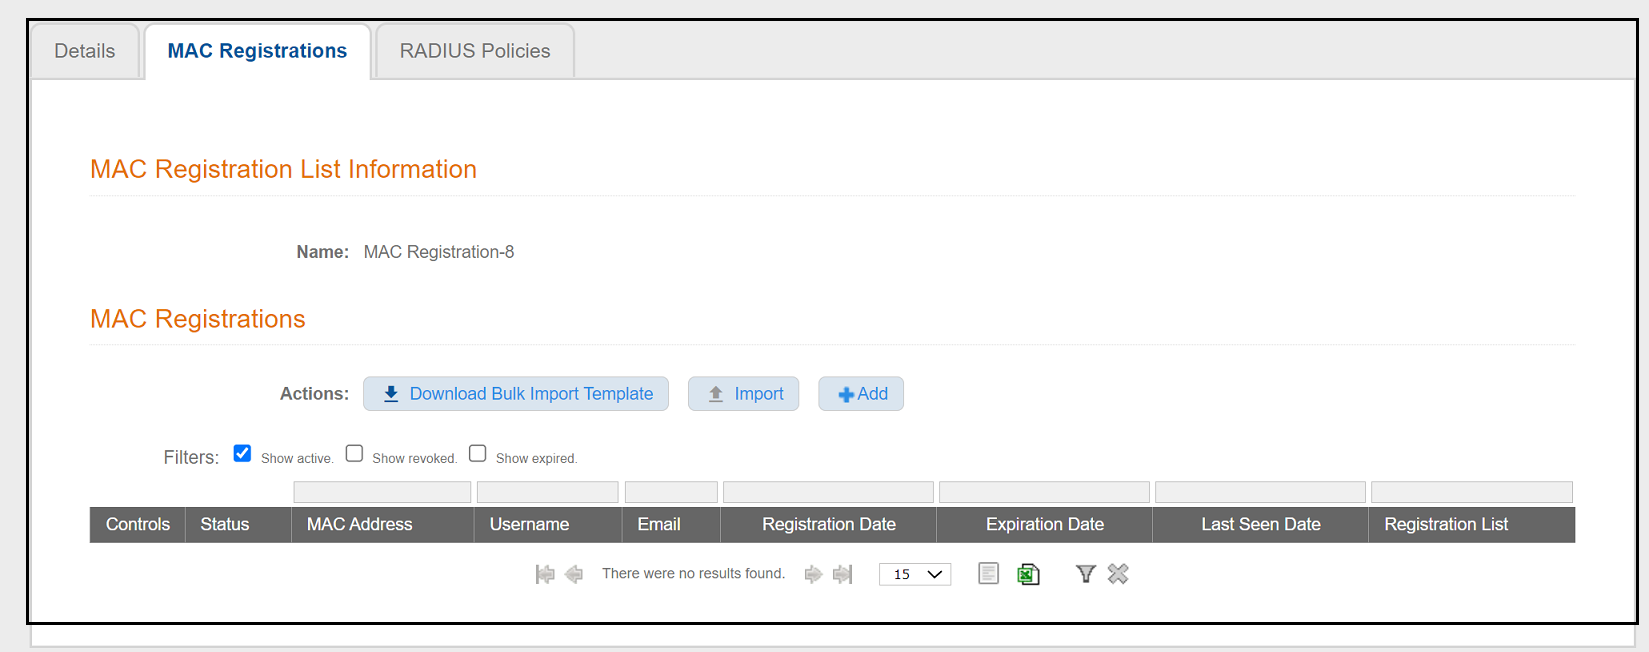
- On the ensuing screen, click the MAC Registrations tab. A screen such as the following is invoked:
- If you first need a template for adding MAC addresses to an .xls file, click Download Bulk Import Template.
- Once you are ready to import the list of MAC addresses to the MAC registration list,
click
Import.
Note: If importing from a .csv file, the following date formats are supported: yyyyMMdd, HHmmss, yyyyMMdd HHmm, yyyyMMdd, MM/dd/yyyy HHmmss, MM/dd/yyyy HHmm, MM/dd/yyyy, yyyy-MM-dd HH:mm:ss, yyyy-MM-dd.
- Browse to select your MAC address list, then click Continue.
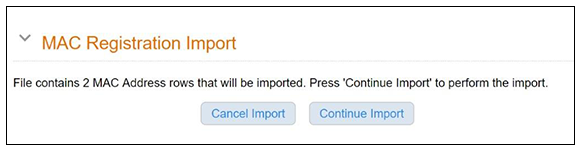
- A popup message appears, where you click Continue Import:
- The file is imported and the MAC addresses are added to the applicable MAC Registration list.
Importing Individual MAC Addresses
Follow these steps to import individual MAC addresses into a MAC registration configuration.
- From the MAC Registrations tab of the desired MAC Registrations List (refer to the example in MAC Registrations Tab of a MAC Registration List), click the Add button in the "MAC Registrations" portion of the screen.
- In the popup window, enter the MAC addresses, separated by commas, that you wish to add.
- Click Save.
- Confirm the import on the ensuing popup window.
You are returned to the MAC Registrations tab, and there should be a confirmation message at the top, indicating that the MAC addresses have been successfully added. They will also appear at the bottom of that screen.
Removing a MAC Registration Configuration List or Its MAC Addresses
Follow these steps to either remove the MAC addresses from a MAC registration configuration list or to remove both the MAC addresses and the list itself:
- Click the Details tab from an open MAC Registration List screen.
- Click Edit.
- Scroll to the bottom of the screen until you get to the Cleanup area, and click Cleanup to display the options:
- Click on the desired option.
A Warning popup appears.
- If you wish to continue, be sure to check the box to indicate that you "understand the warning," then click Continue.
