System Setup Wizard
After a successful deployment and activation (or login), the system setup wizard takes you through a few steps.
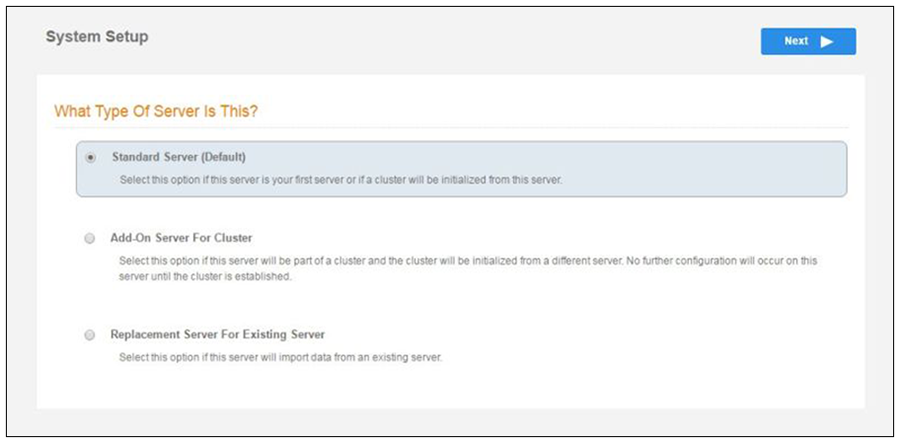
- Select Server Type.
In most cases, select Standard Server, the default. This selection takes you through a setup wizard, which prompts you for the basic information required for an Cloudpath server.
- If you are setting up this server for replication, you can choose to set the server as an Add-On or Replacement server. These selections provide an alternate set up process, requiring less information for the initial setup. Add-On and Replacement servers receive most of their configuration from the primary server in the cluster.
- If you are setting up this server to replace an existing server, and you are importing the database from the existing server, select Replacement Server for Existing Server.
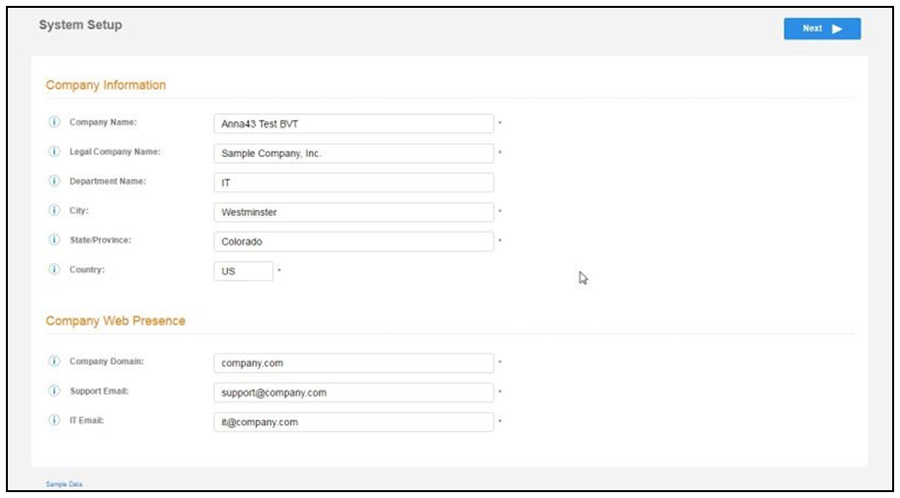
- Enter Company Information, then click Next.
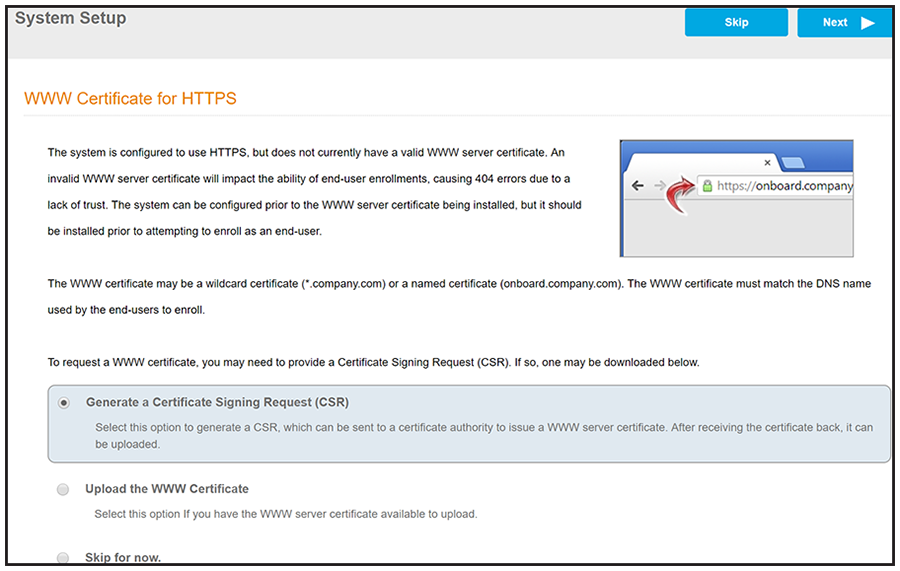
- In the WWW Certificate for HTTPS screen (below), choose the applicable radio button,
then click
Next.
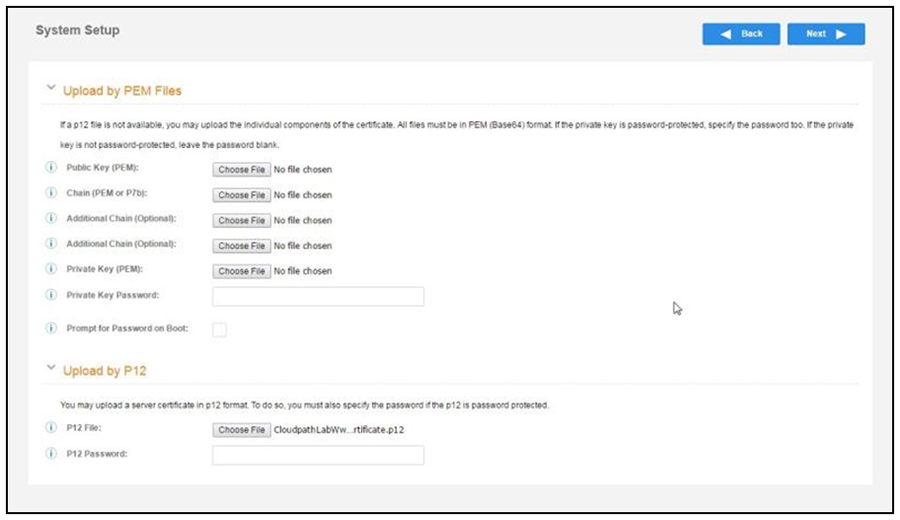
Note: Cloudpath supports web server certificates in P12 format, password-protected P12, or you can upload the individual certificate components: the public key, chain, and private key or password-protected private key.
- If you selected the "Generate CSR" radio button, perform .
- If you selected the "Upload the WWW Certificate" radio button, perform .
- You can select the "Skip for now" radio button for the initial configuration. However, you should perform this step prior to attempting to enroll as an end-user. To return at a later time to the screen shown above, navigate to Administration > System Services > Web Server service, then click Upload WWW Certificate. For now, proceed to
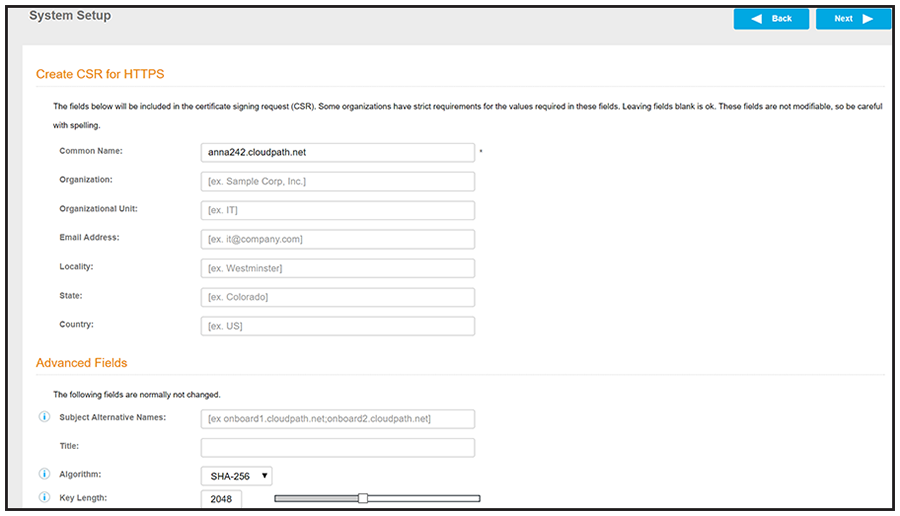
- (Only if you selected "Generate CSR" radio button.) You should now be at the Create
CSR for HTTPS screen:
- Enter the required information.
- Click Next.
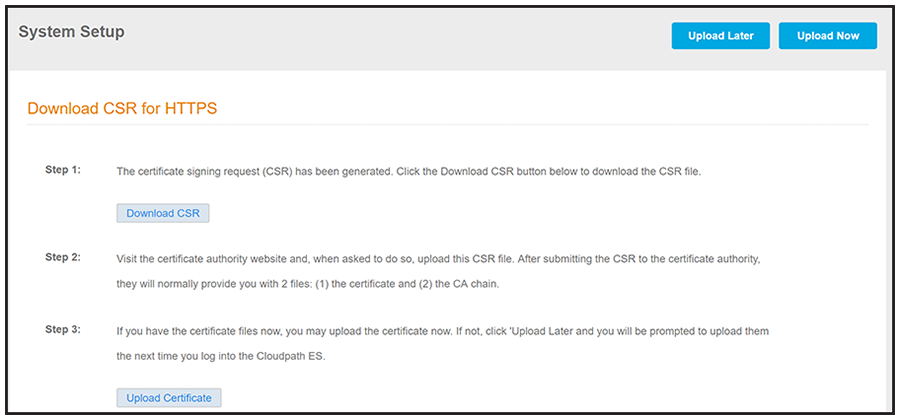
- Click Download CSR to download the .csr file, which you can then open in Notepad.
- Upload the CSR to any CA website to receive a certificate.
-
I left some of this step in - I assume we want to keep this:?Follow the instructions for the CA website to download the public key and chain.
- In the screen that is shown in Download CSR for HTTPS Screen, click Upload Certificate.
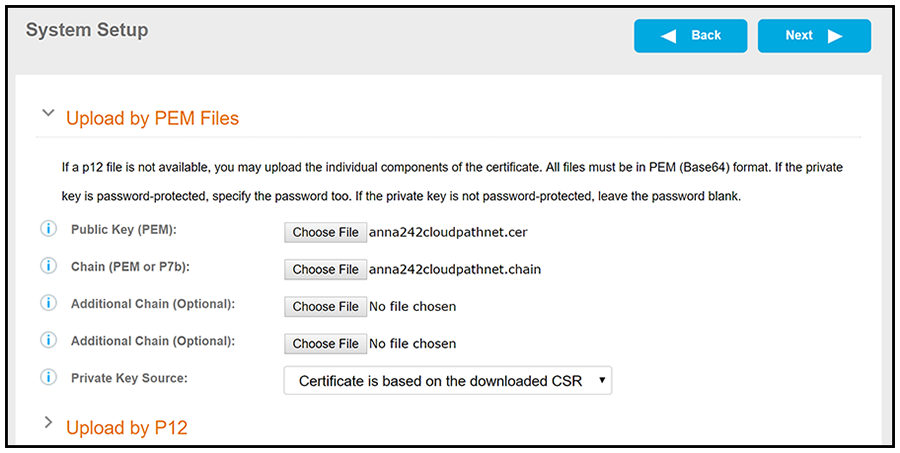
- Upload your certificates using the screen shown above.
- Click Next to continue with the system setup.
- Proceed to .
- (Only if you selected the "Upload the WWW Certificate" radio button, which you should only have done if you already have received your WWW certificate from a public CA.) You should now be at the following screen:
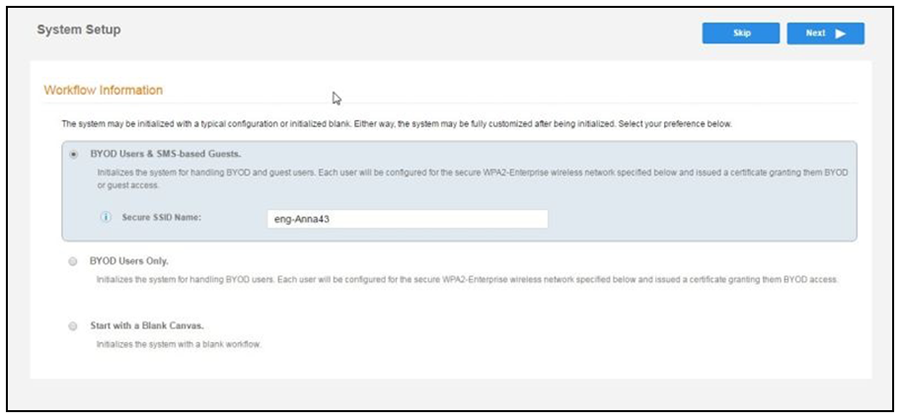
- Select the Default Workflow.
- To initialize the system with a sample configuration, select BYOD Users & SMS Guests, or BYOD Users Only. This creates an initial workflow for BYOD users and sponsored guests (or BYOD users only) that you can use as a template, or simply add a device configuration and use immediately.
- To create your own workflow, select Start with Blank Canvas.
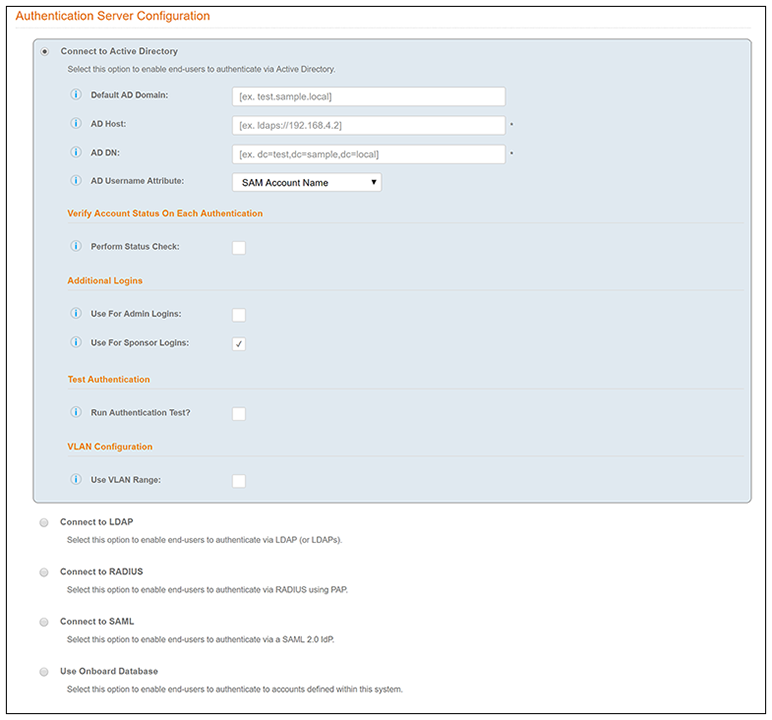
- Configure the Authentication Server.
Note: If you selected a Blank Canvas for the default workflow, you are not prompted to set up an authentication server during the initial system setup.
If you plan to use an authentication server to authenticate end-users or sponsors, Ruckus recommends populating the authentication server information page.
If using multiple authentication servers, additional authentication servers may be added through the workflow or from the Configuration > Authentication Servers page.
- To setup the initial configuration of the Authentication Server, select and enter the required fields.
- Consider these optional settings for the authentication server:
- Verify Account Status on Each Authentication - If selected, Active Directory is queried during subsequent uses of the certificate to verify the user account is still enabled. You must provide the bind username and password for an authentication server administrator account.
- Additional Logins - If Use for Admin Logins is selected, administrators can log into the Cloudpath Admin UI using credentials associated with this authentication server. If Use for Sponsor Logins is selected, sponsors can log into the Cloudpath Admin UI using credentials associated with this authentication server.
- Test Authentication - If selected, an authentication will be attempted using the username and password provided to test connectivity to the authentication server. This test can also be run from the workflow.
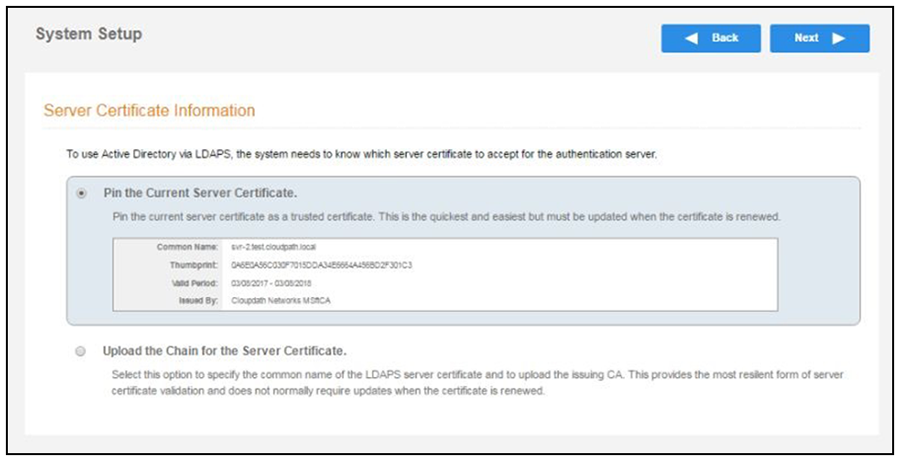
- Set up the Authentication Server Certificate:
- To use LDAP over SSL (LDAPS), the system must know which server certificate to accept for the authentication server.
- Select Upload the Chain for the Server Certificate to upload a certificate chain from an issuing CA. You must specify the common name for the LDAPS server certificate. This certificate does not need to be updated when the certificate is renewed.
- Select Pin the Current Server Certificate to use the current server certificate as the trusted certificate. This setting must be updated if the certificate is renewed.