Adding a Configuration Profile
Configuration profiles allow you to define
the VLANs for switch models of your choice and Access Control Lists (ACLs). Once
defined,
these switch profiles can be applied to one or more venues. Any switch joining a
venue will
have the defined configuration applied automatically. You can create switch configuration
profiles and attach these profiles to venues as required. When a switch is registered
on
RUCKUS One under this venue comes online, it inherits all the configuration.
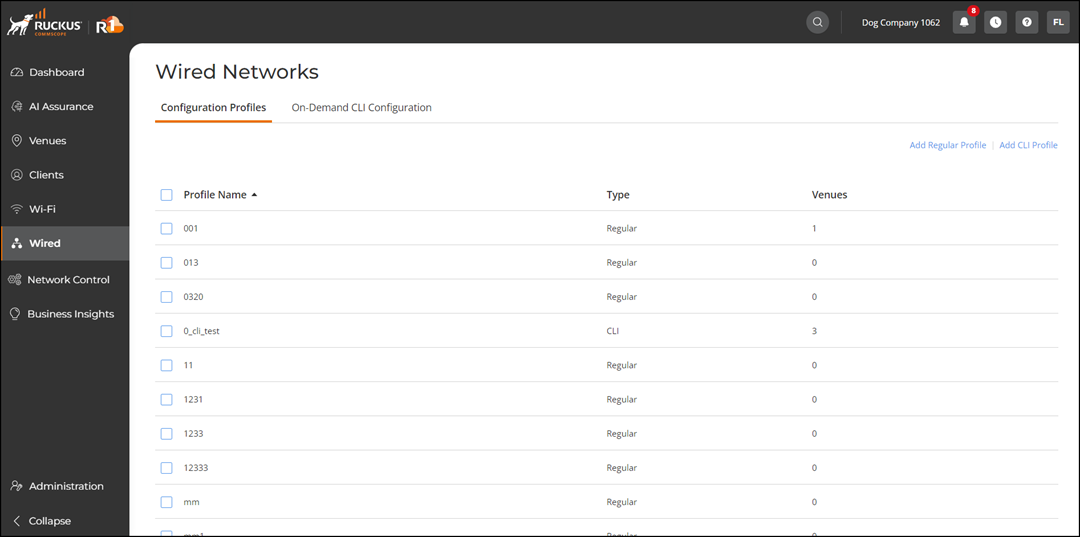
- On the navigation bar, click .
- In the General Properties page, enter the profile name and description in the Profile Name field and Profile Description field respectively and click Next.
- In the Add
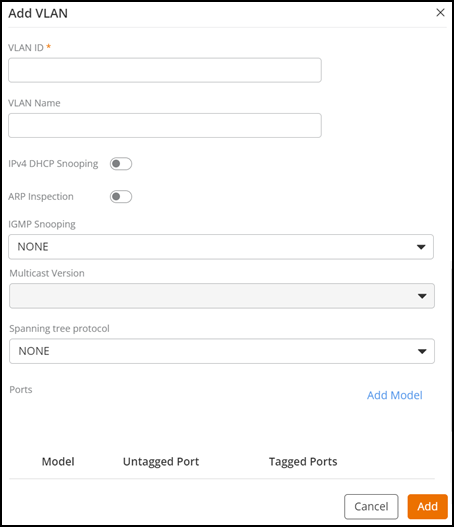
VLAN page, add a VLAN and click Save.
- VLAN ID: Enter a valid number between 2 and 4095, except 4087, and from 4090 through 4094.
- VLAN Name: Name of the VLAN.
- IPv4 DHCP Snooping: If DHCP Snooping is turned ON, you must select trusted ports when prompted.
- ARP Inspection: If ARP Inspection is turned ON, you must select trusted ports.
- IGMP Snooping: Select one of the following options.
- Spanning tree protocol: Select one of the following.
- Spanning
tree priority (0):Likely root bridge: Select one of the
switch models or None.
Note: Selection of this allows the switch series to participate in the root bridge selection.
- Ports: The port number.
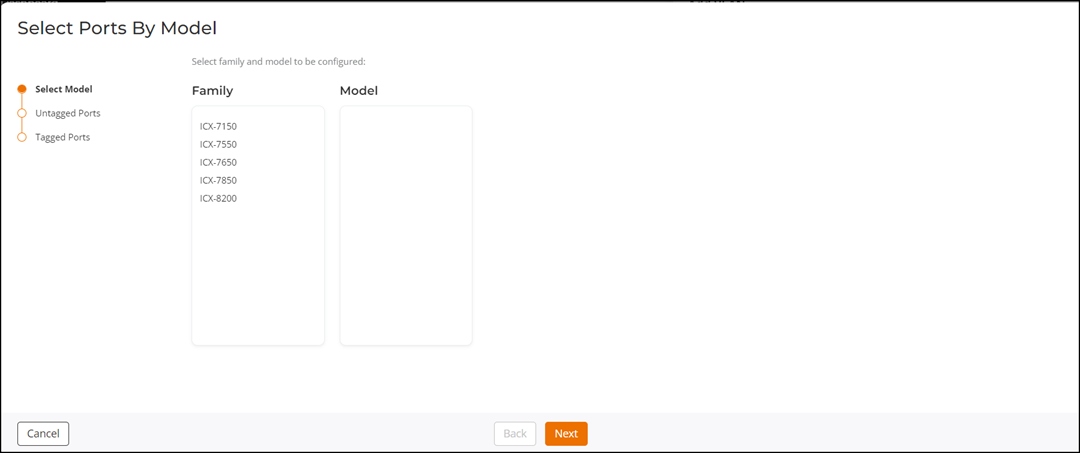
- ICX models selected during VLAN creation are shown automatically. Other models can be added by clicking Add Model to select ports.
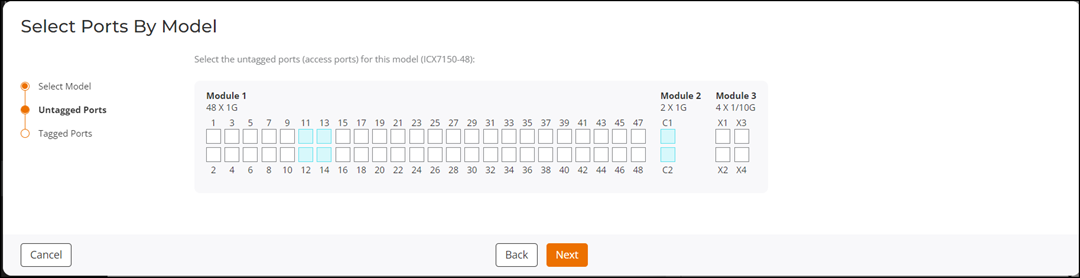
- After selecting a switch model, select the port from a module in the Untagged Ports section and click Next.
- Select the tagged ports from the available module in the Tagged Ports section and click Next.
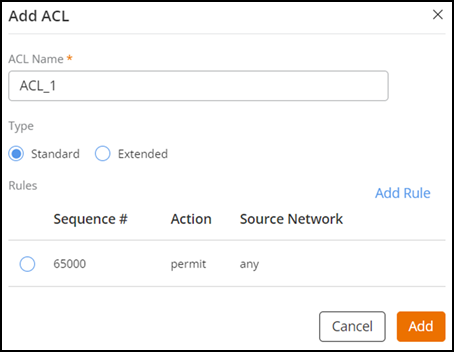
- In the Add
ACL dialog box, add an ACL and click Save.
- Sequence: Specify a sequence from 1 through 65,000.
- Action: Select an action to permit or deny.
- Source Network: Specify the source network either as Any or Specific Subnet.
For adding an Extended ACL rule, you must specify the following:- Sequence: Specify a sequence from 1 through 65,000.
- Action: Select an action to permit or deny.
- Protocol: Select a protocol
- Source Network: Specify the source network, as Any or Specific Subnet.
- Destination Network: Specify the destination network either as any or from a specific subnet.
- Source Port: Specify the source port.
- Destination Port: Specify the destination port.
- In the Venues page, select venues in which you want to activate this profile and select ON in the Activate column.
- Click Change Profile to apply the new profile to the venue. Click Keep current profile to retain the existing profile.
- In the Summary page, review the switch configuration profile and click Finish.