Installing RUCKUS IoT Controller on Hyper-V
The RUCKUS IoT Controller can be
installed on Hyper-V using a VHD file.
Installing Hyper-V
- Extract the VMDK file from the .OVA file using a zip extractor application such as 7-Zip, WinZip, WinRAR, and so on.
- Download the QEMU file for Windows from the following link https://www.qemu.org/download/#windows.
- Install QEMU or extract the ZIP version to a preferred directory.
- Open command prompt in the
folder that contains your
.vmdkfile and execute the following commandqemu-img.exe convert -f vmdk input.vmdk -O vpc -o subformat=dynamic output.vhdwhereinput.vmdkrepresents actual VMDK filename, andoutput.vhdrepresents the desired name for the converted VHD file. - From the Windows 10 Start menu, enter Settings, and press Enter.
- Click Apps, and select Apps and Features.
- Under Related settings, select Programs and Features.
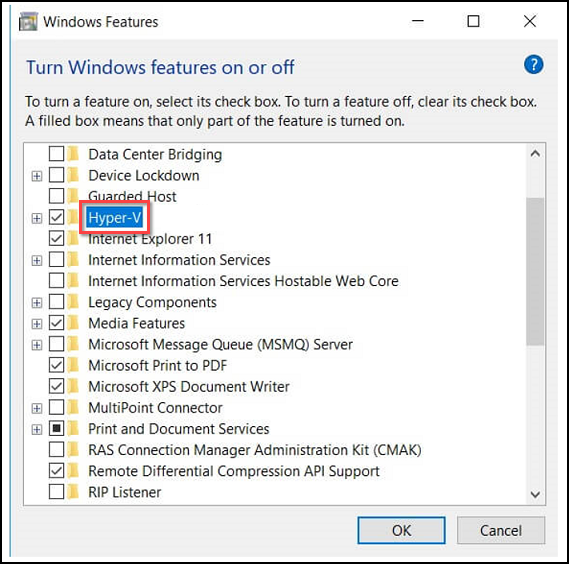
- Select Turn Windows Features on or off.
- Select Hyper-V, and click OK.
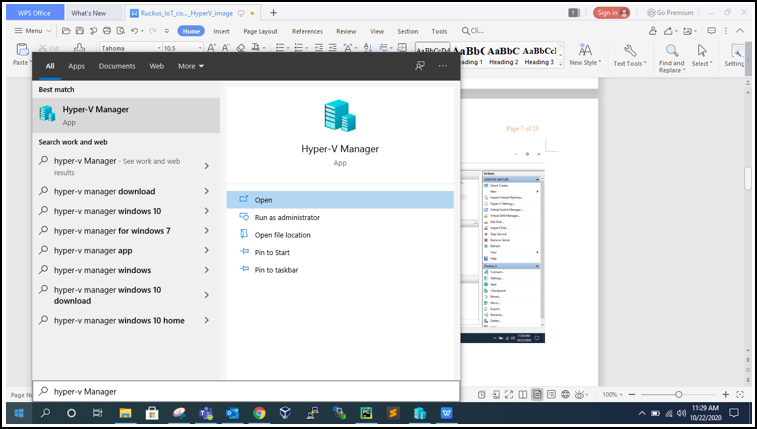
- From the Windows 10 Start menu, enter Hyper-V Manager, and press Enter.
- Click Open.
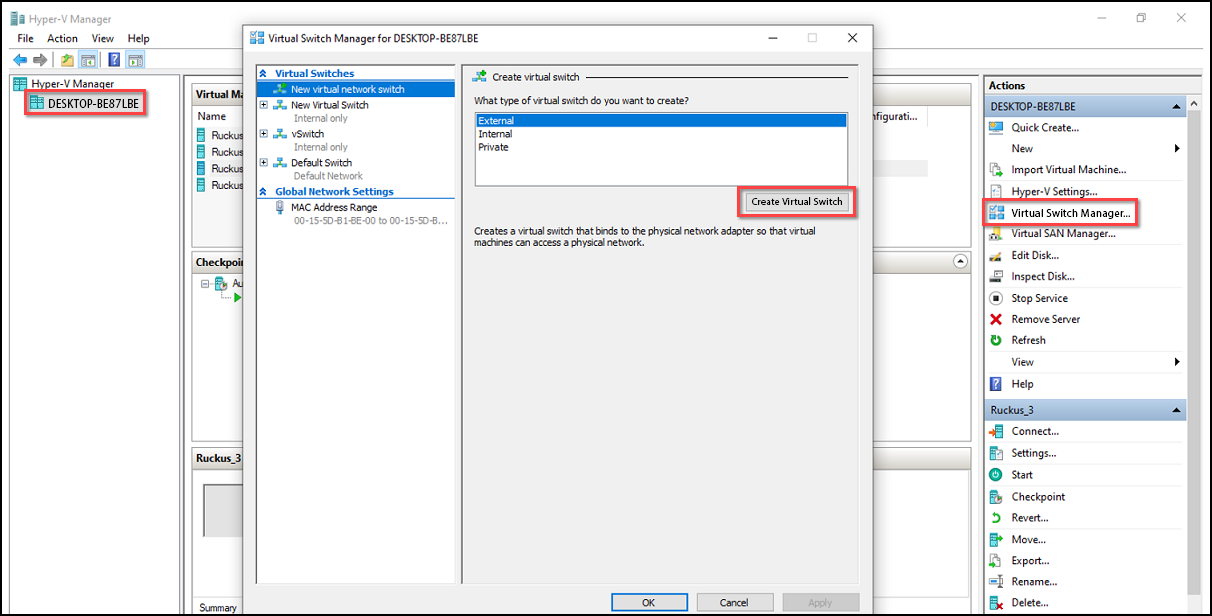
- Click the Hyper-V host computer name in the left pane, and select Virtual Switch Manager from the Actions list in the right pane.
- Select the type of virtual switch (External, Internal or Private), click Create Virtual Switch, and click OK. .
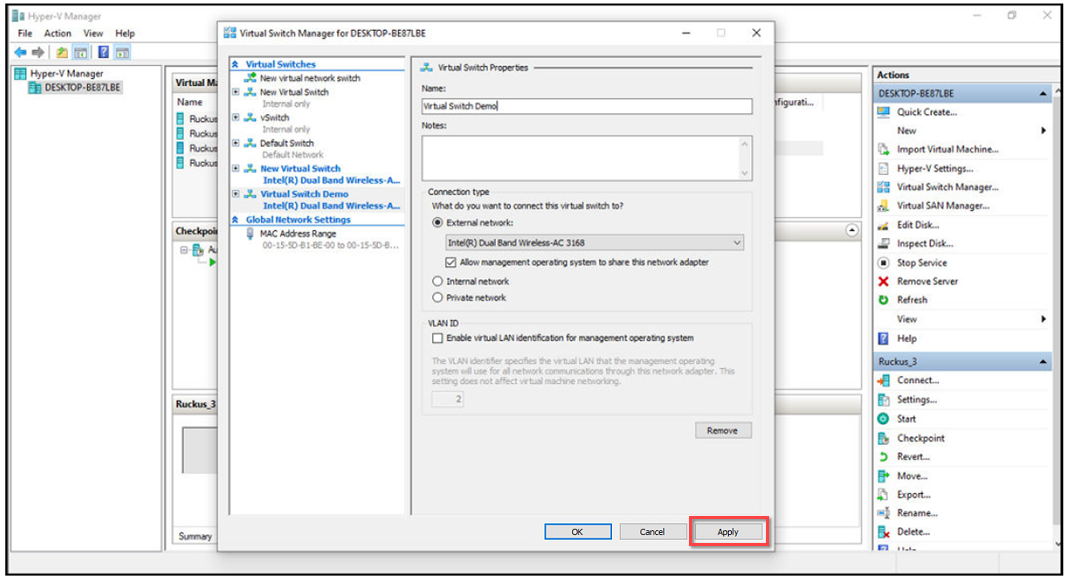
- In the Name field, enter the name of the virtual switch. You can enter additional information in the Notes field.
- Under Connection type, select External network, Internal network, or Private network. If you select External network, select the type of network adapter you want to use, and select the Allow management operating systems to share the network adapter check box.
- Click Apply.
=GUID-3F7053D6-7E01-43D1-899F-92287CDDAC23=2=en-US=Low.png "Selecting the Network")
Creating a New Virtual Machine
- After installing Hyper-V on your computer, you can create new virtual machine. To create Virtual Machine, type Hyper-V Manager in the search box situated on the taskbar below and press ENTER.
- From the Windows 10 Start menu, enter Hyper-V Manager, and press Enter.
- Click Action tab, select .
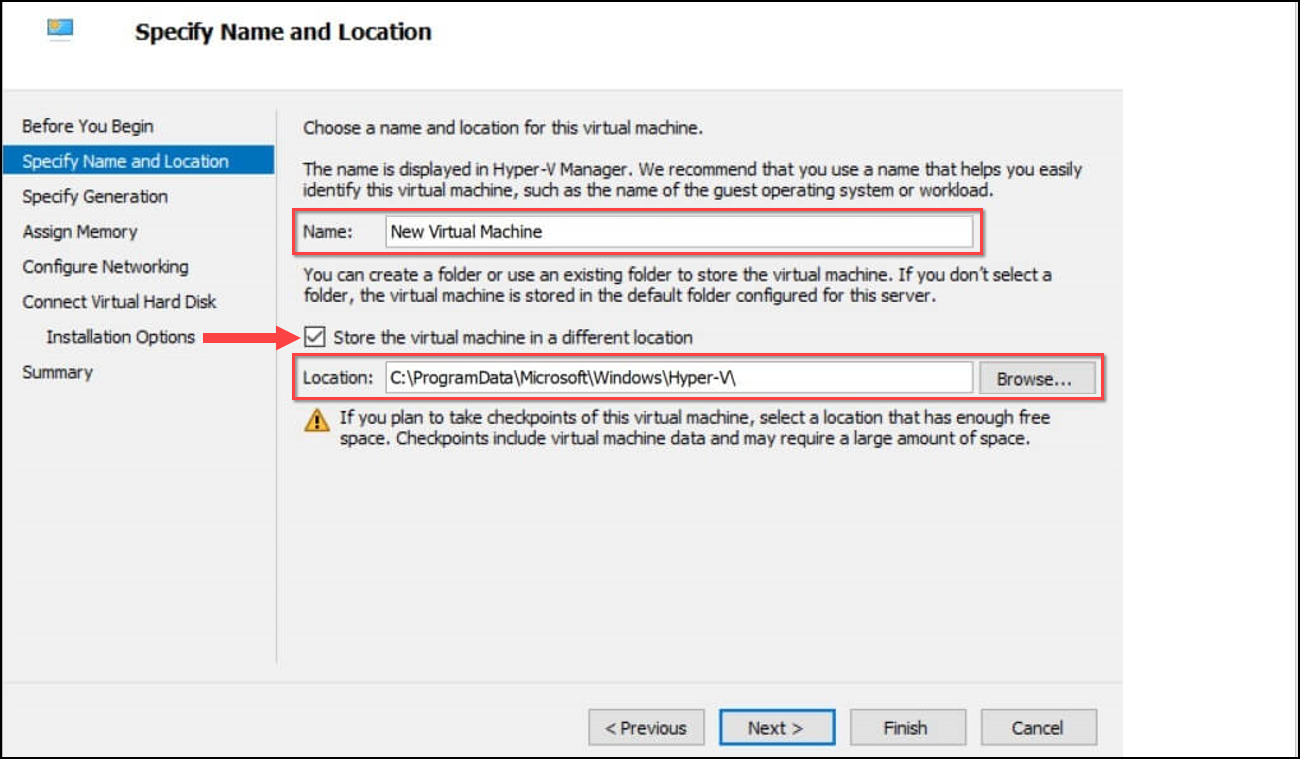
- Under Specify Name and Location, in the Name field, enter the name of the VM. Either store the VM in the default location or select the Store the virtual machine in a different location check box, and click Browse to select a different location.
- Click Next.
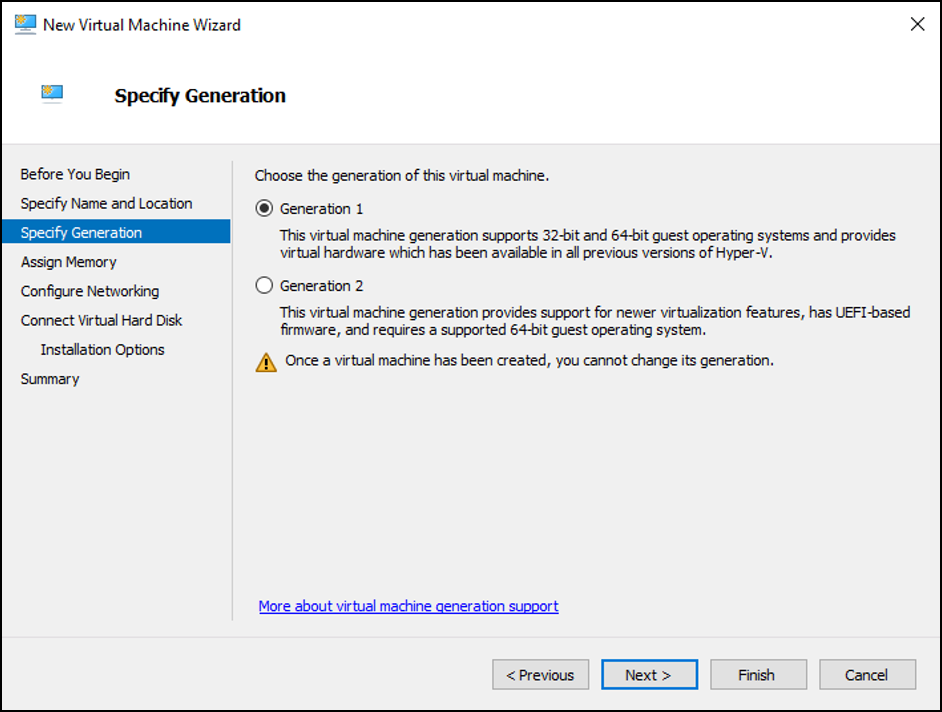
- Under Specify Generation, select Generation 1 or Generation 2. It is recommended to select Generation 1, because Generation 1 VMs support 32-bit and 64-bit guest operating systems and BIOS-based architectures.
- Click Next.
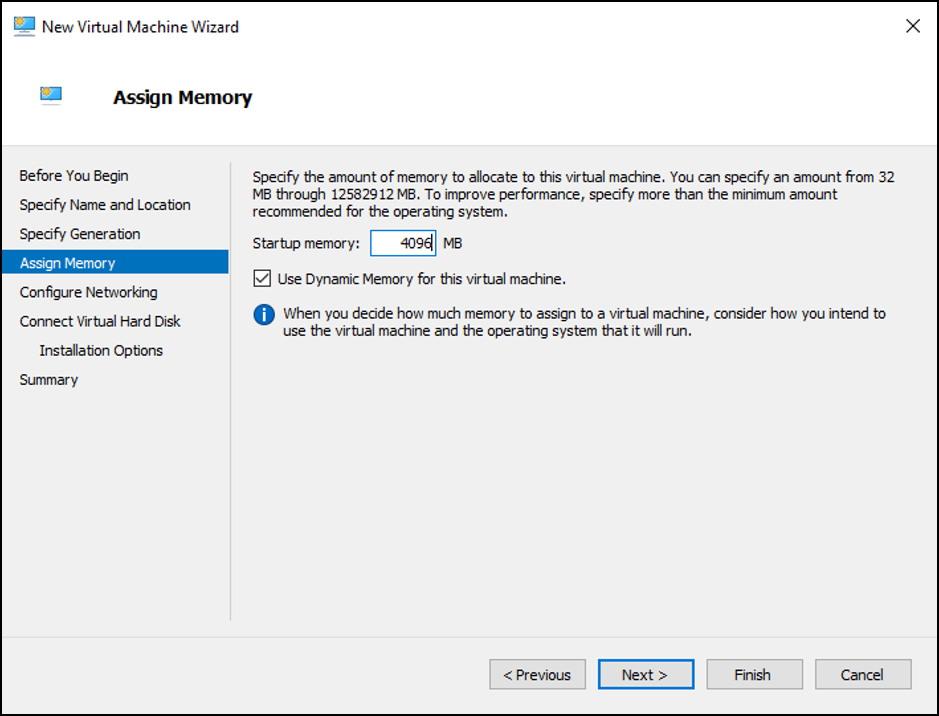
- Under Assign Memory, in the Startup memory field, enter the amount of memory that will be assigned to the VM (4096 MB as it is minimum RAM required for RUCKUS IoT controller). Select the Use Dynamic Memory for this virtual machine check box to save memory.
- Click Next.
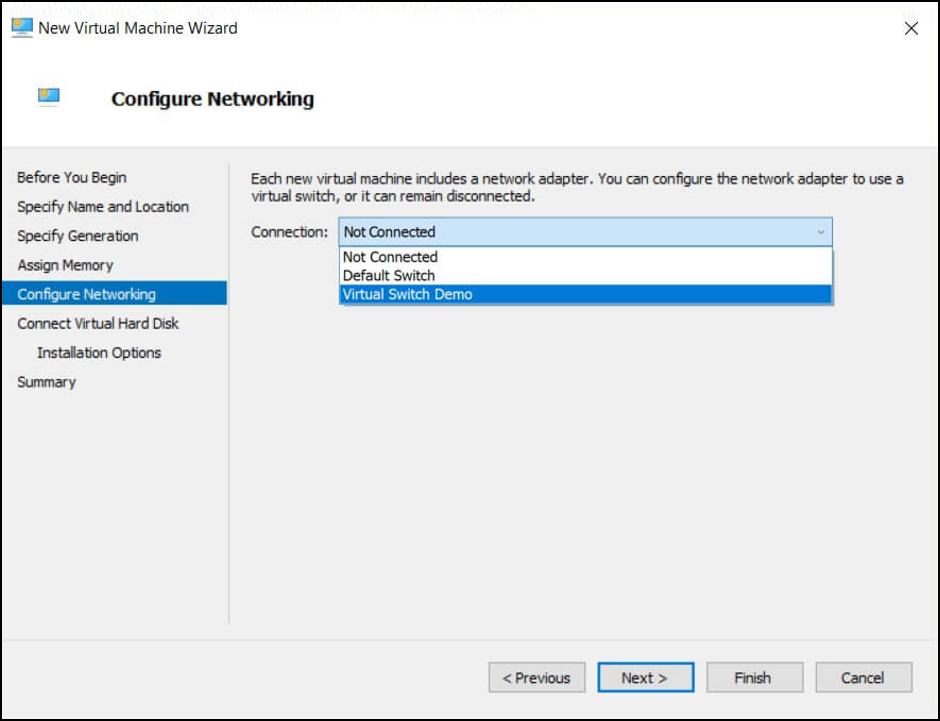
- Under Configure Networking, select the connection that will be used when connecting the VM to the network. If you have not created a virtual switch earlier, select Not Connected.
- Click Next.
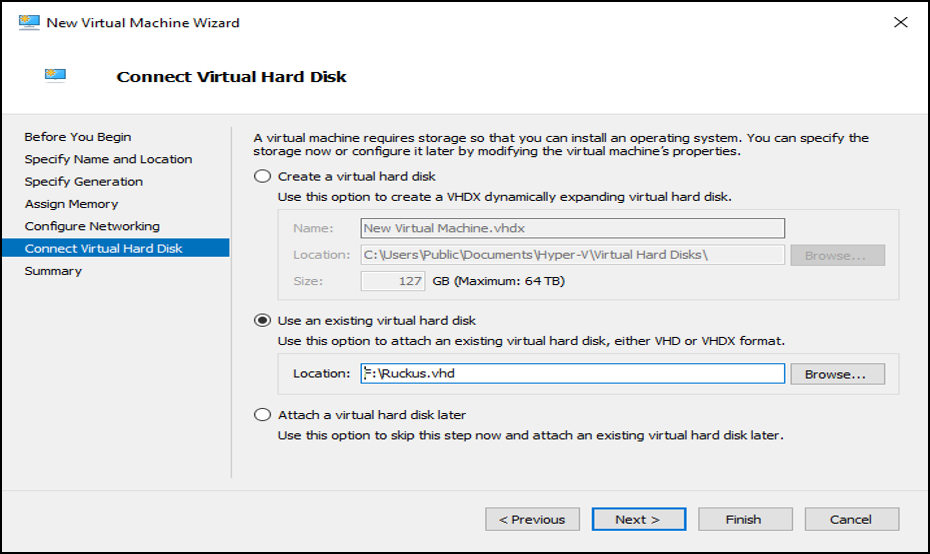
- Under Connect Virtual Hard Disk, select Use an existing virtual hard disk to attach an existing virtual hard disk in VHD or VHDX format, and click Browse to select the location of the virtual hard disk.
- Click Finish.
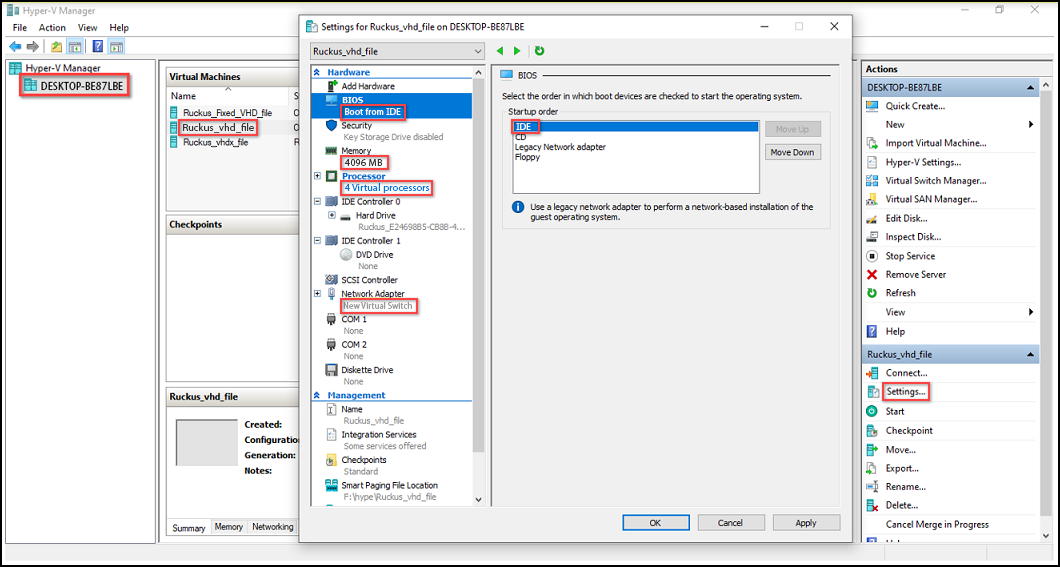
- Open the VM in Hyper-V Manager and from the Actions list in the right pane, click Settings. Confirm the displayed VM configuration settings such as number of PROCESSOR is 4, RAM size is 4096 MB, and HDD size is 100 GB, click Apply, and click OK.
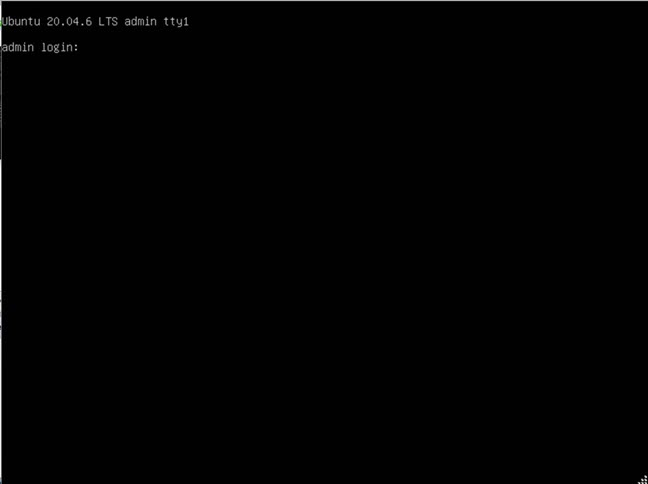
- Log in to the virtual machine using the username and password.
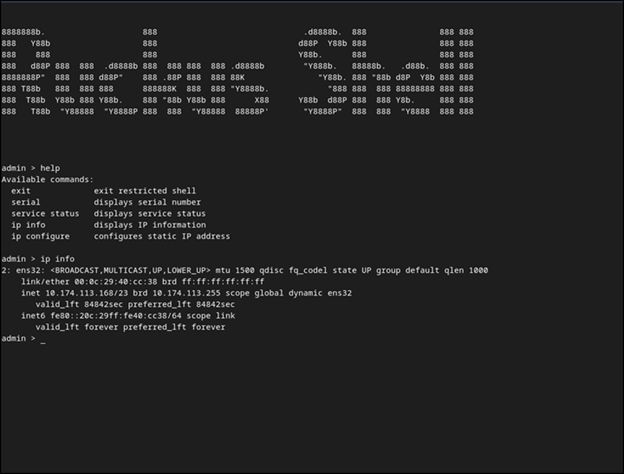
- Enter help at the admin prompt to view the list of available commands.
- Enter ip info at the admin prompt to get the IP address of the virtual machine.
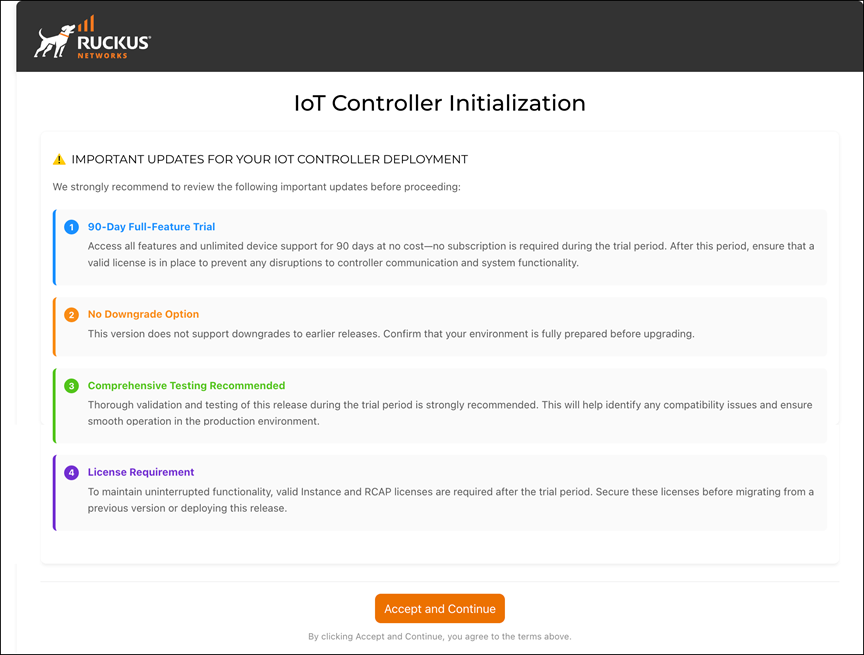
- Open a web browser on your host machine and enter the IP address of the VM in the address bar.
- Click Accept and Continue to agree the terms.
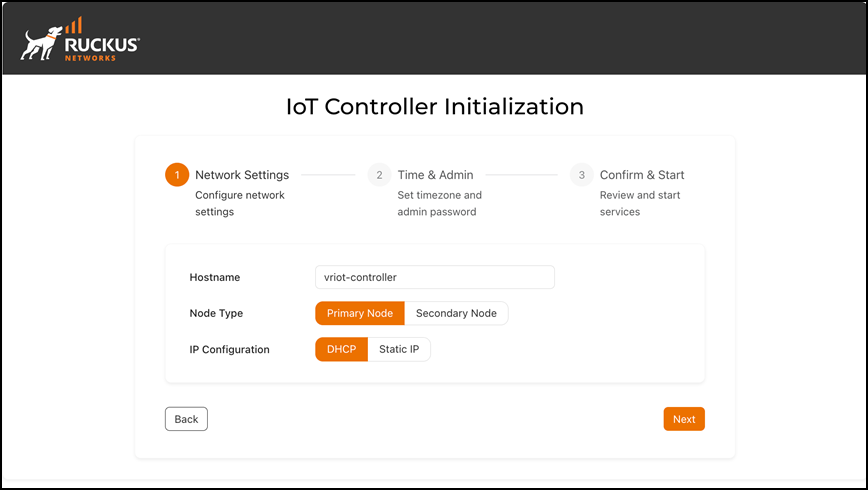
- Configure the Network Settings. Enter the Hostname. Select Primary Node to configure the controller as standalone or select Secondary Node to add the controller to the HA cluster. Select the IP Configuration (DHCP or Static), and click Next.
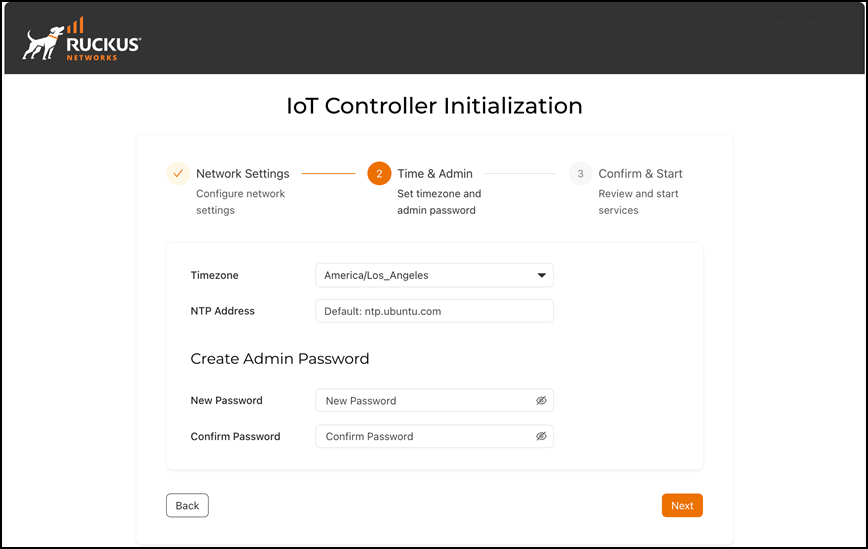
- Configure the Time &
Admin. Enter the values for Timezone and
NTP
Address. In the Create Admin
Password, enter new password and re-enter the new password
in the Confirm
Password field. Click Next.Note: If you enable High Availability (HA) on the RUCKUS IoT Controller, ensure that the admin password is the same on both the primary and secondary nodes.
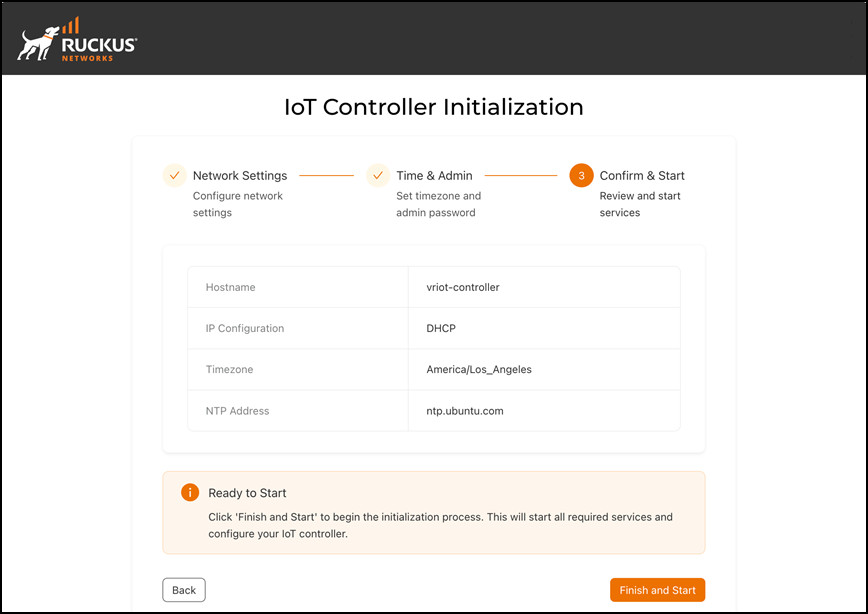
- Review the configurations and click Finish and Start.
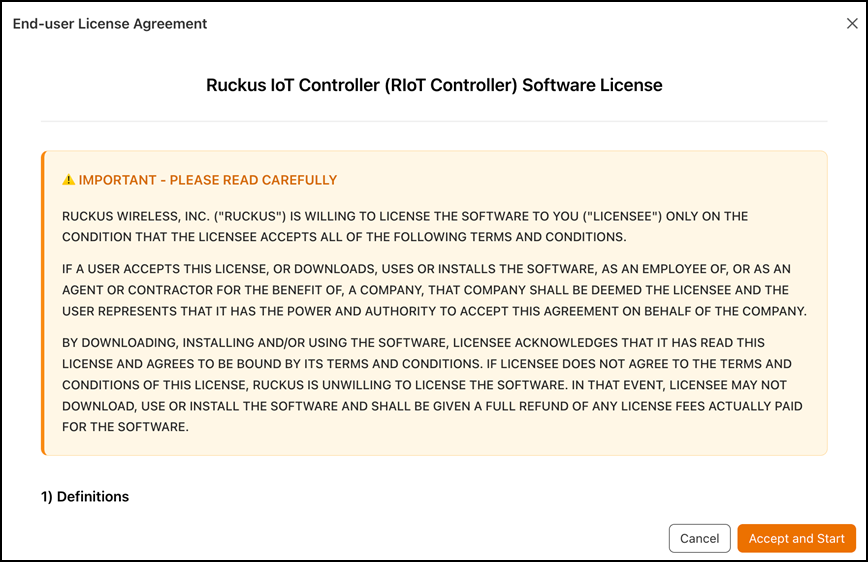
- The End-user License Agreement page is displayed. Click Accept and Start to accept the RUCKUS IoT Controller license.
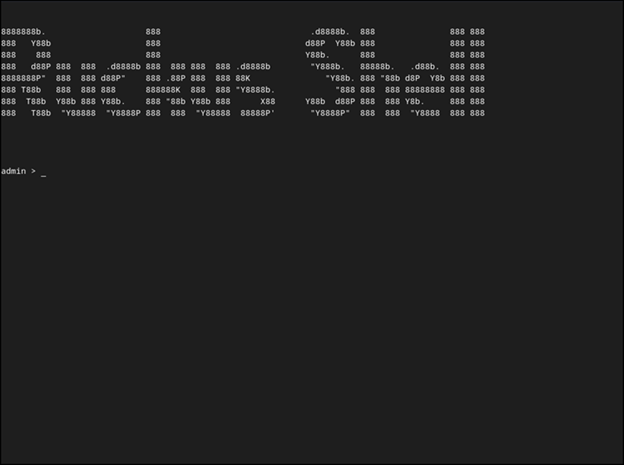=GUID-54BF4085-78C3-44BA-B69C-915CF7489C3A=1=en-US=Low.png "Displaying the CLI Window")
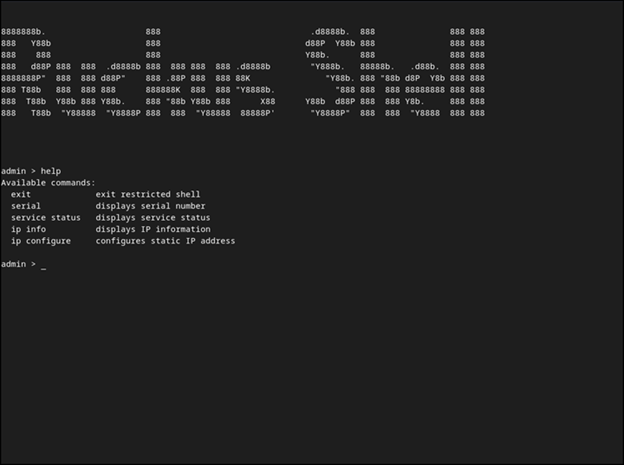
=GUID-EBEE54DF-1389-4EF5-9BE9-C1D338C08632=2=en-US=Low.png)
=GUID-66BADA96-0EAA-4CB6-9DBD-31E4B8F45F81=2=en-US=Low.png)