Hitless Stacking Switchover Examples
The following examples illustrate hitless stacking failover and switchover operation during a CLI-driven switchover or priority change.
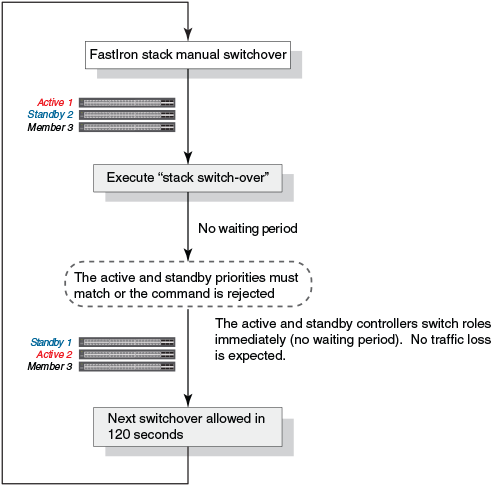
The following figure illustrates a hitless stacking switchover triggered by the
stack switch-over command.
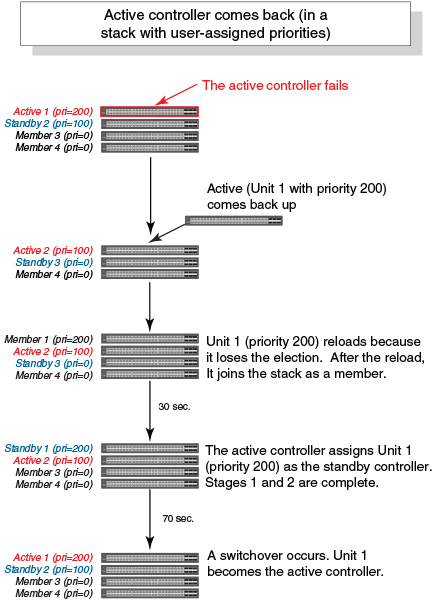
The following figure illustrates a hitless stacking switchover when the active controller goes down and then comes back up. The stack in this example has user-configured priorities.
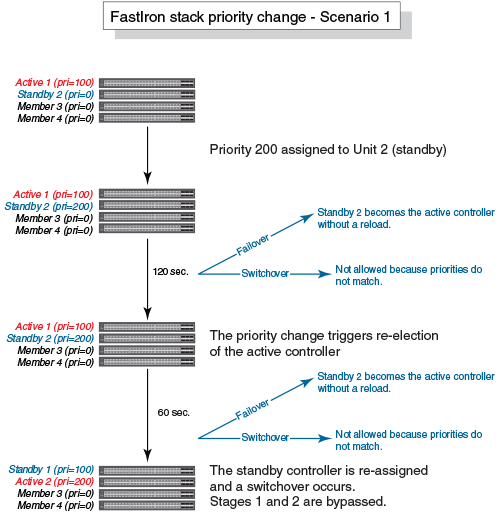
The following figure illustrates a hitless stacking switchover after the network administrator increases the priority value of the standby controller.
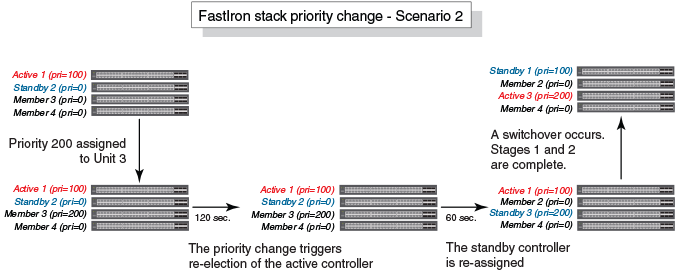
The following figure illustrates a hitless stacking switchover after the network administrator increases the priority value of one of the stack members.
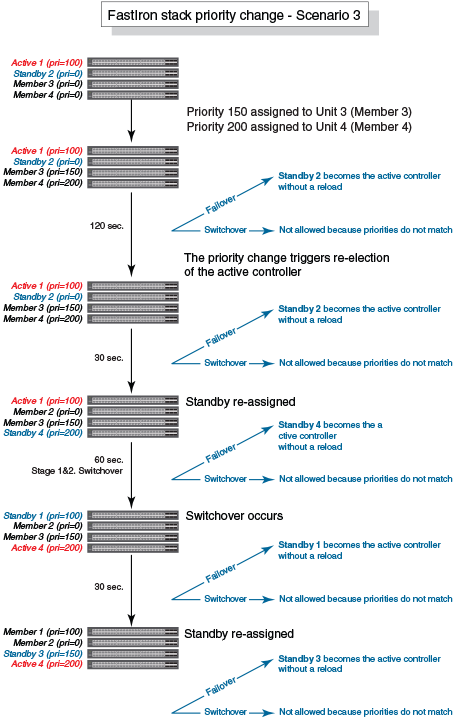
The following figure illustrates a hitless stacking switchover after the network administrator increases the priority value for two of the stack members.