Device Configuration
- On the right side of the Result step, click the Edit icon.
- Select A new device configuration.
- On the Add Device Configuration page, provide a name for the device configuration. This is the name a user sees in the device Wi-Fi networks list.
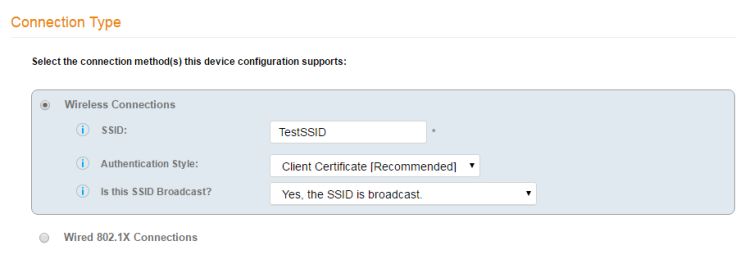
- Select Wireless Connections (the default) and enter the SSID of the secure wireless network.
- Set the Authentication Style:
- Leave the default Broadcast setting and click Next.
- Specify
Conflicting SSIDs.
This setting attempts to deter enrolled devices from joining listed SSIDs after the secure SSID is configured. It is recommended that you include the open-enrollment SSID in this list. Specifying this option is required for mobileconfig-based iOS/MacOS enrollments to disconnect from the open-enrollment SSID and re-scan for the secure SSID at the time of the mobileconfig profile installation. Note that this option is case-sensitive, and the case must match exactly the value broadcast by your wireless network infrastructure.
For mobileconfig-based Mac OS X enrollments to be disconnected upon profile installation, the "WLAN Profile Type" must be set to "Machine." To locate this setting in the UI, go to Configuration > Device Configurations, then click the arrow to expand the device configuration. Next, click the OS Settings tab, then click the pencil icon to edit the field called "Configuration from the Network(s) and Trust tabs" under the Mac OS X Settings area. In the Advanced Settings area, see "WLAN Profile Type."
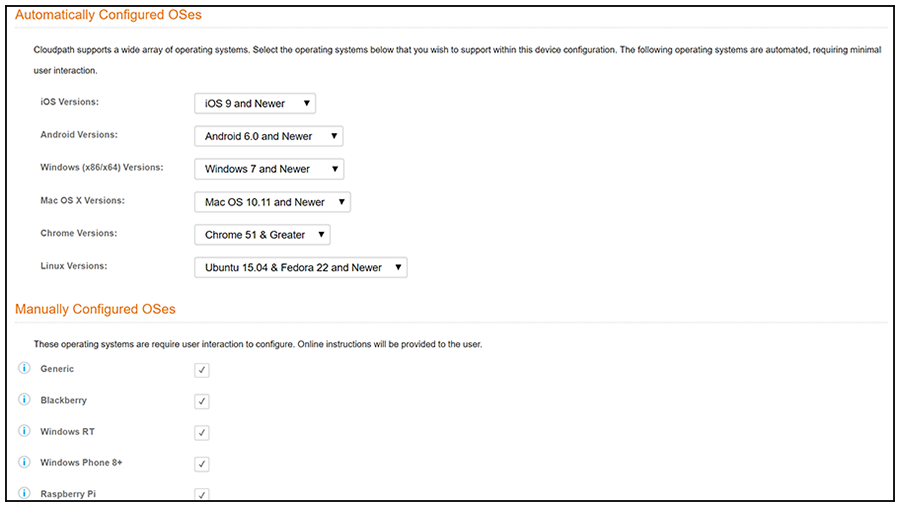
- Select the operating system families and versions that to support within this device configuration.
- Select Client will authenticate to the onboard RADIUS server.
- Configure additional settings for the device configuration.
A more comprehensive list of additional settings is available after the device configuration is created. You can go to Configuration > Device Configurations, click the arrow next to the desired device configuration to expand the view, then click the OS Settings tab. From there, you can scroll to see your options to edit or add settings for the various operating systems.
Continue to the next section to select the client certificate template with the appropriate user policy.