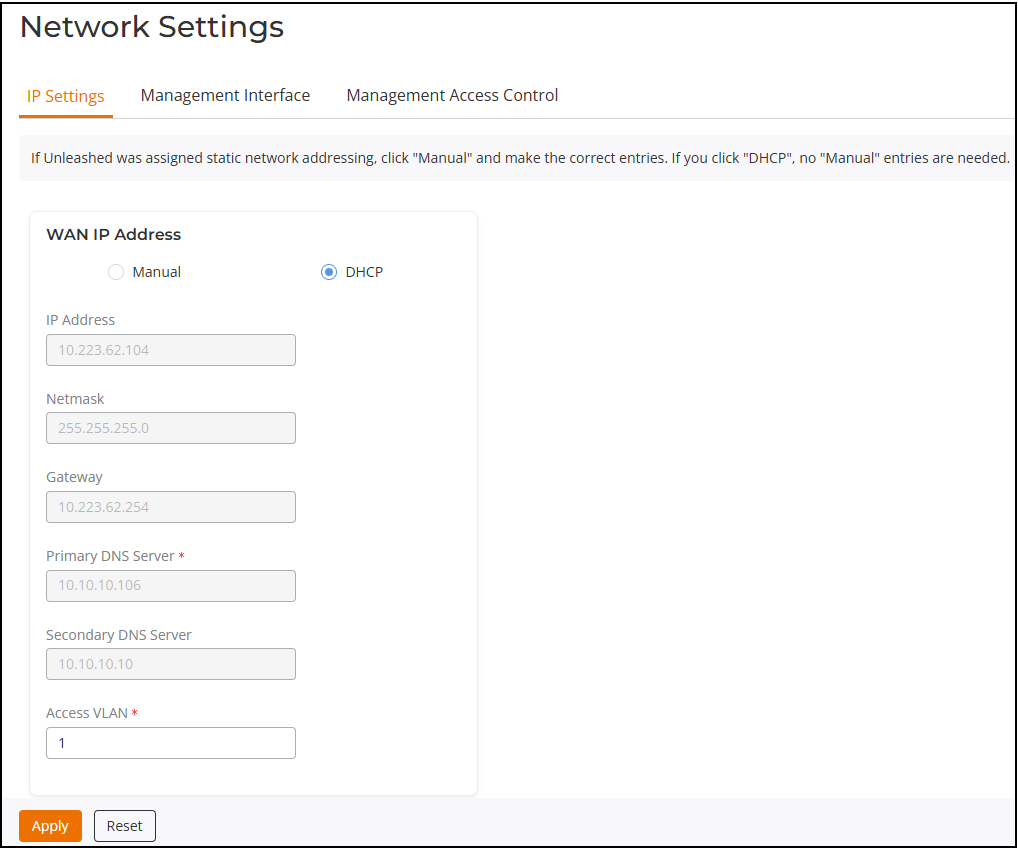
Configuring Device IP Address Settings
You can update the IP address and DNS
server settings of your Master AP.
Note: As soon as the IP address has been
changed (applied), you will be disconnected from your web interface connection
to
the Master AP. You can log in to the web interface again by using the new IP address
in your web browser.
Complete the following steps to change the IP address settings.
- From the main menu, select .
- Review the IP
Settings options. Note: If you enable the Gateway mode, all devices will reboot immediately. Refer to Gateway Mode.
- Under WAN IP Address,
select one of the following options:
- Manual: If you select Manual, enter the correct information in the active fields (IP Address, Netmask, Gateway, Primary DNS Server, Access VLAN are required).
- DHCP: If you
select DHCP, Access VLAN
field becomes active. Enter the VLAN ID.
Note: The default value of the VLAN ID is 1. VLAN is configurable only in the Dedicated mode.
- Click Apply to save your settings. You will lose connection to the Master AP.
- To log in again in to the web interface, use the newly assigned IP address in your web browser or use the Universal Plug and Play (UPnP) application to rediscover the Master AP.